
Add a Custom Role
Learn about adding a custom role.
Follow these steps to add a custom role:
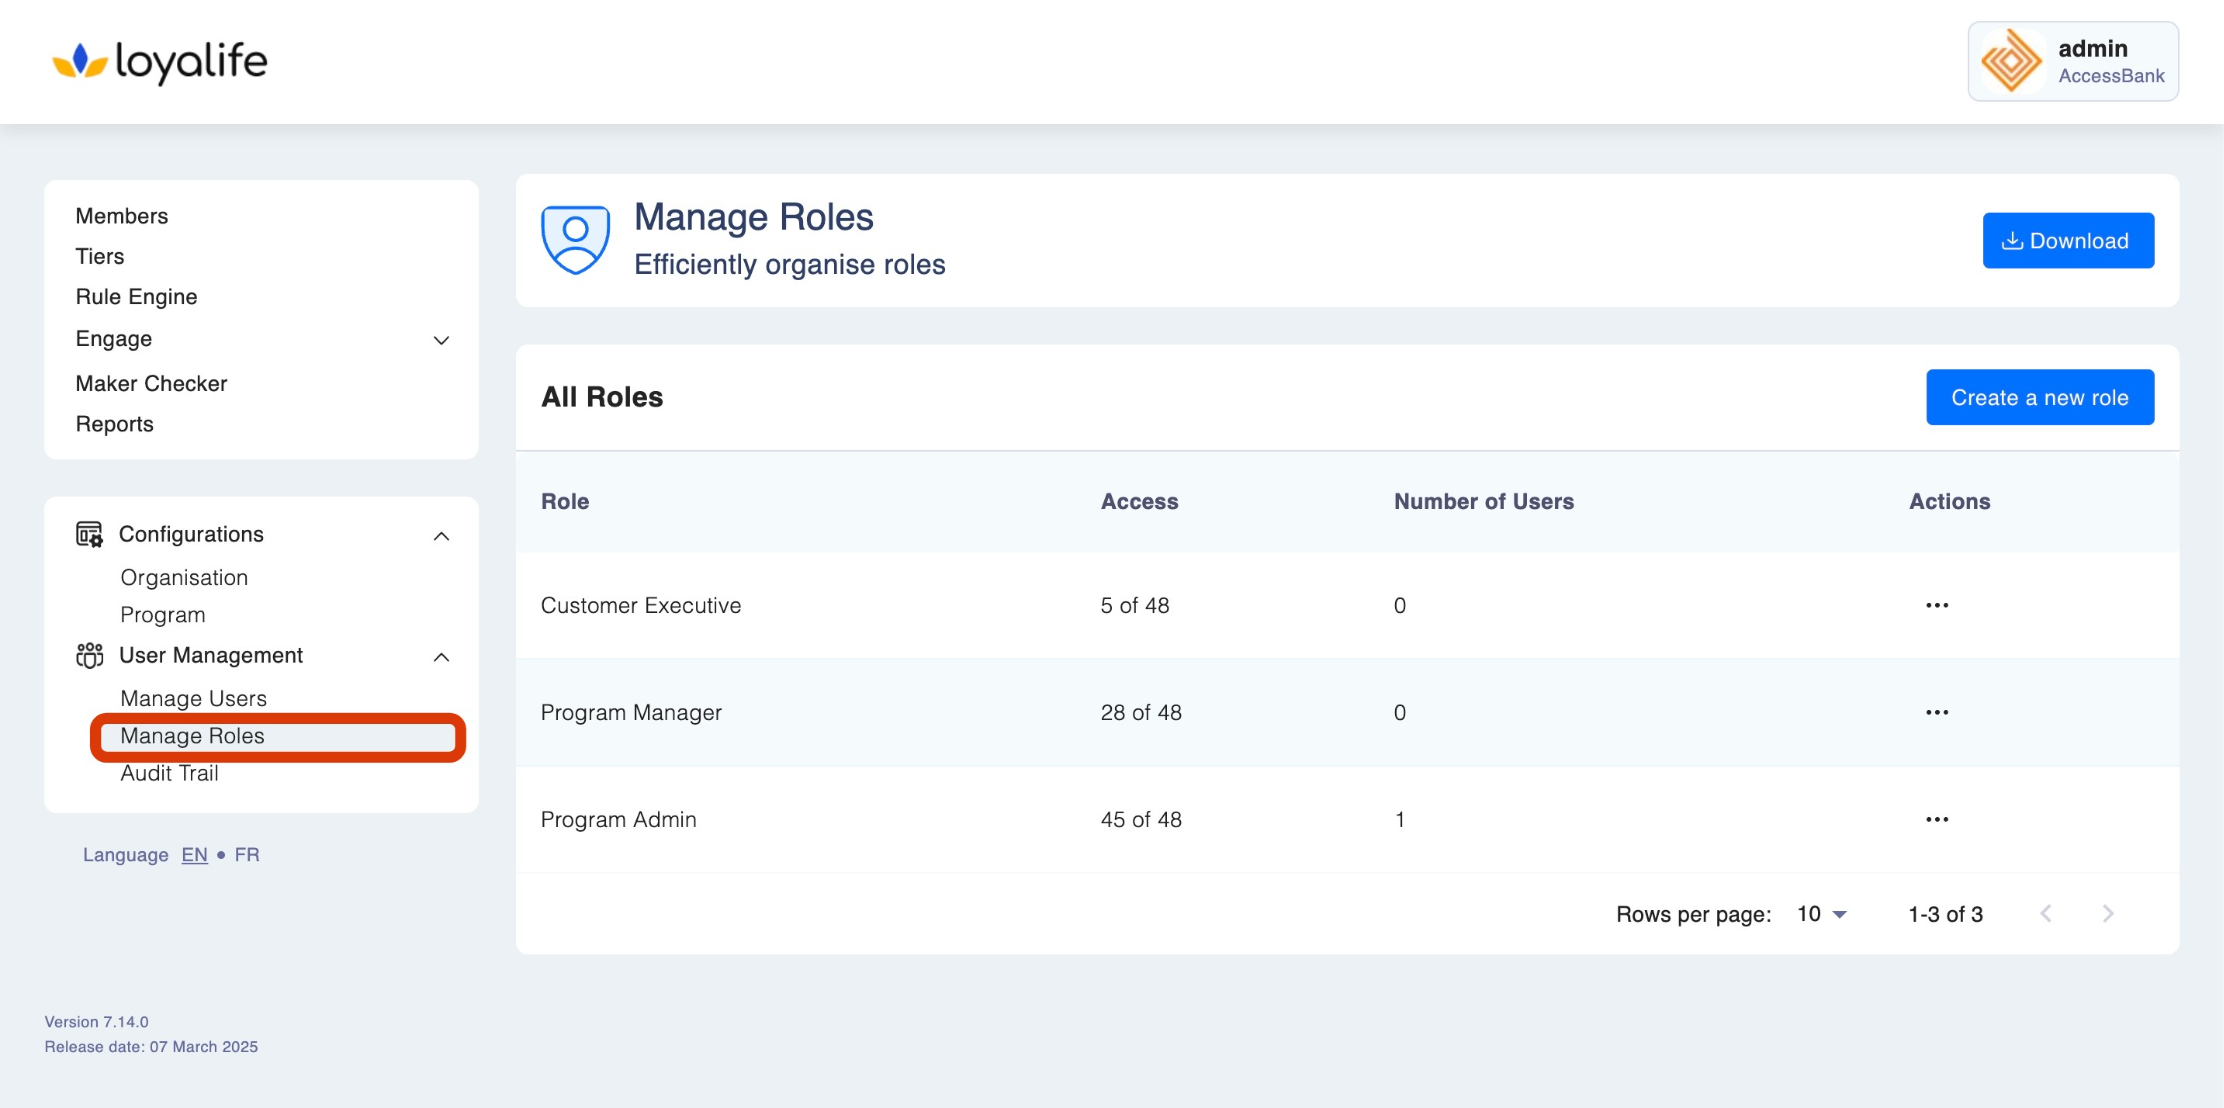
Step 1: Access User Access Management
Once logged in, navigate to the "User Access Management" ➝ "Manage Roles" in the sidebar.
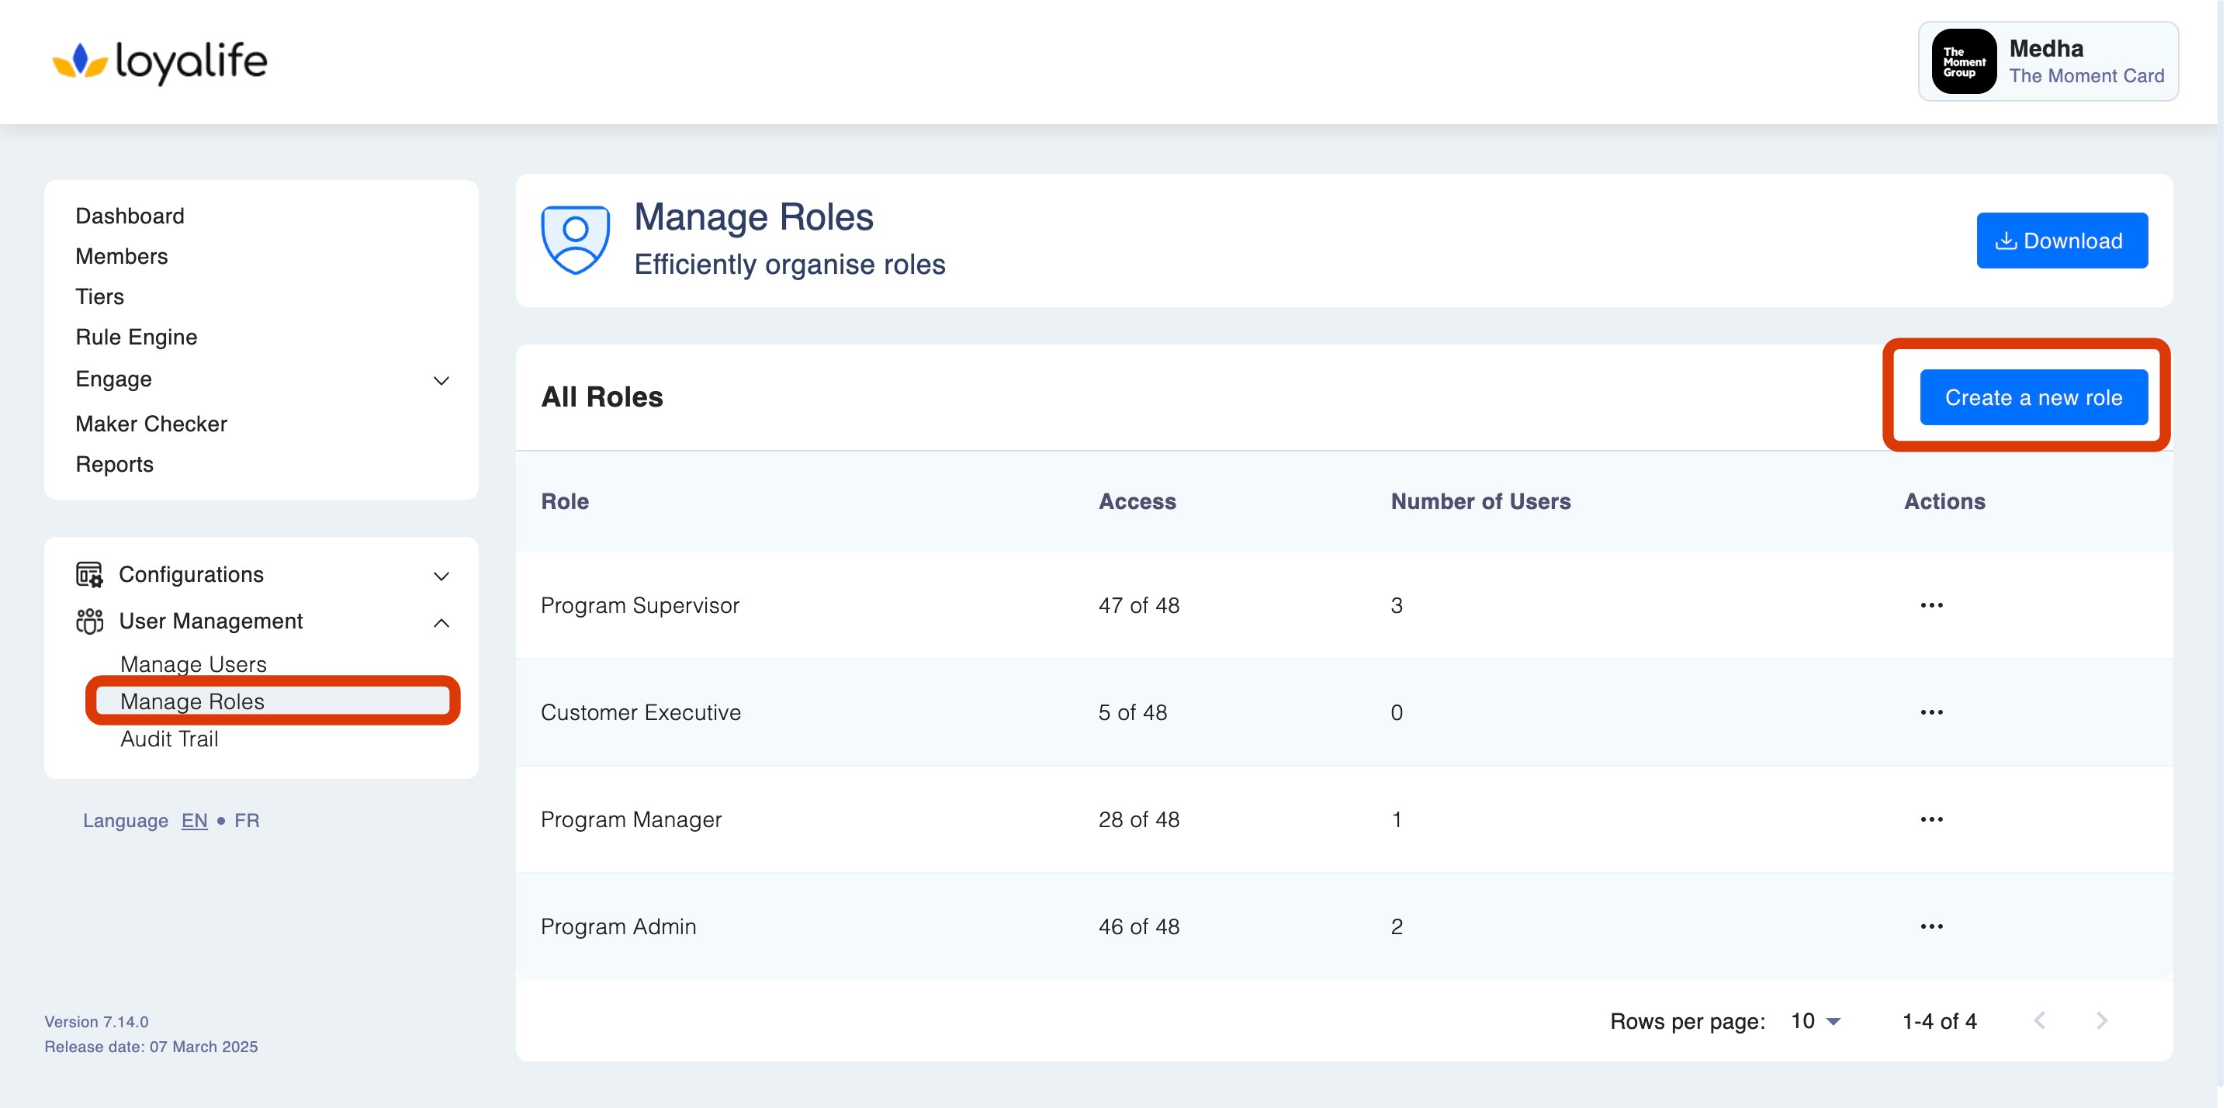
Step 2: Create a New Rule
In the Roles section, you should see an option to "Create New Role". Click on this option to start creating your custom role.
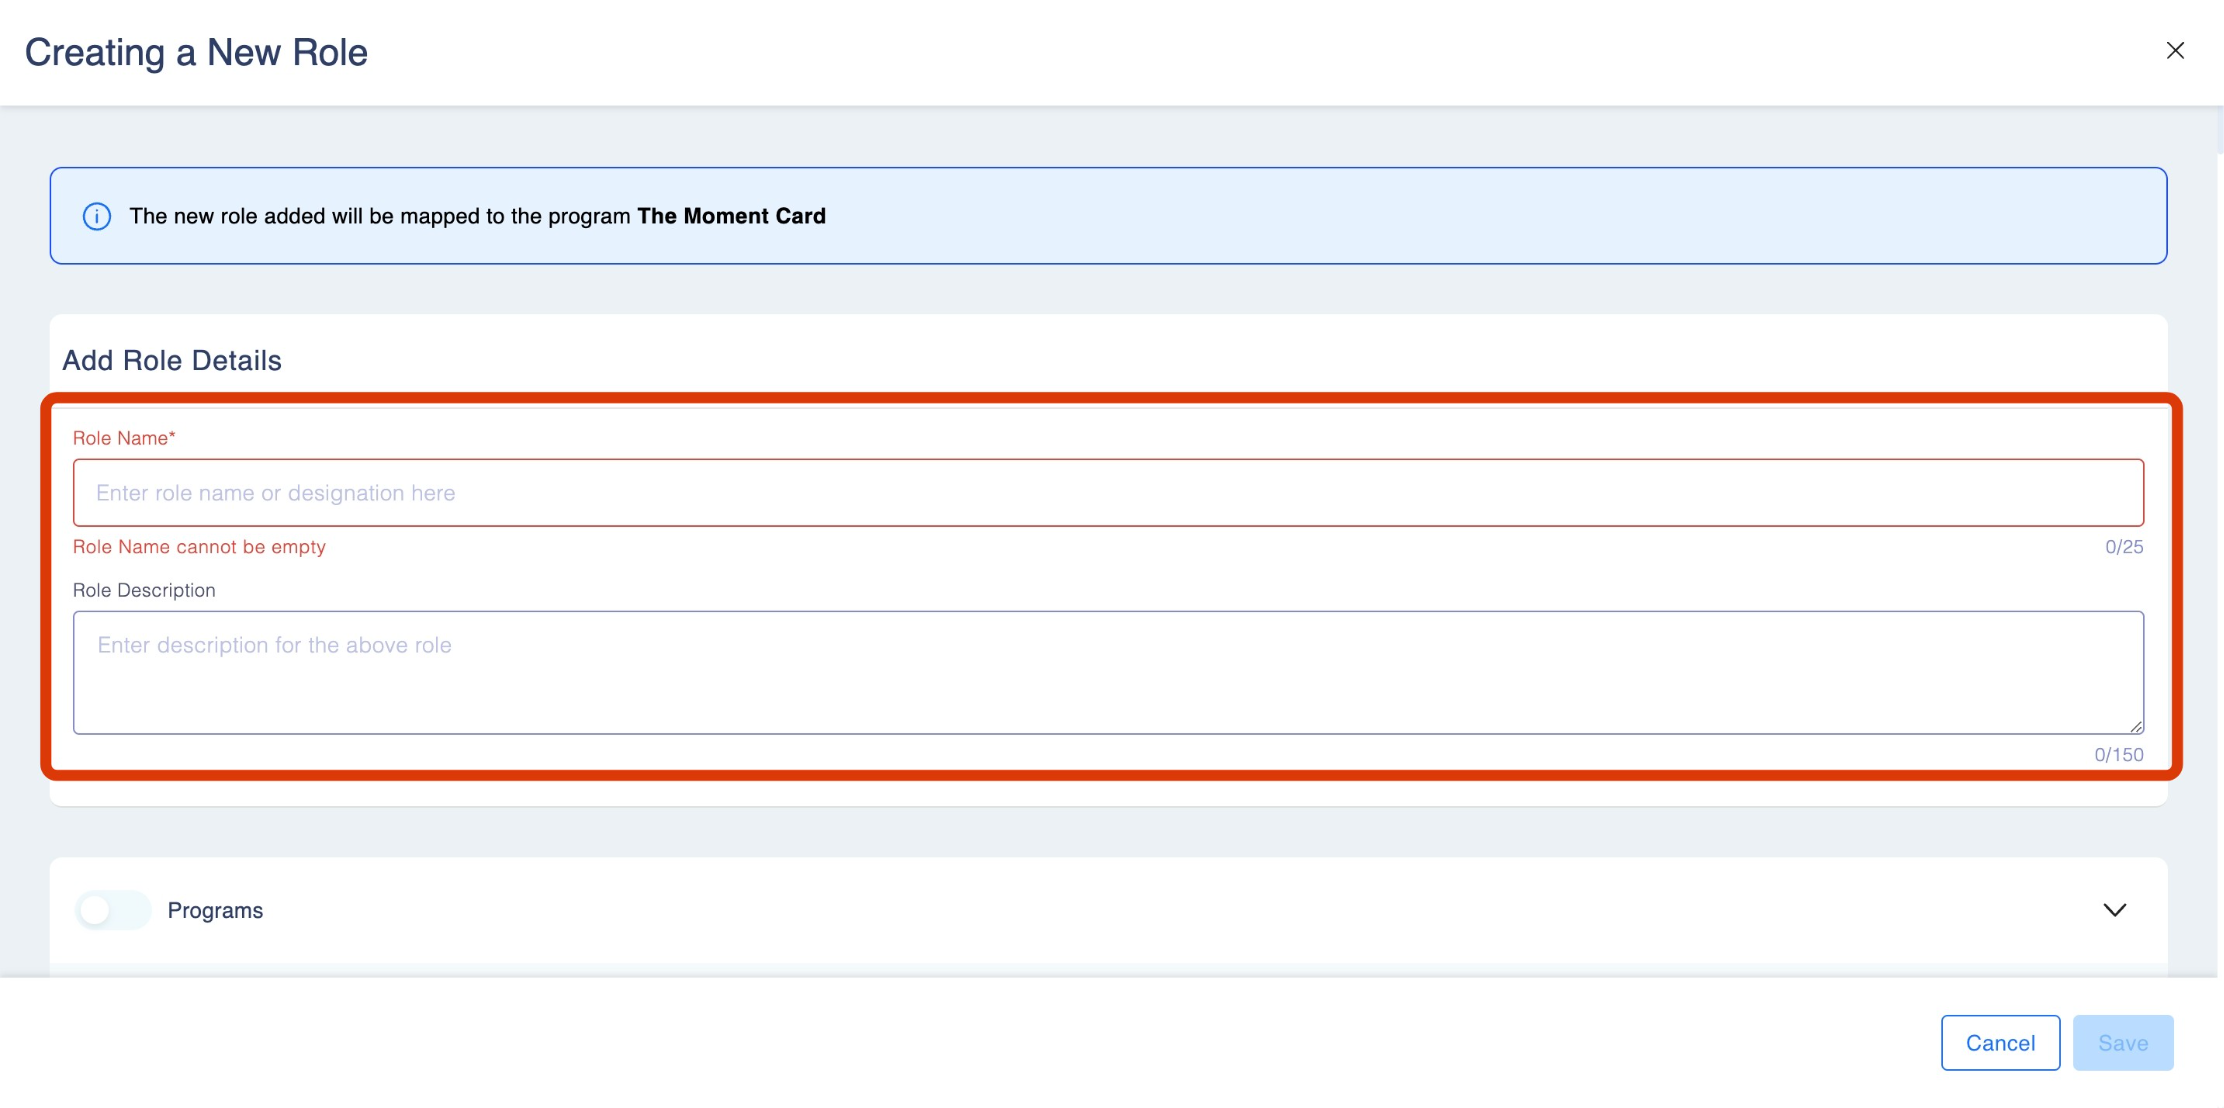
Step 3: Define Role Name and Description
- Provide a name for the new custom role. This name should clearly represent the role's purpose or responsibilities.
- Add a brief description or summary of the role to help users understand its function.
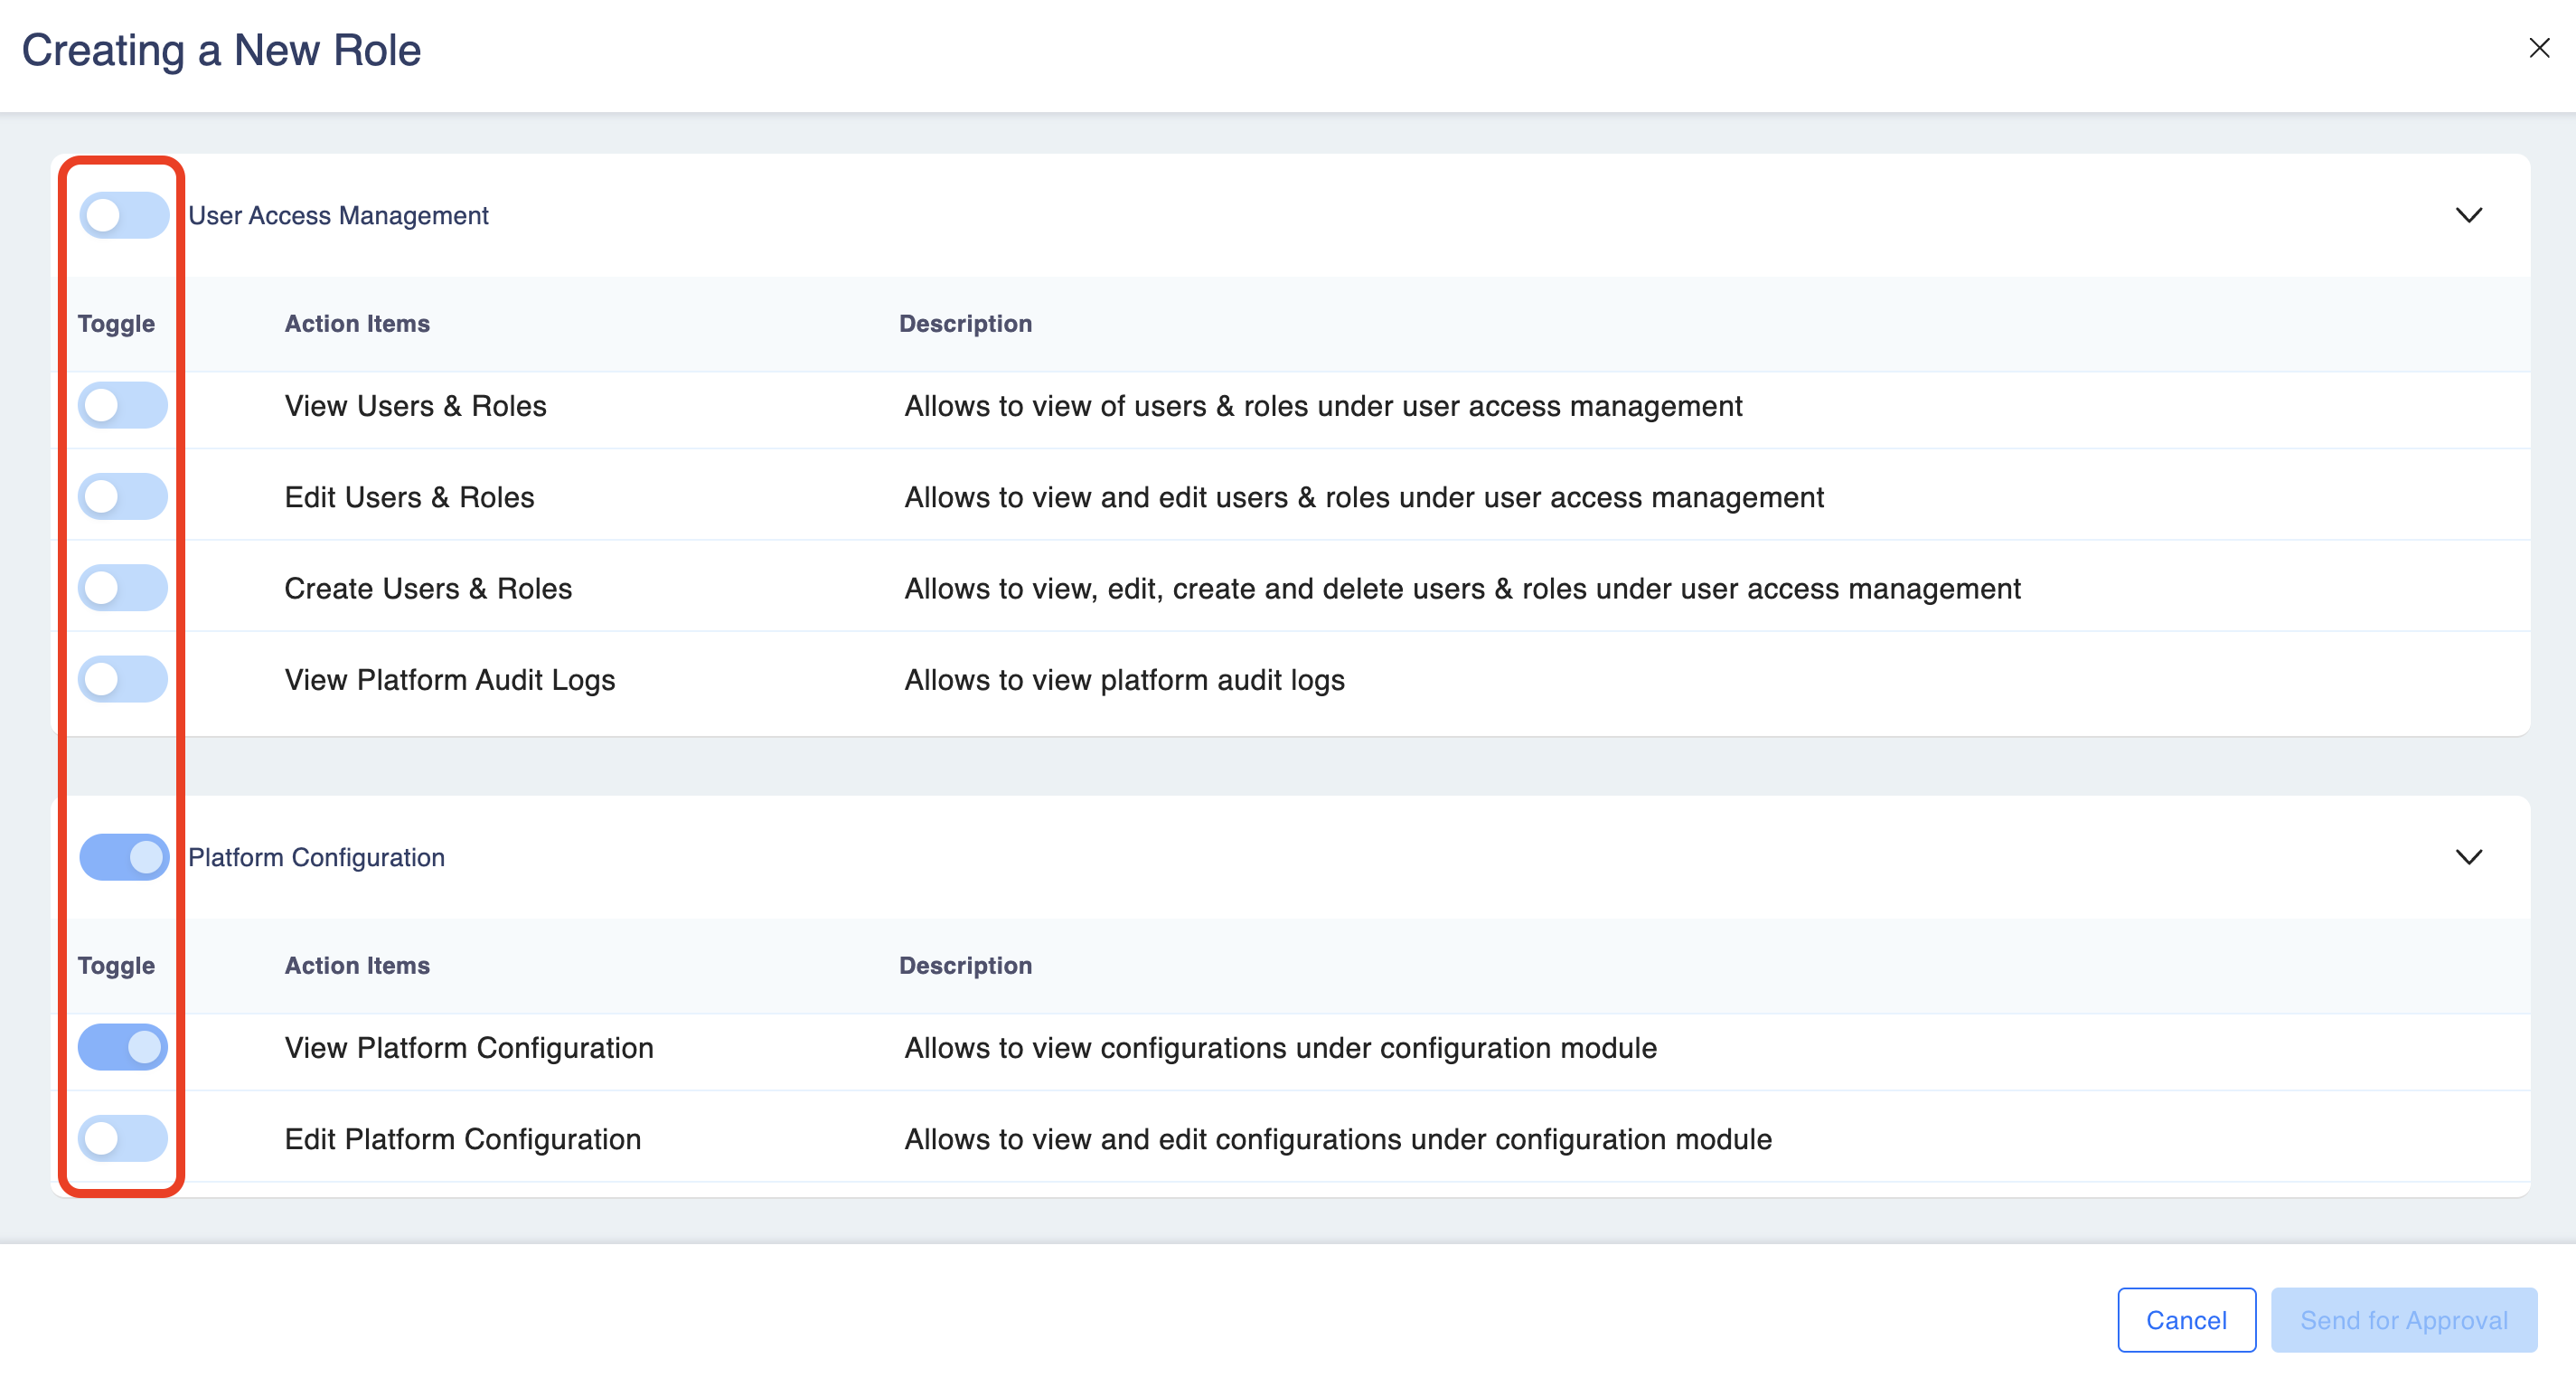
Step 4: Customize Permissions
Customize the role's permissions based on the specific needs and responsibilities of this custom role. You may have the option to enable or disable various permissions, allowing you to tailor the role to your requirements.
Step 5: Save the Custom Role
After defining the role name, description, and setting permissions, save the custom role. This role should now appear in your list of available roles.
Best Practices
Tips for Effective User Role Management
- Regularly review and update user roles to align with changing responsibilities.
- Maintain role-based access control to safeguard sensitive data.
Ensuring Proper Access
- Always assign the least privilege necessary to perform a task to enhance security.
- Document role permissions and responsibilities for reference.
Updated 2 months ago