
Logs
Learn all about Logs under Reports Module of Loyalife.
Overview of Logs
The Logs module in Loyalife provides detailed information about SFTP file uploads and their processing statuses. This section is essential for auditing and troubleshooting data uploads, including Customer Profile Data (CPD), Customer Relation Data (CRD), Transaction Data (TXN), and Bonus Data (BNS) files. The logs allow administrators and users to monitor the success or failure of these data processes, ensuring transparency and operational integrity.
Types of Files Logged
-
Customer Profile Data (CPD)
- Purpose: CPD files contain member profile information such as names, addresses, and contact details.
- File Actions: New, Update, Suspend.
- Sample Fields: Member Relation, Address, Mobile Number, Email, Gender, Date of Birth (DOB).
- Processing Behavior: Files are uploaded daily, and errors during upload, such as invalid email or duplicate records, will be flagged.
-
Card Data (CRD)
- Purpose: CRD files are used for managing card-related information for members.
- Sample Fields: Member Relation Reference, Card Number, Card Type, Product Code, Expiry Date, and Status.
- Processing Behavior: CRD files help update or manage member card information, including card creation, activation, and expiration details.
-
Transaction Data (TXN)
- Purpose: TXN files record loyalty transactions related to points accrual, redemption, or reversal.
- Sample Fields: Transaction ID, Member Reference, Amount, Product Code, Transaction Date/Time.
- Processing Behavior: TXN files process loyalty transactions, including credits, debits, and reversals.
-
Bonus Data (BNS)
- Purpose: BNS files manage bonus points awarded to members as part of specific campaigns or promotions.
- Sample Fields: Member Reference, Bonus Points, Bonus Type, Date of Award.
- Processing Behavior: BNS files are typically used during marketing campaigns to grant additional points to members.
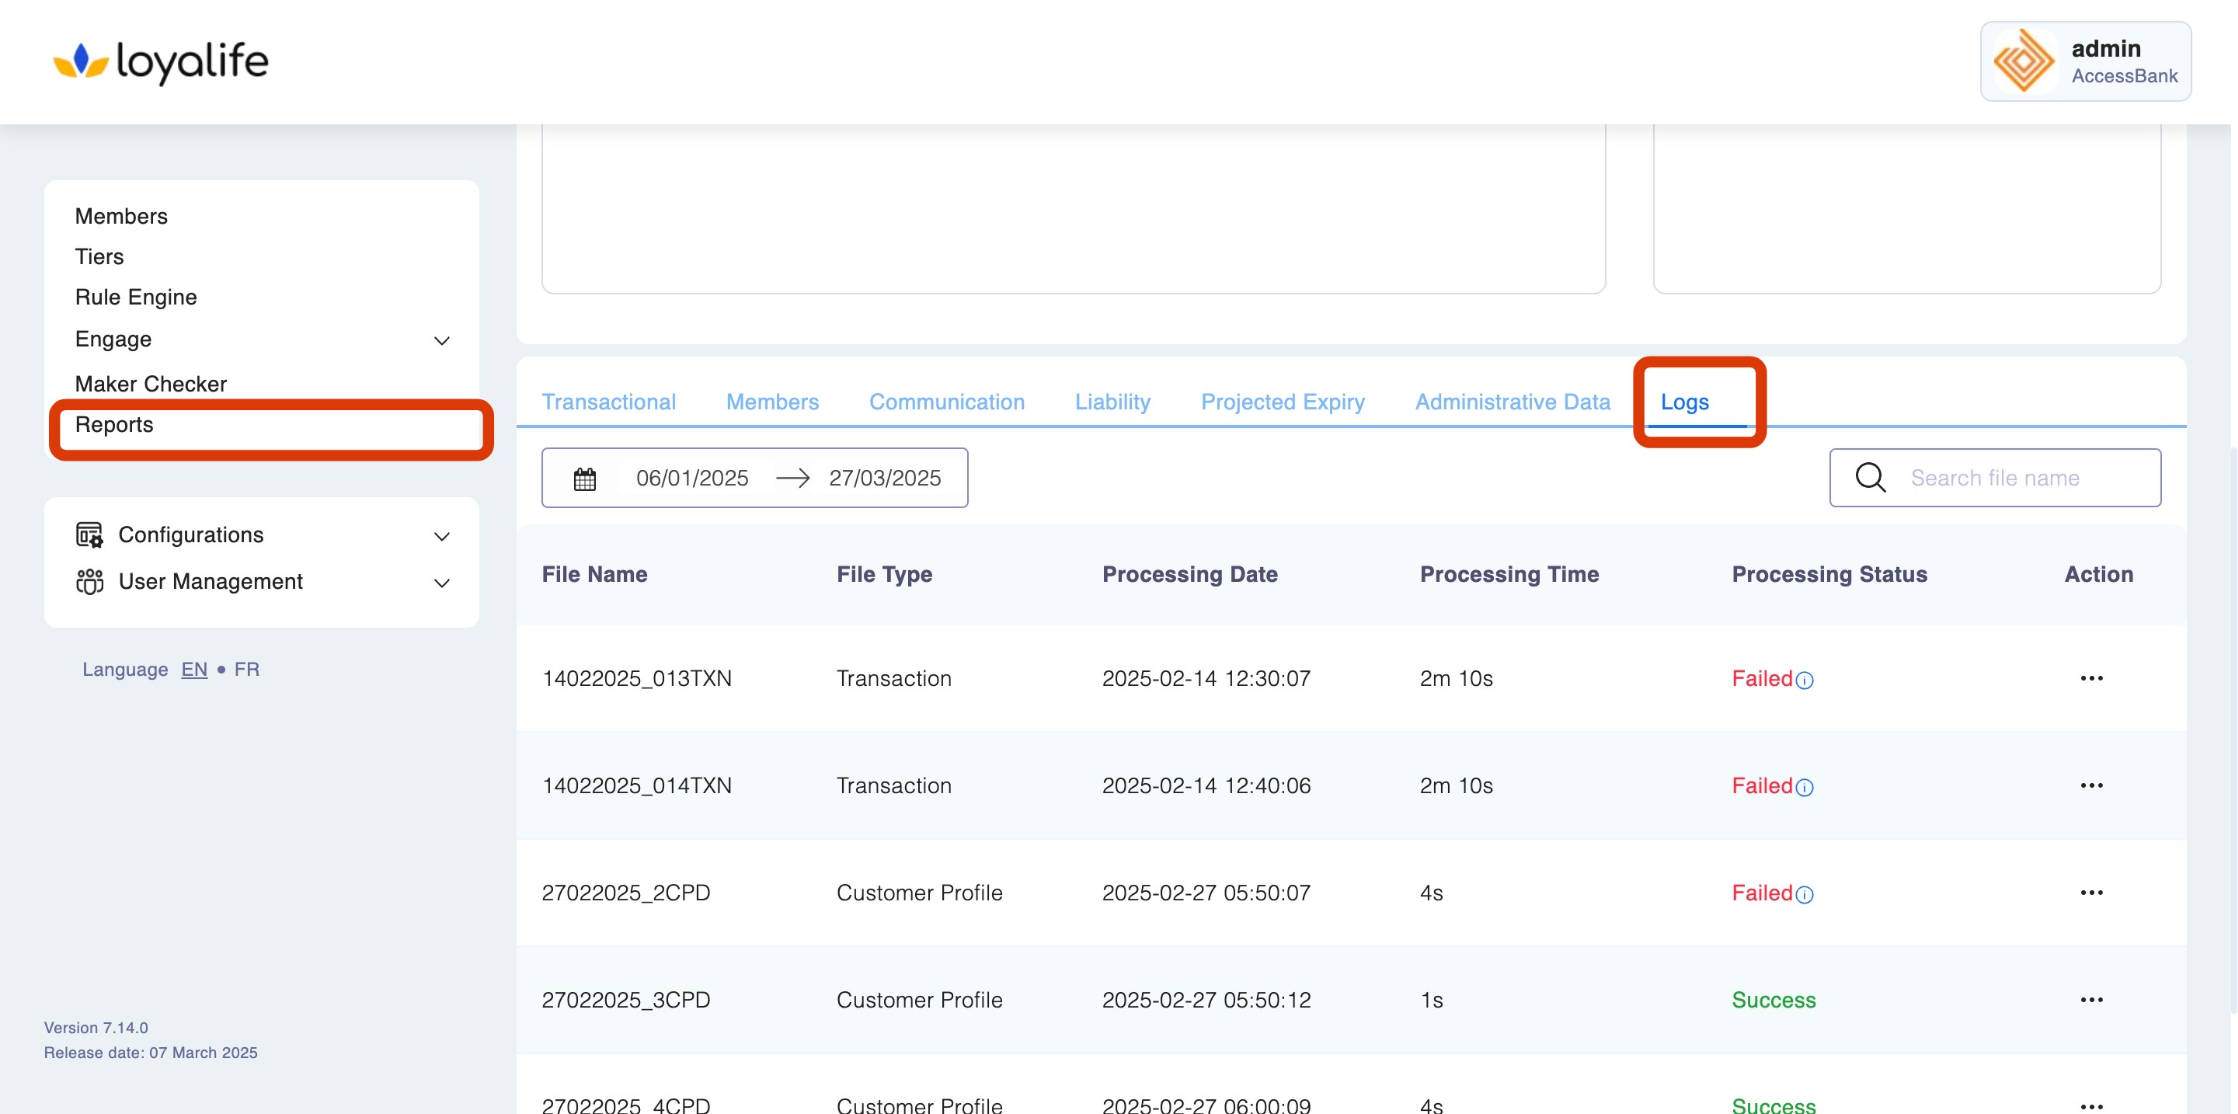
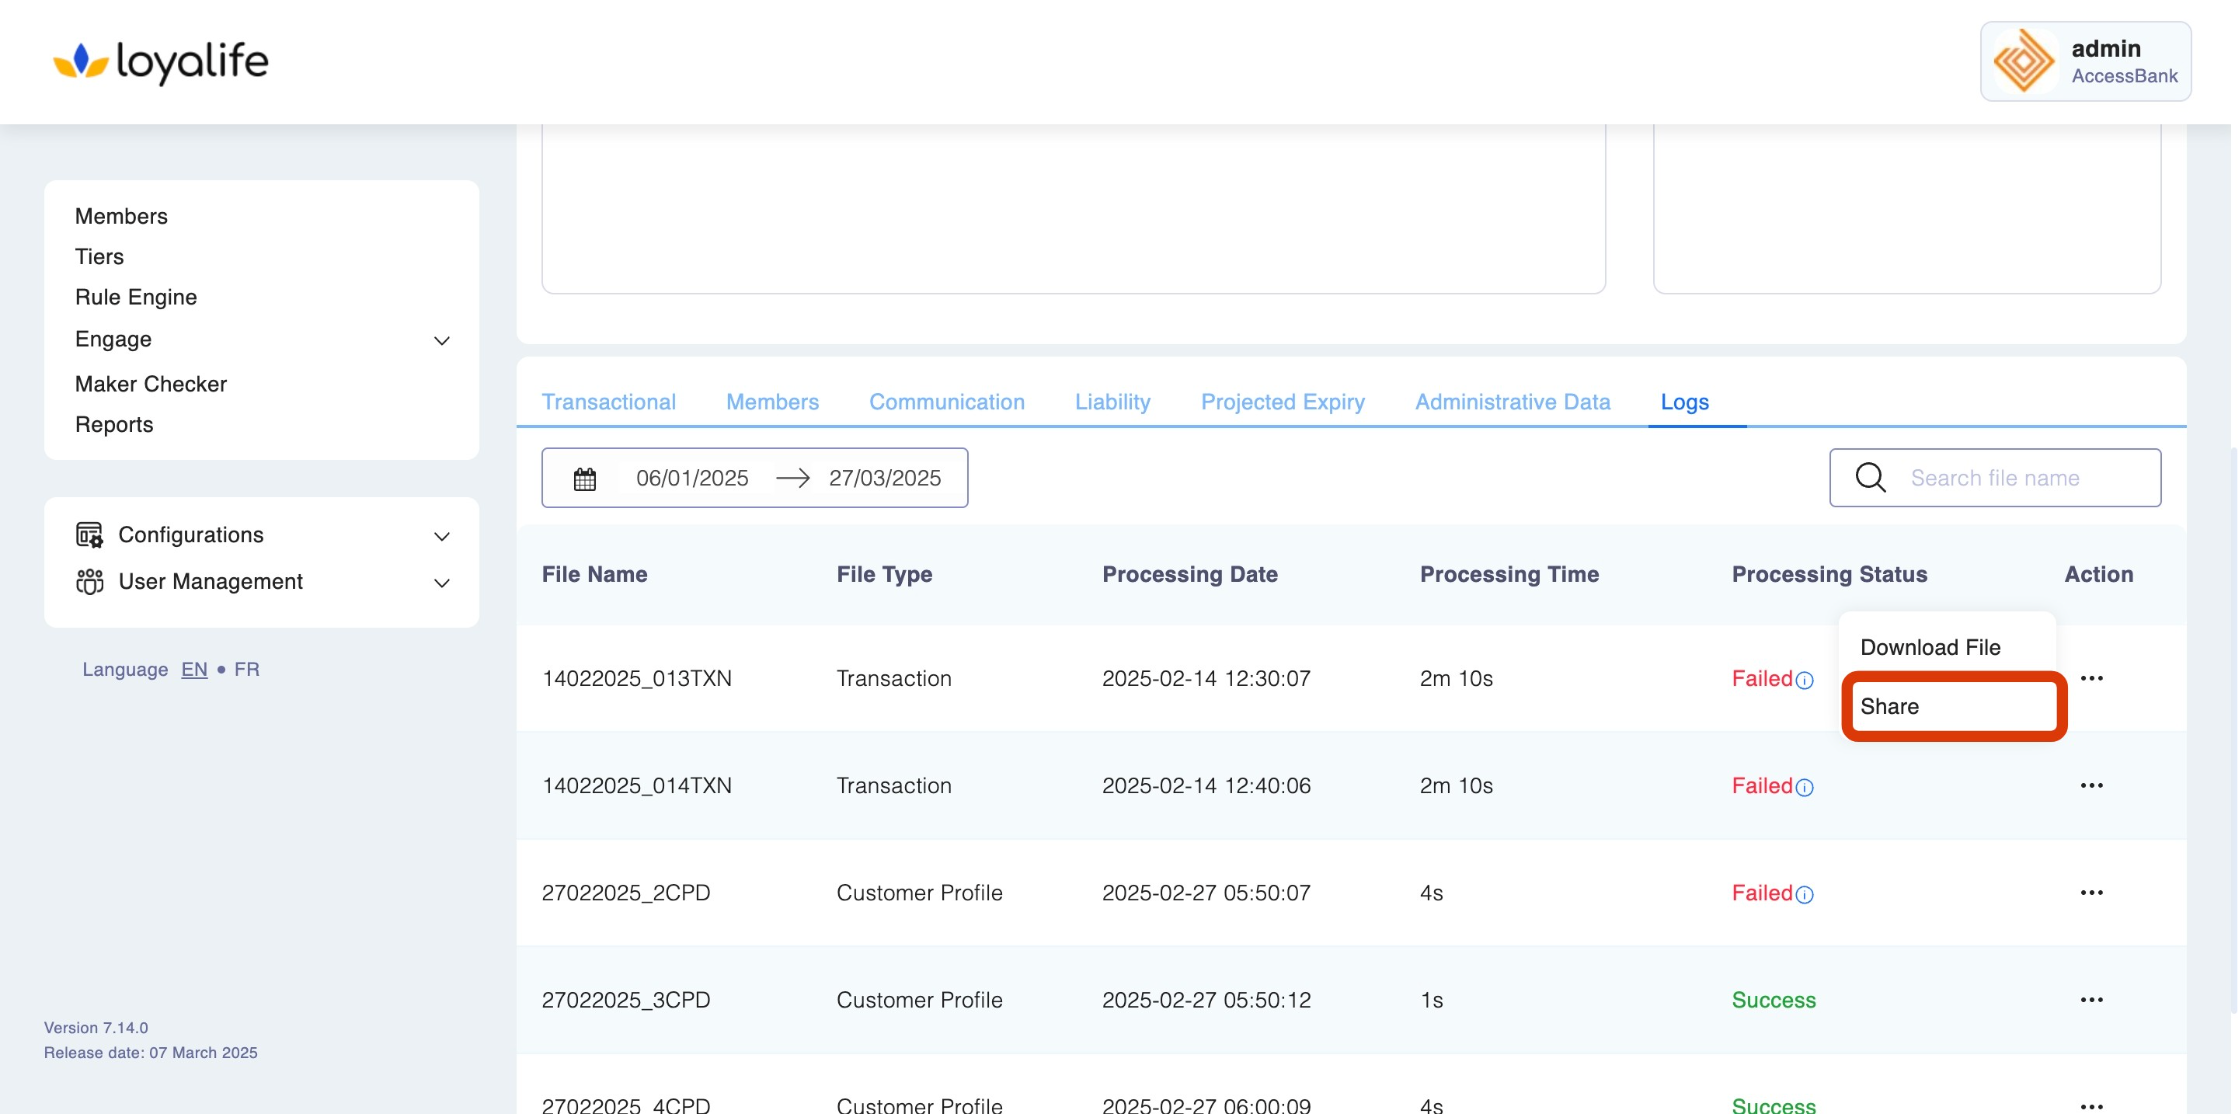
Accessing and Viewing Logs
Navigate to the Logs Section:
- From the main menu, go to Reports > Logs.
Search for Specific Logs:
- Use the date range picker to filter logs based on a specified time period.
- Alternatively, use the search bar to look for logs by file name or type.

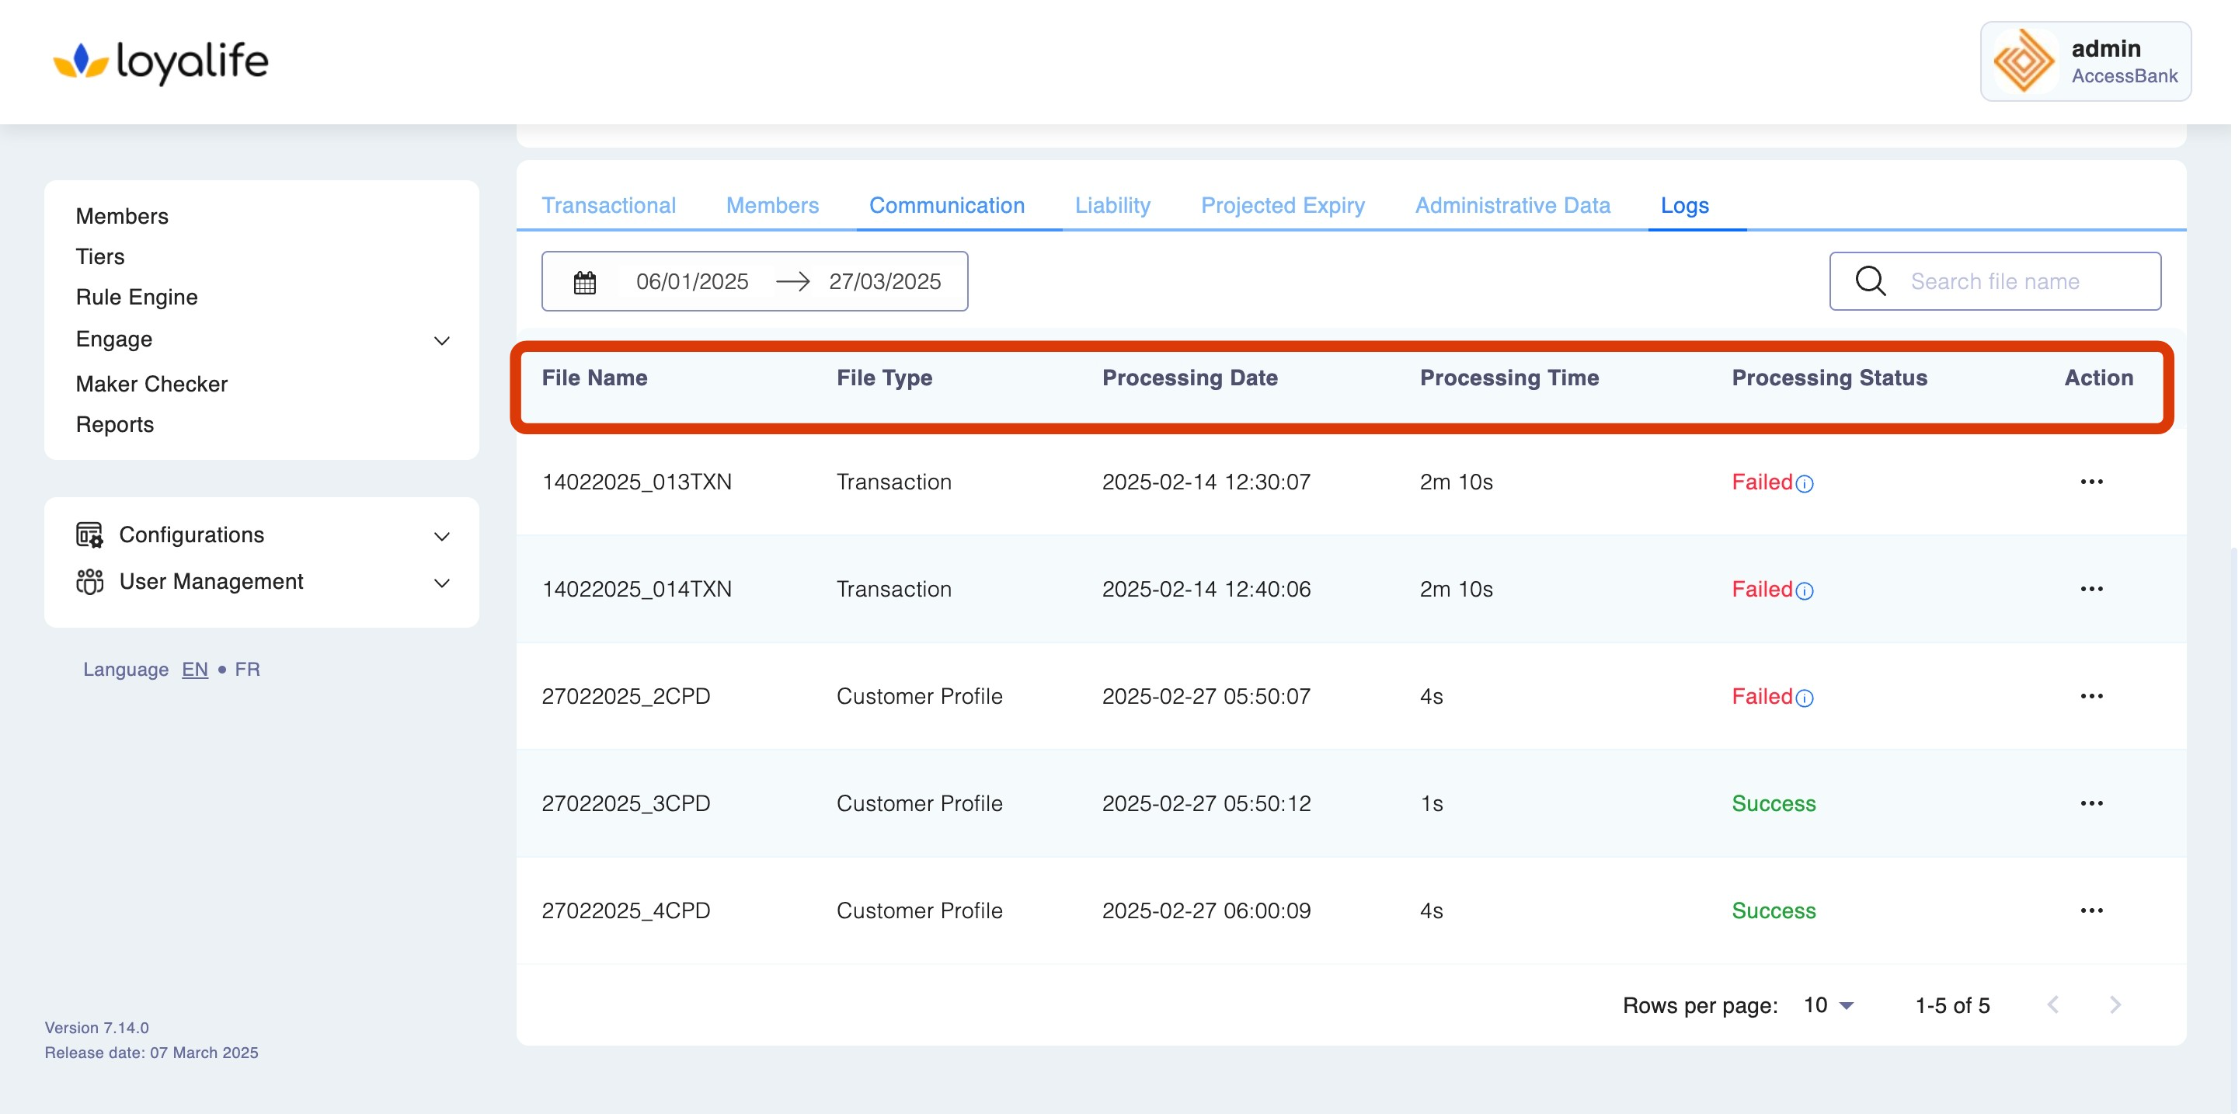
Interpreting the Log Fields:
- File Name: Name of the uploaded file.
- File Type: The category of the file (CPD, CRD, TXN, BNS).
- Processing Date: The date the file was uploaded and processed.
- Processing Time: Time taken to process the file.
- Processing Status: Status of the file processing (e.g., Success, Incomplete Processing, Error).
- Action: Allows for advanced action like downloading or sharing the report.
Downloading Logs
You can download logs to review errors in detail and take corrective action. Here’s how:
-
Download the Log File:
- Locate the specific log entry for the file you wish to review.
- Click on the three-dot menu in the Actions column next to the log entry.
- Select Download. The system will generate and download a file containing details of the processing, including any errors encountered.
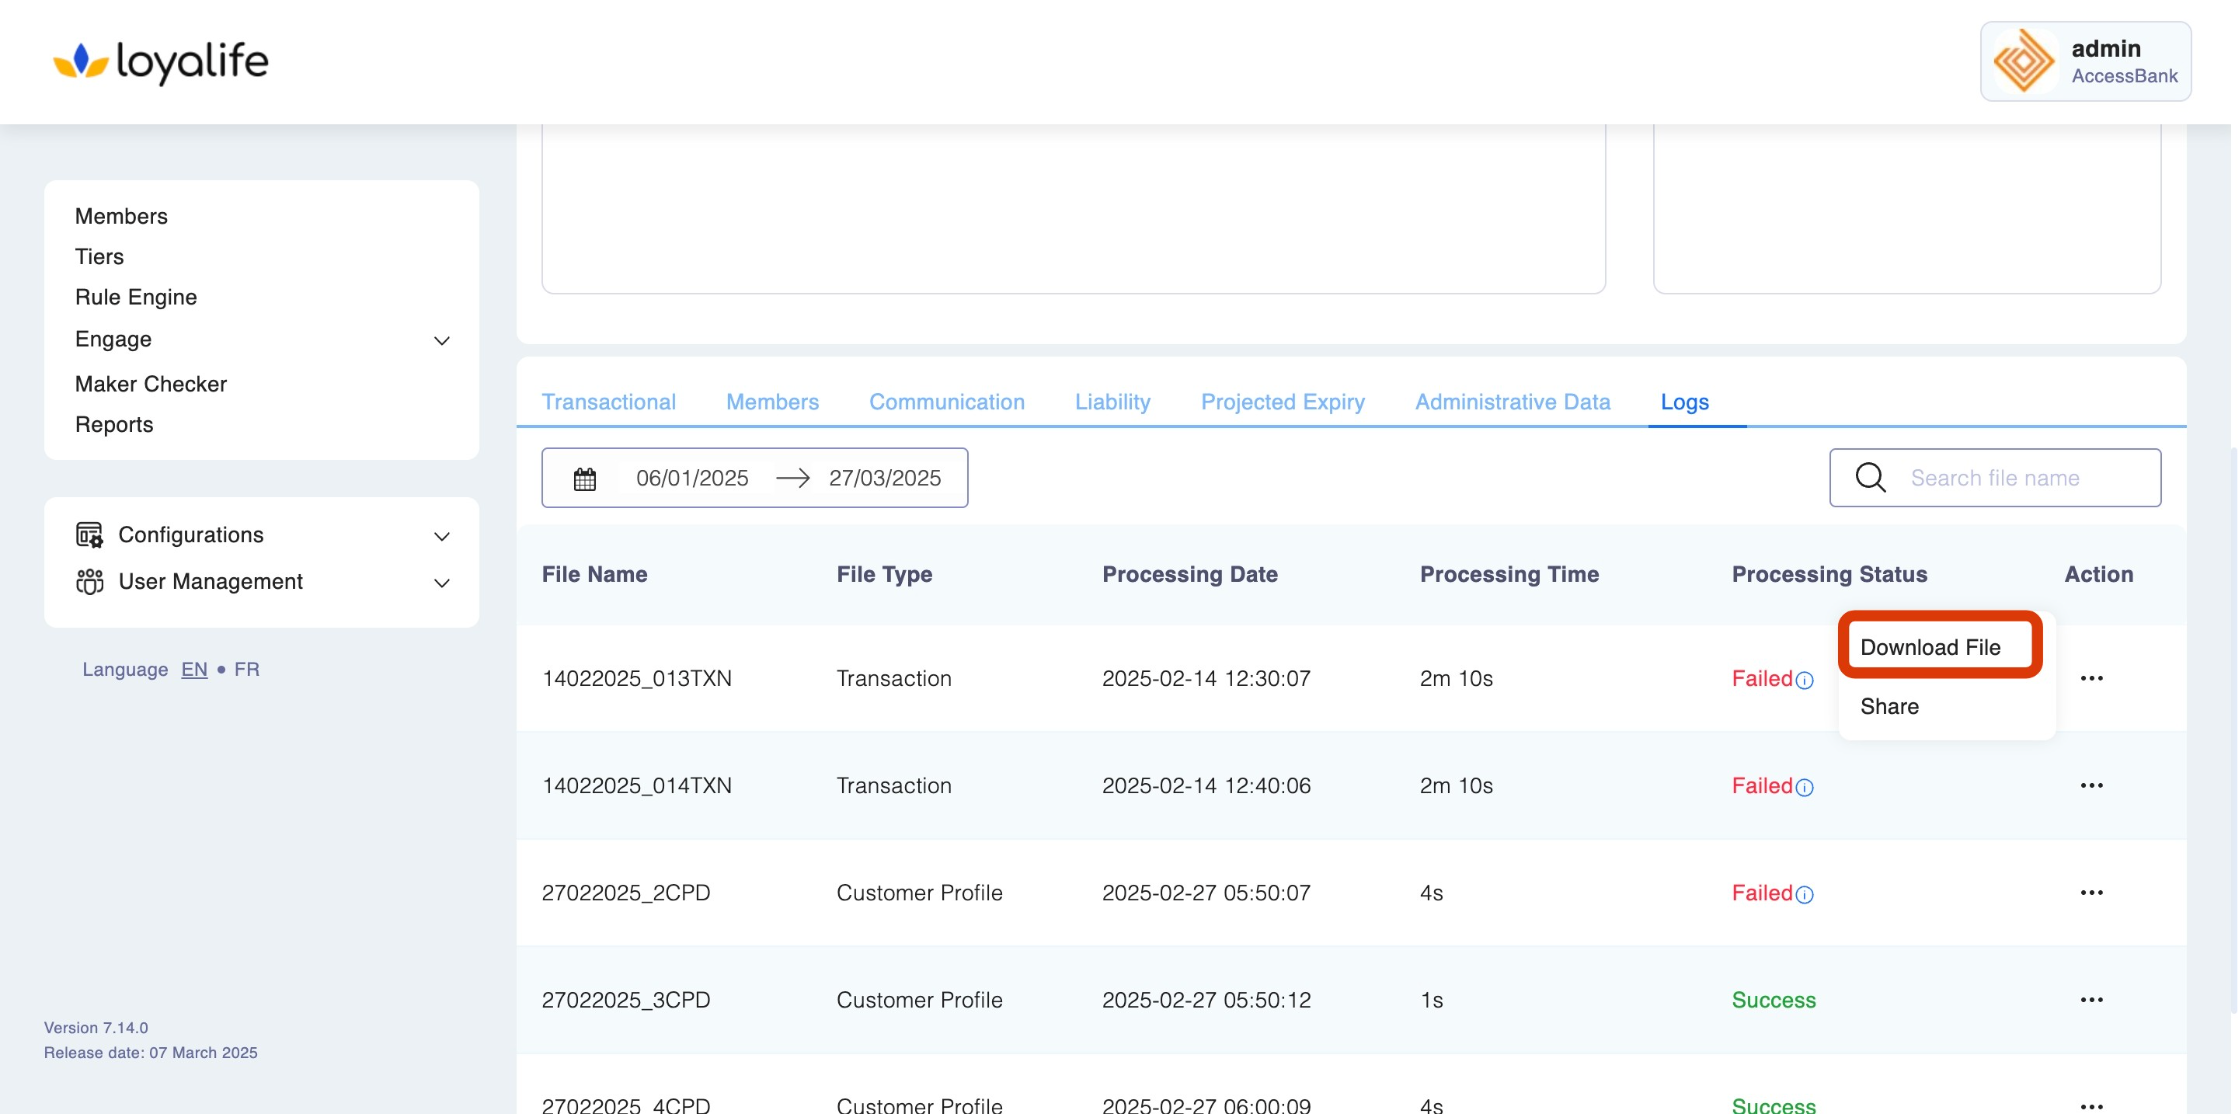
- Reviewing the Downloaded File:
- The downloaded log file will contain rows that include both successfully processed records and those that encountered errors. Each row will detail the processing status and, in case of errors, provide a description of the issue.
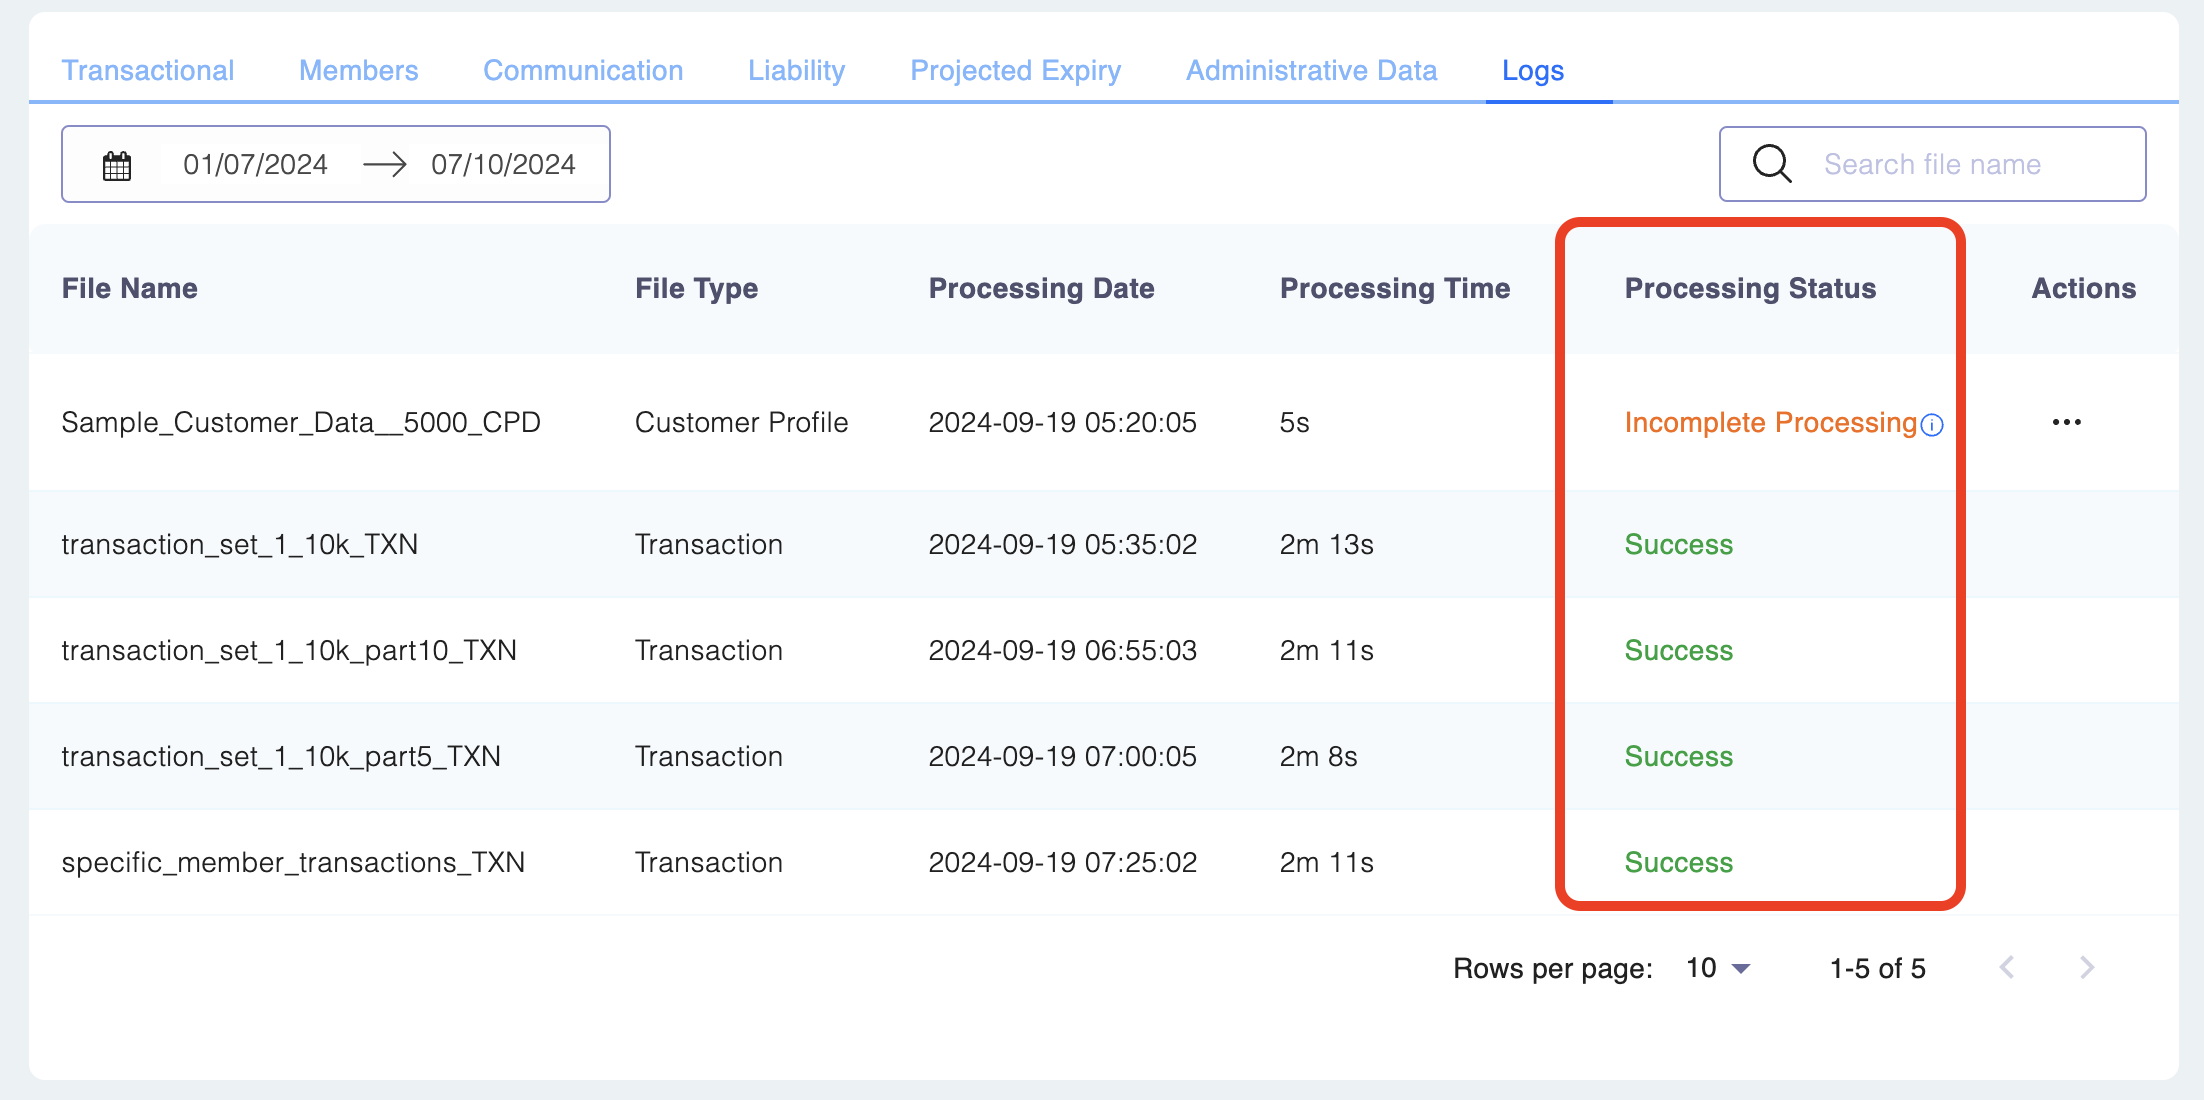
Log Status Indicators
-
Success:
The file has been successfully processed, and all records were integrated without errors. -
Incomplete Processing:
Part of the file was processed, but some records were skipped due to errors. Details of skipped records can be viewed by clicking on the status. -
Error:
The file could not be processed due to errors in the file format, structure, or data validation issues.
Sharing Reports Data
You can share a specific log report by following the steps below:
Select the View to Share:
- Use the date range picker to filter logs based on a specified time period. Alternatively, use the search bar to look for logs by file name or type.
- Find the custom view you want to share.
- Click the three-dot menu on the right side of the view and select Share.
- In the dropdown menu, select the user you want to share the view with.
- Click Share to grant access.
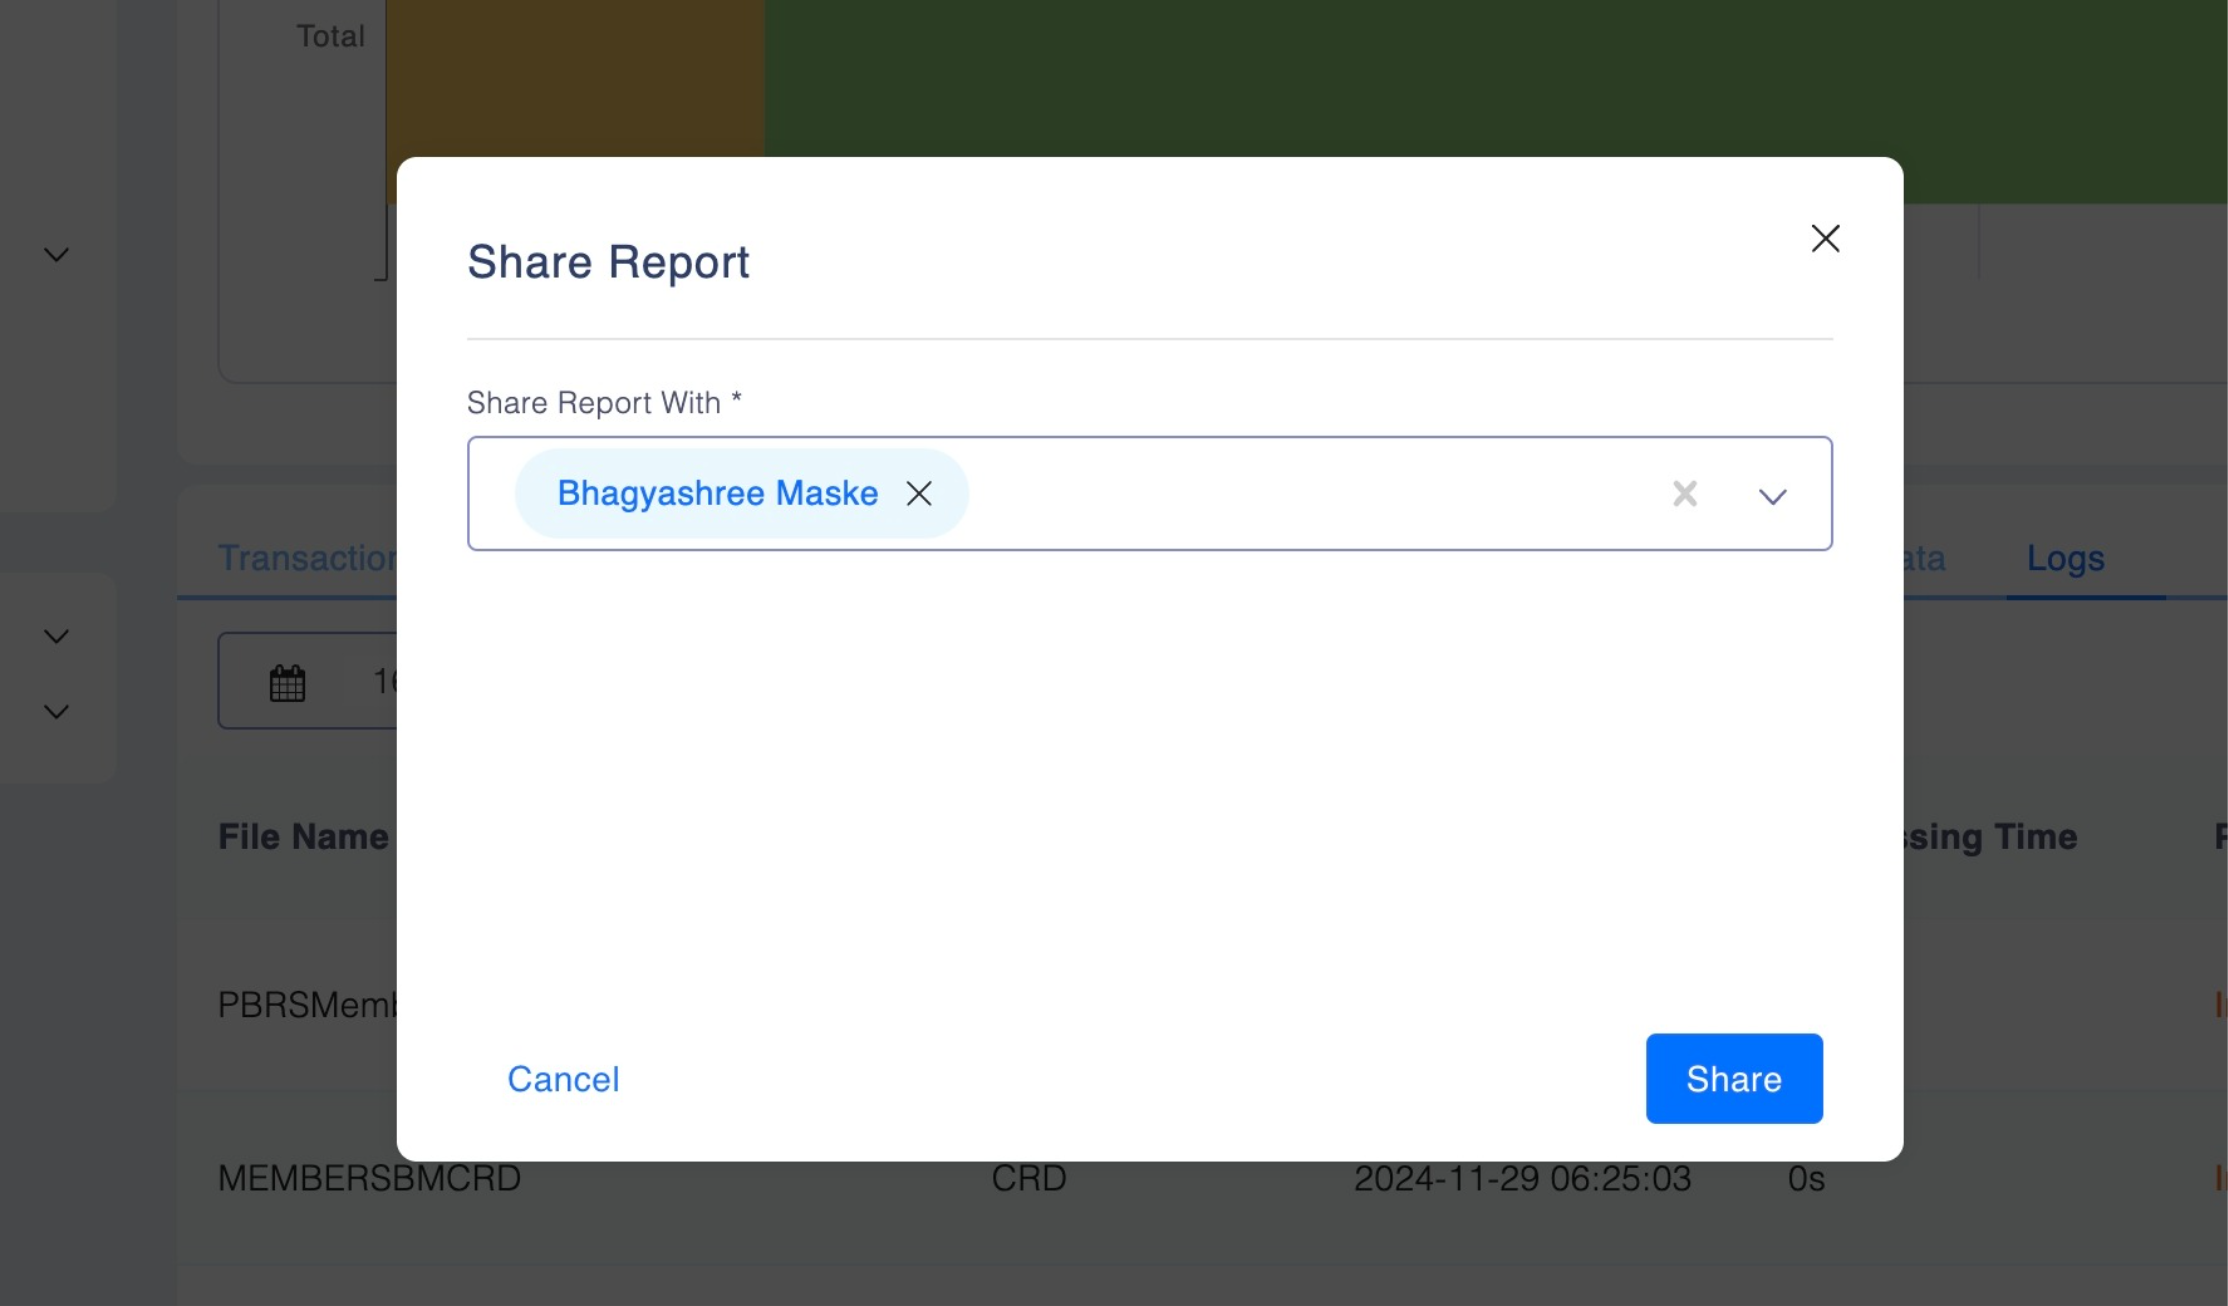
Note: Sharing with a specific user is only available if their access settings allow it.
Common Use Cases
- Security Audit: Reviewing unauthorized login attempts.
- Troubleshooting: Identifying errors in point transactions.
- Compliance: Ensuring data changes comply with organizational policies.
- Performance Analysis: Tracking system performance anomalies.
Updated 2 months ago