
Member Reports
Overview of Member Reports
Purpose:
Member reports in Giift LBMS are designed to provide insights into the demographics, activities, and loyalty statuses of members participating in the loyalty program. These reports allow administrators to monitor member behaviors, track points accumulation and redemption, and assess member engagement levels.
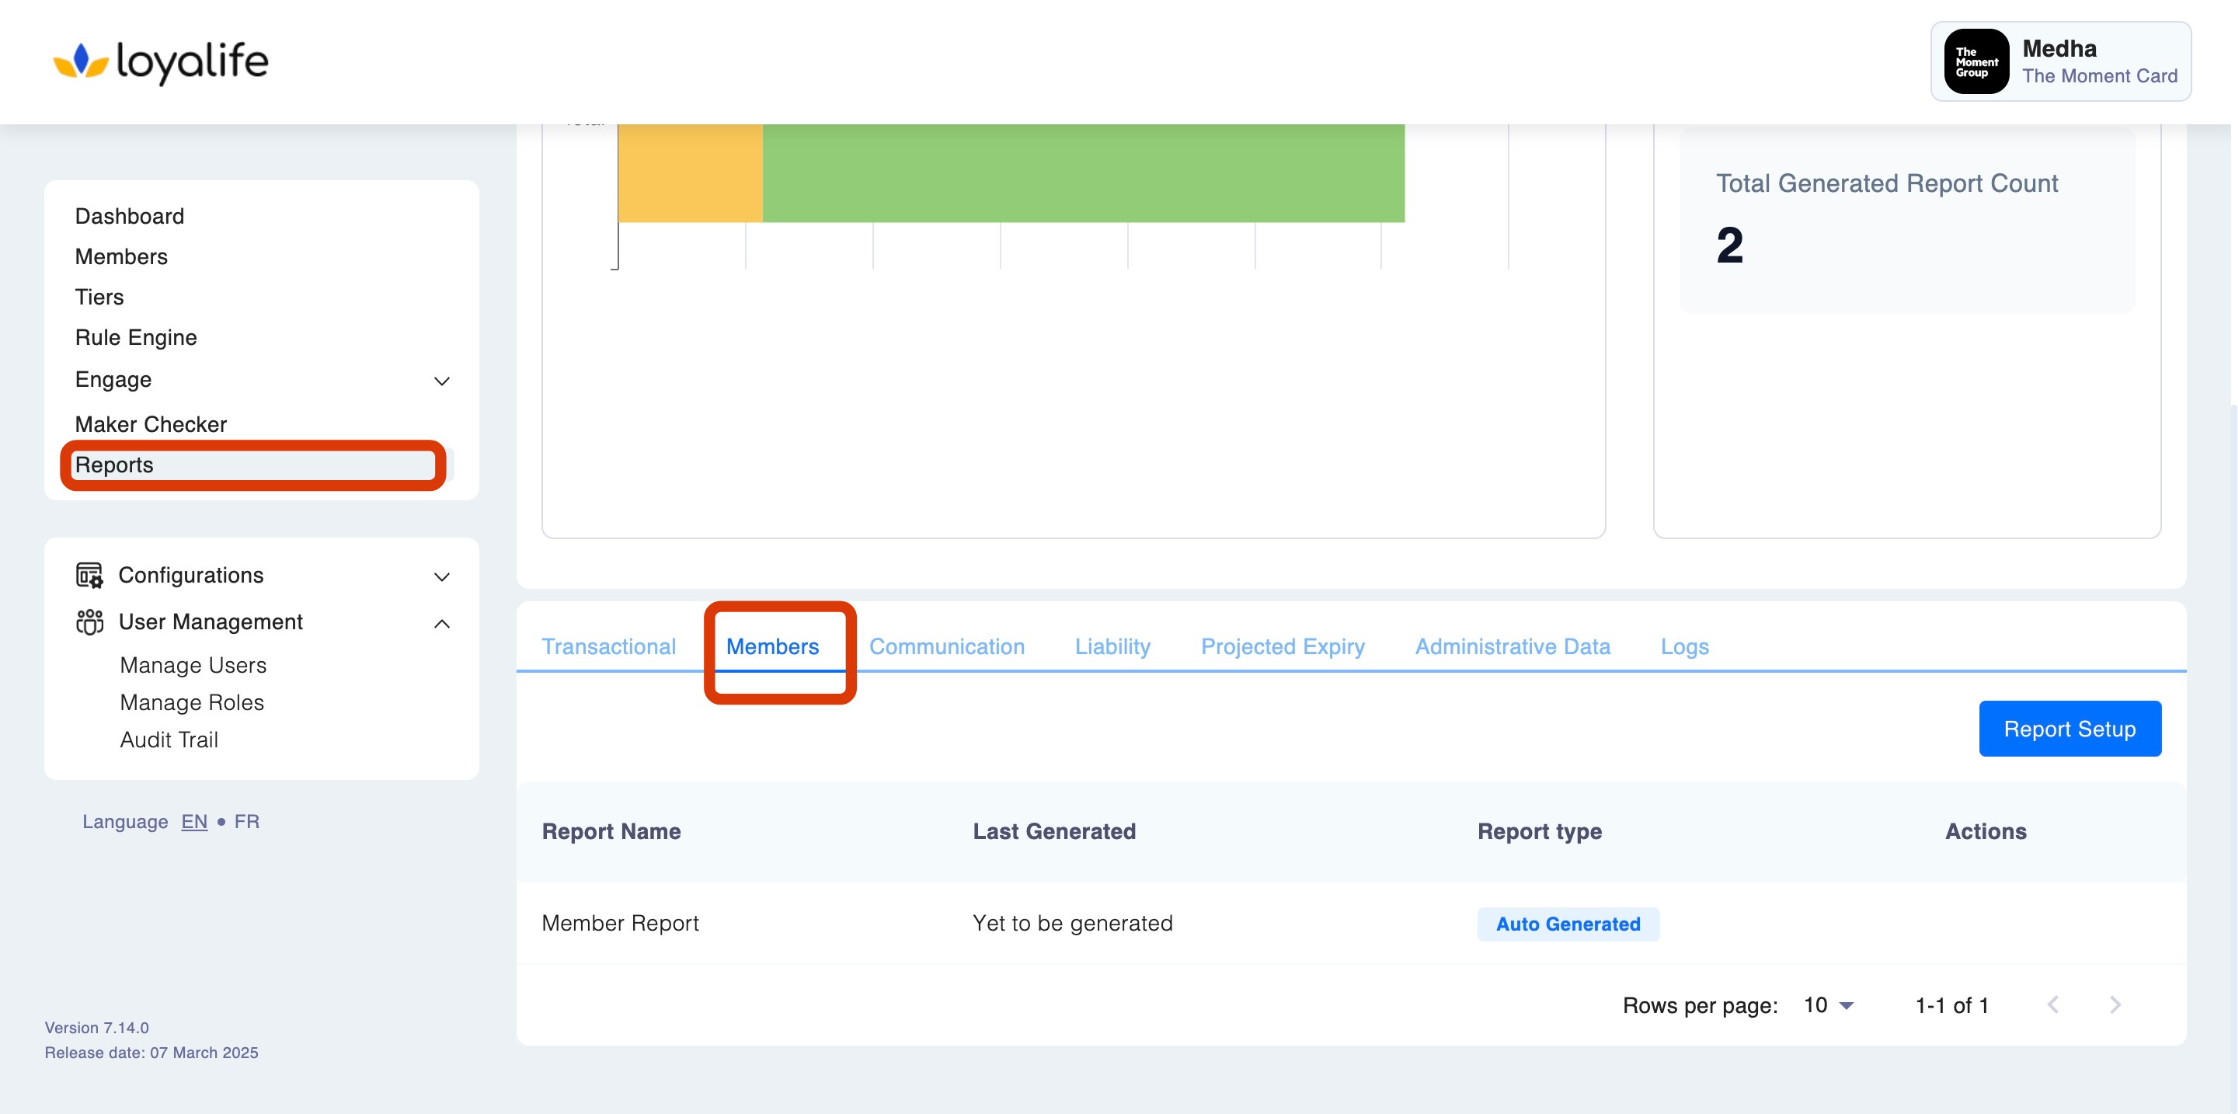
Accessing the Members Report
- Navigate to Reports > Members Tab.
Creating a Custom Member Report
To create a custom member report that meets your specific needs:
Step 1: Navigate to Reports > Member tab.
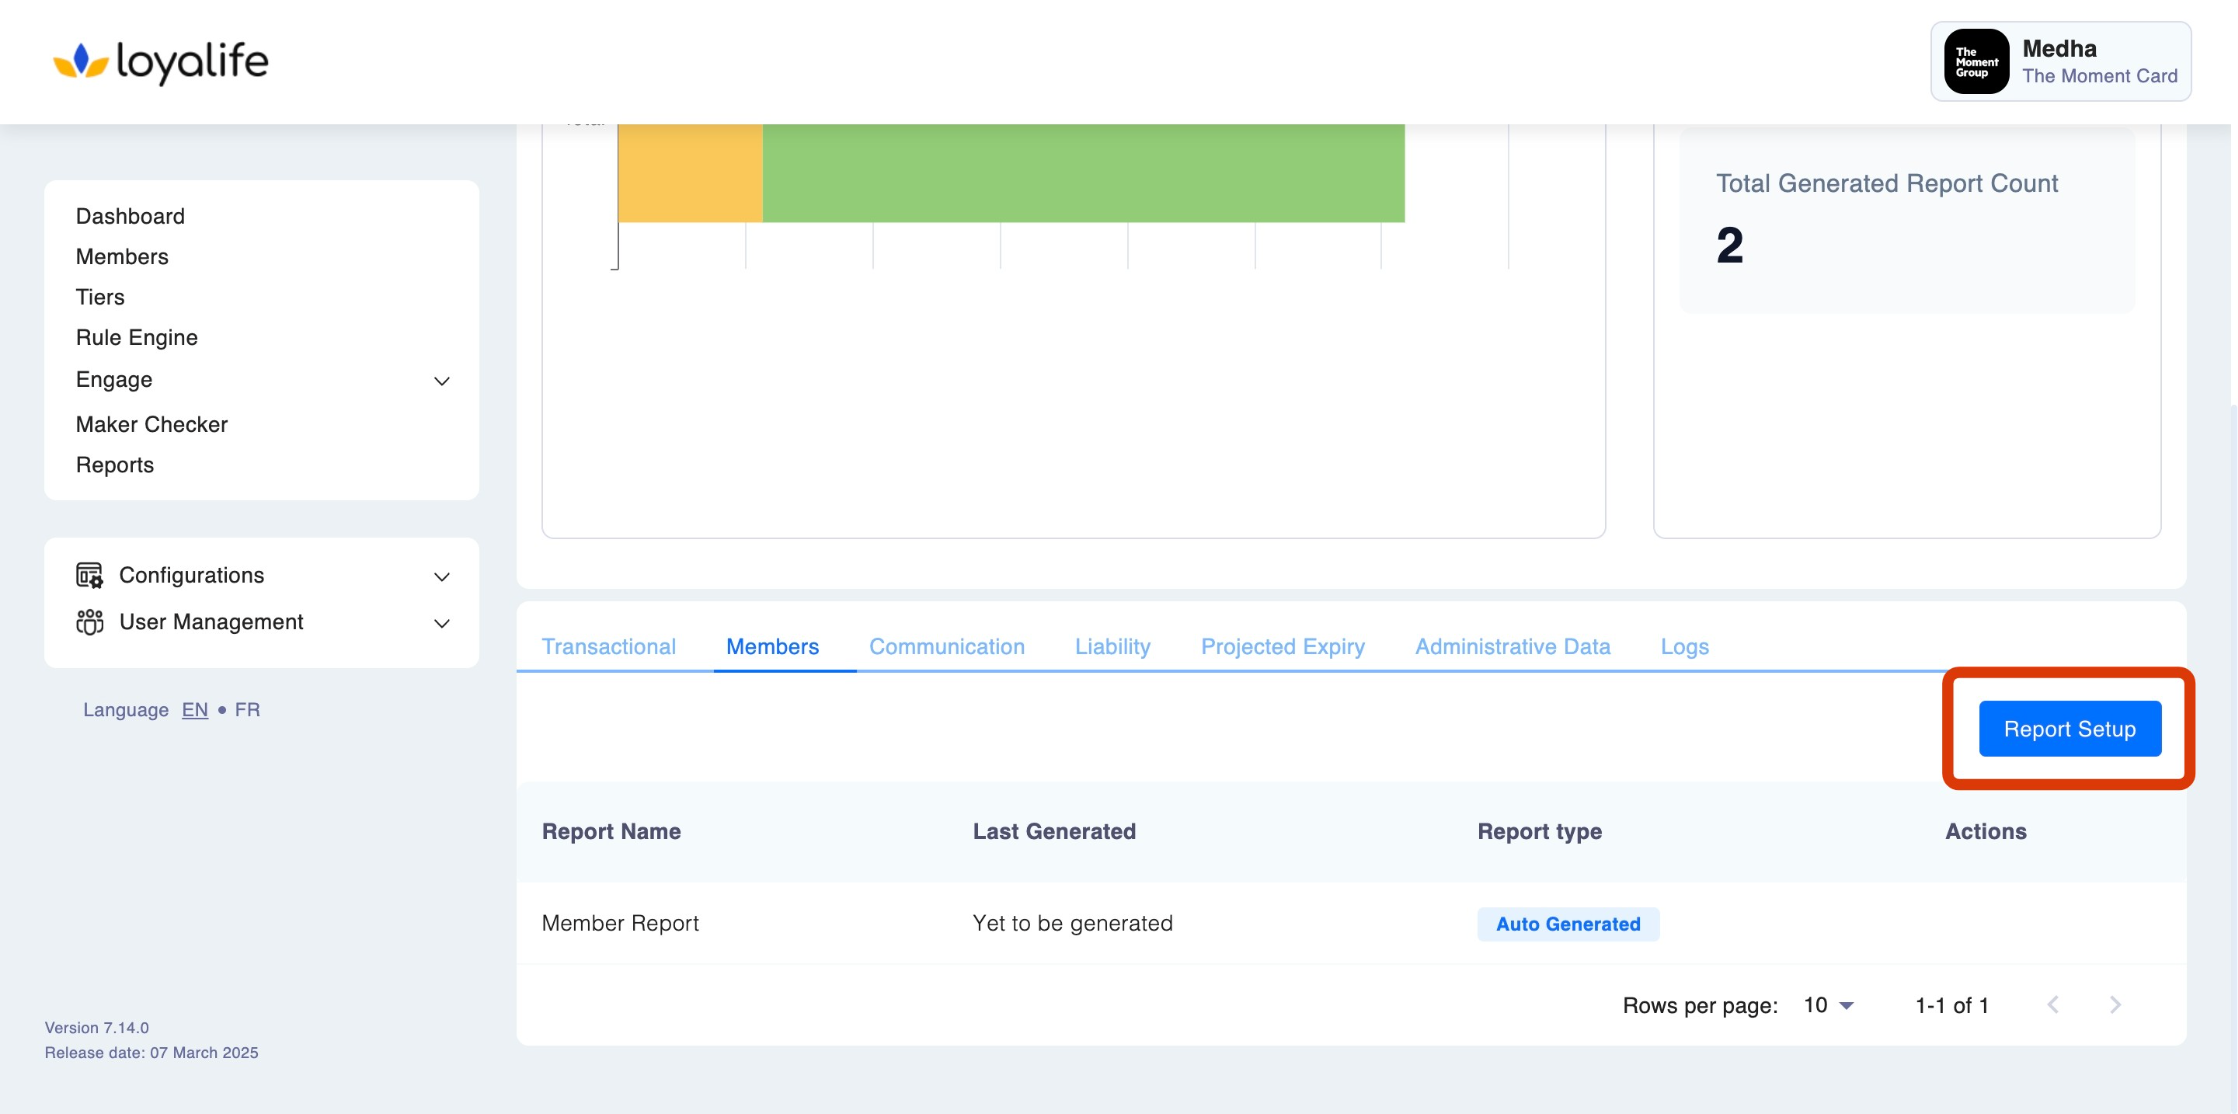
Step 2: Add a Custom Report**
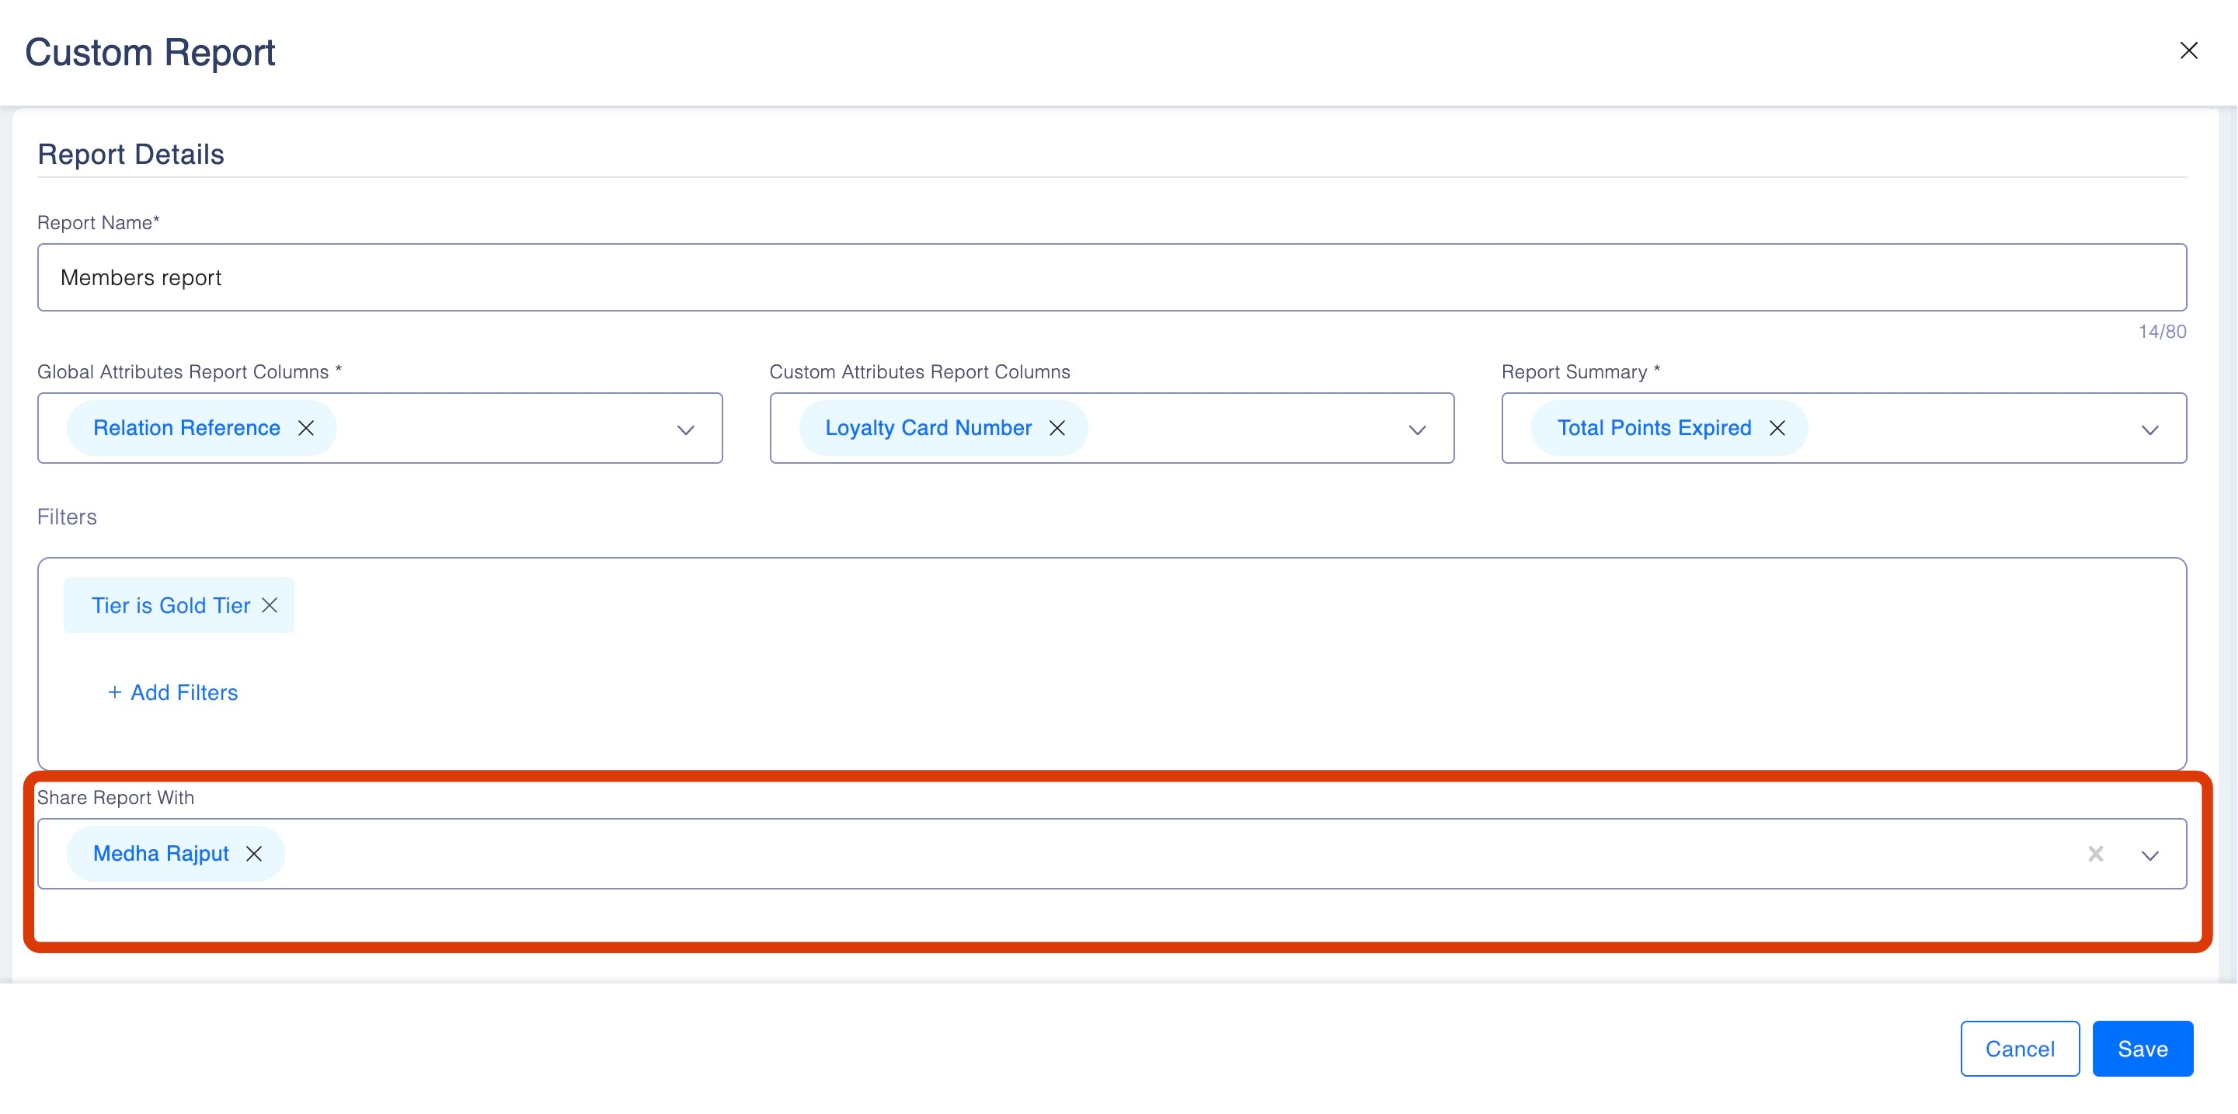
- 2.1 Click Report Set Up and fill in the following details:
- 2.2 Report Name: Provide a meaningful name for the report.
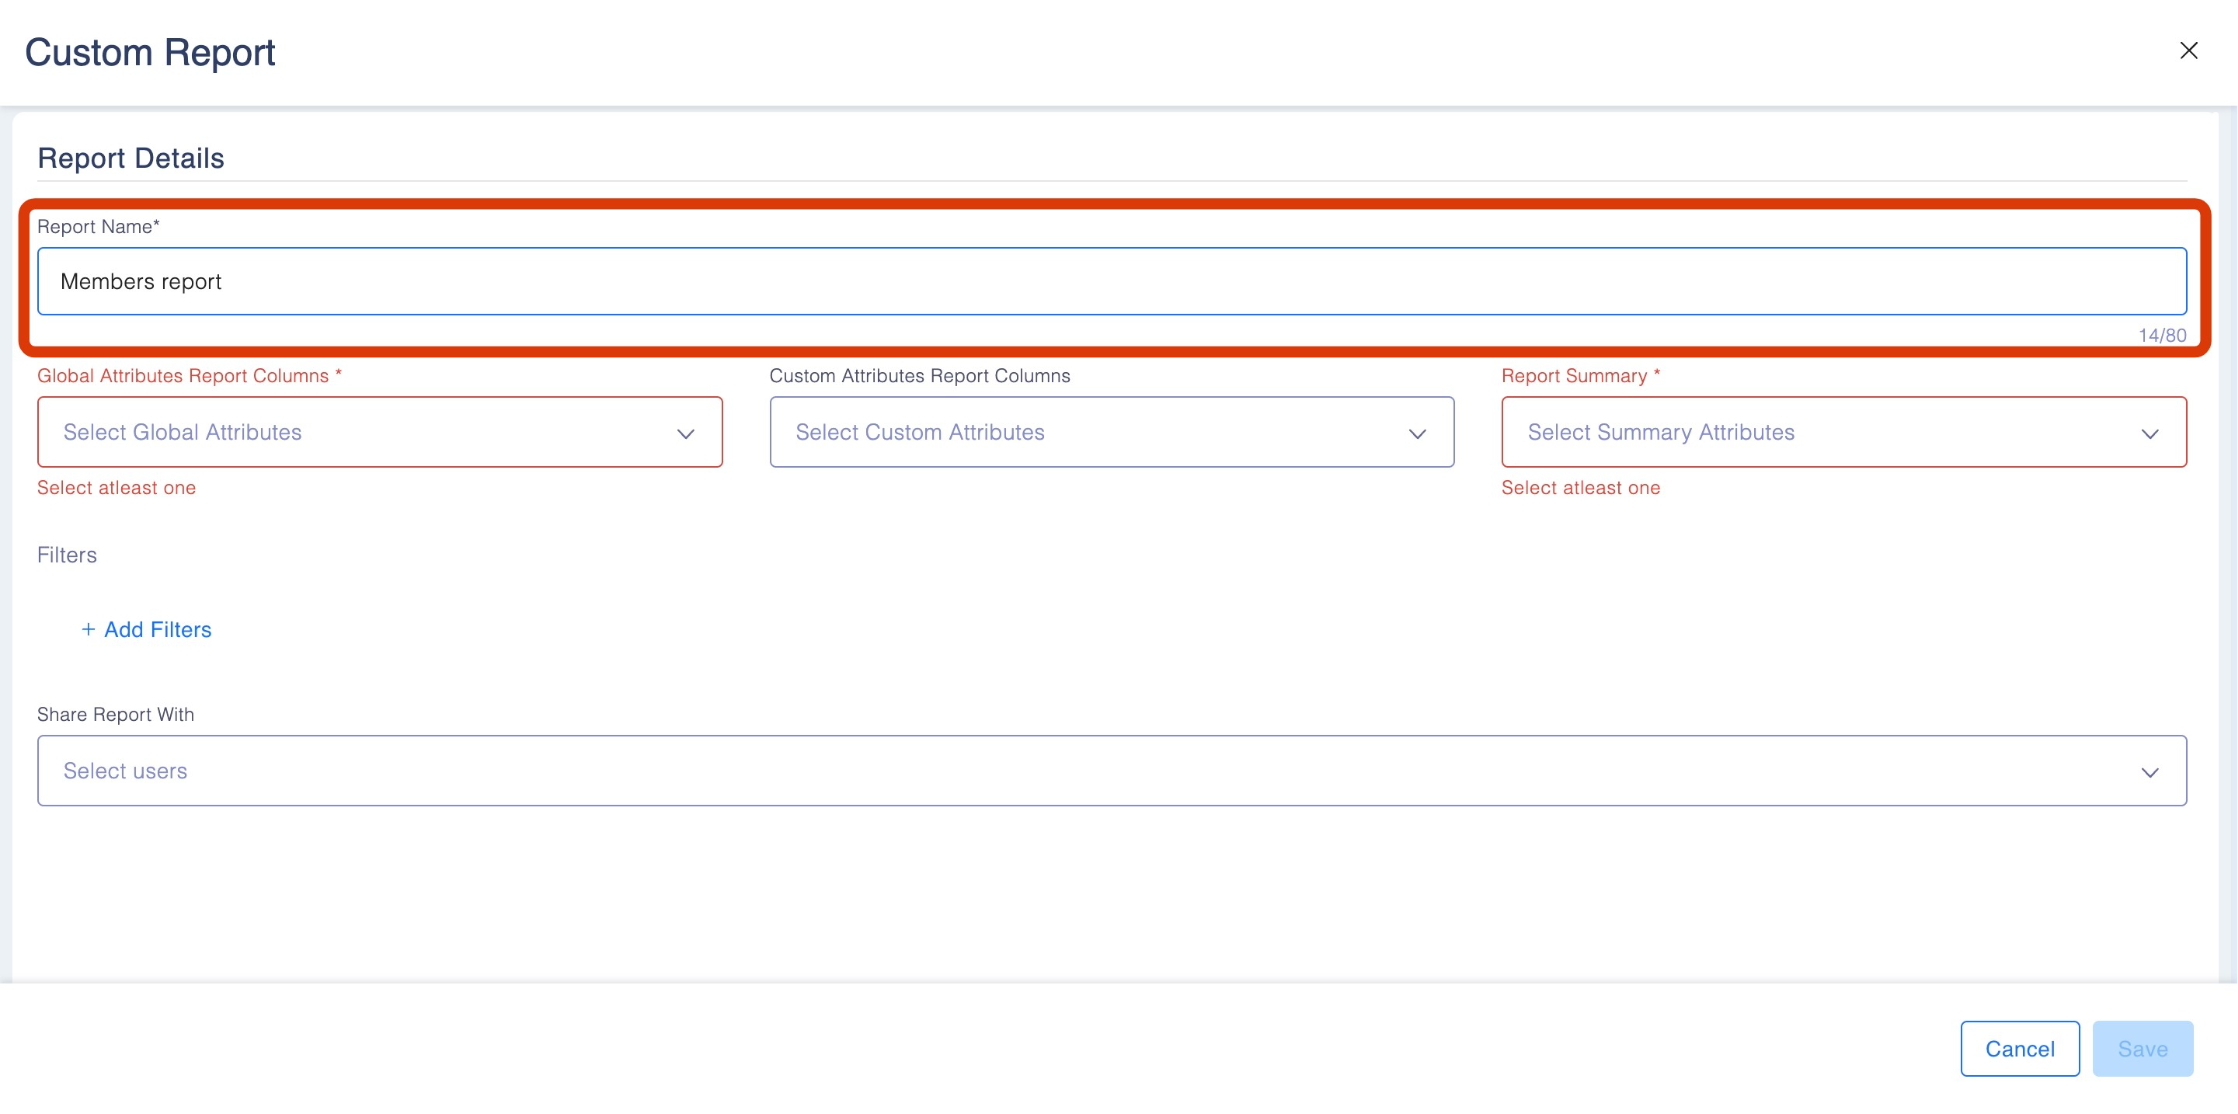
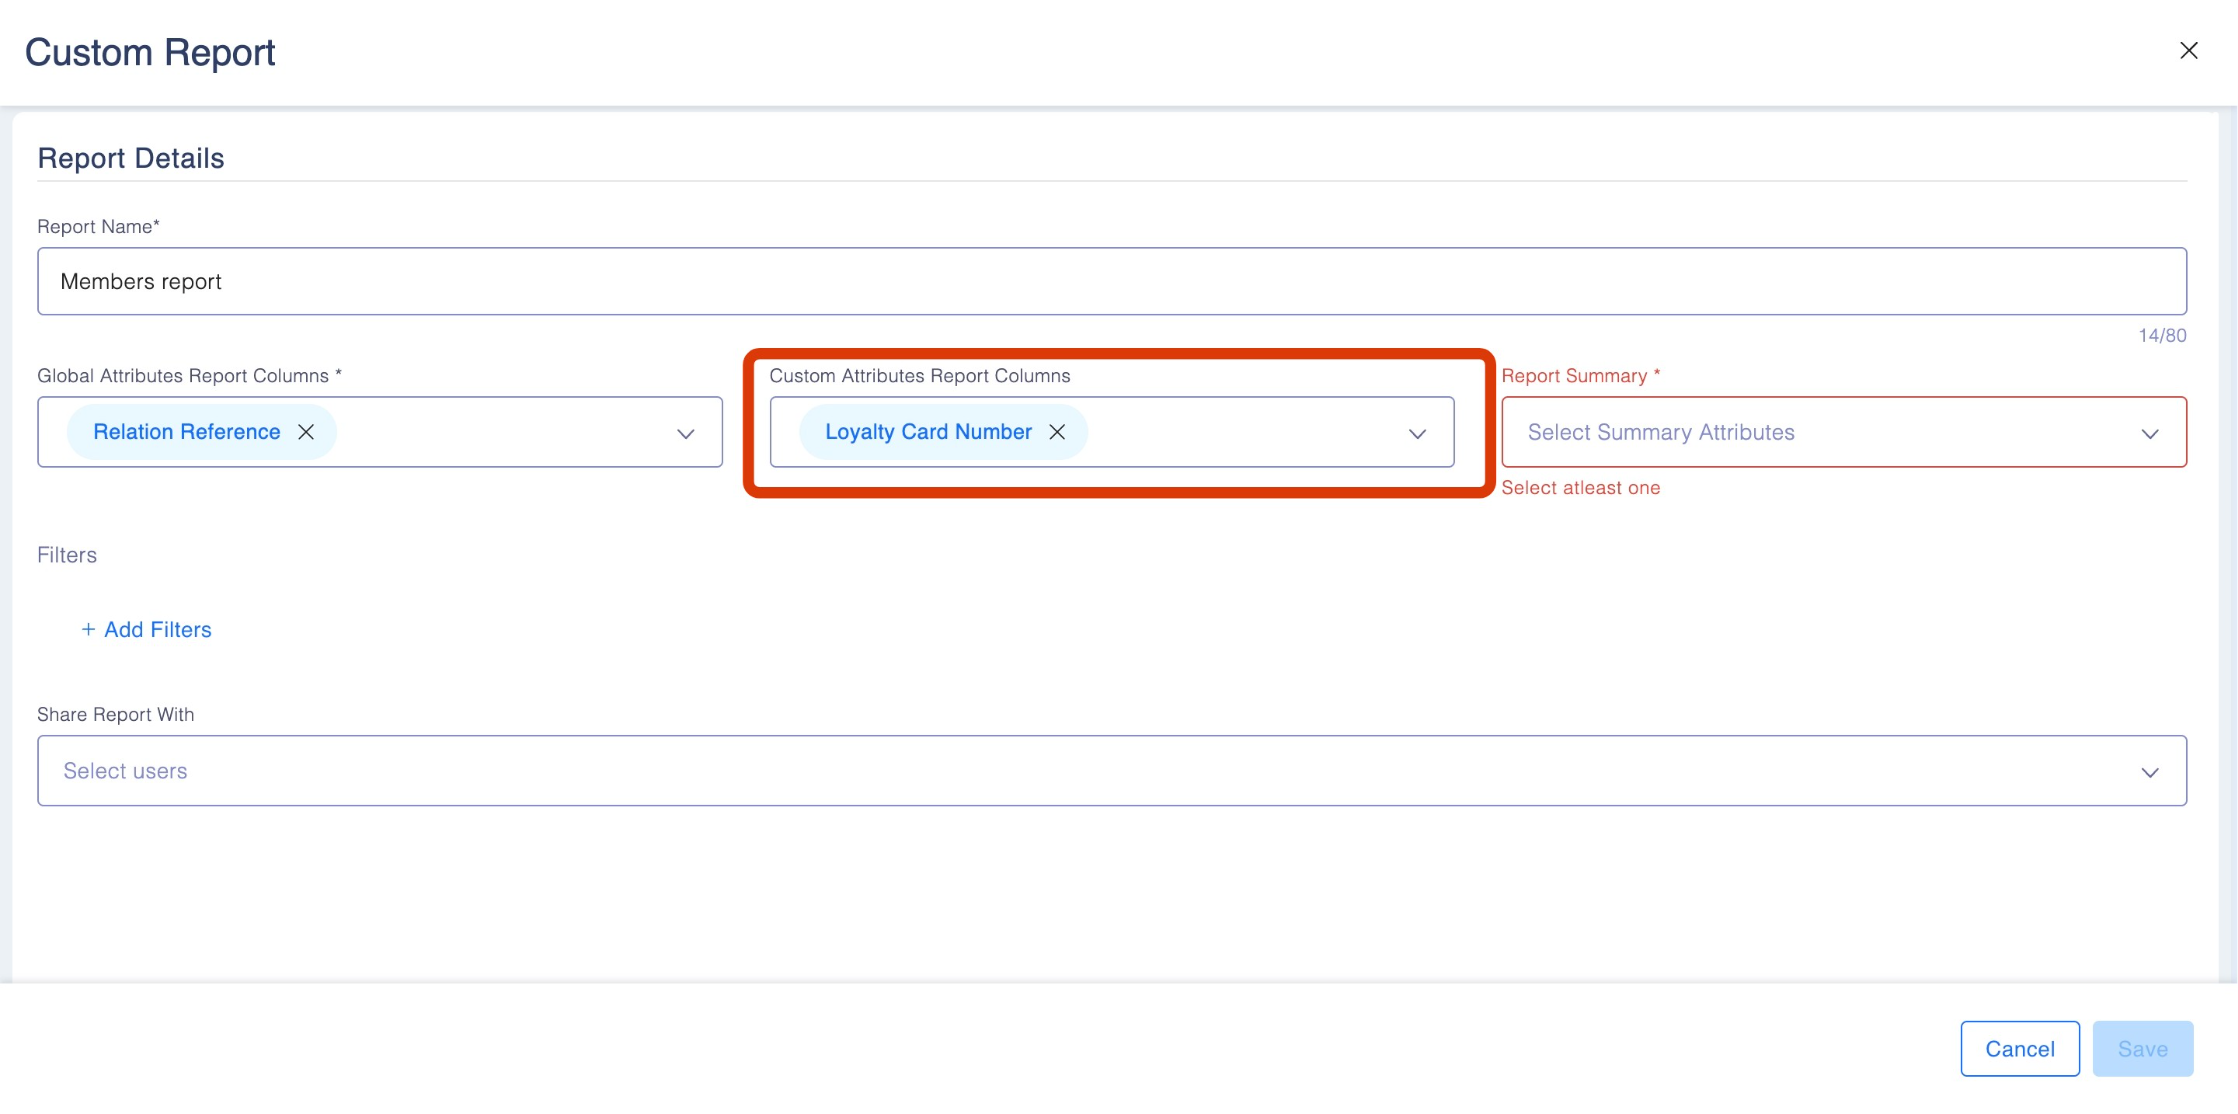
- 2.3 Global Attributes Reports Column: Select the relevant columns to be included in the report (see column list below).
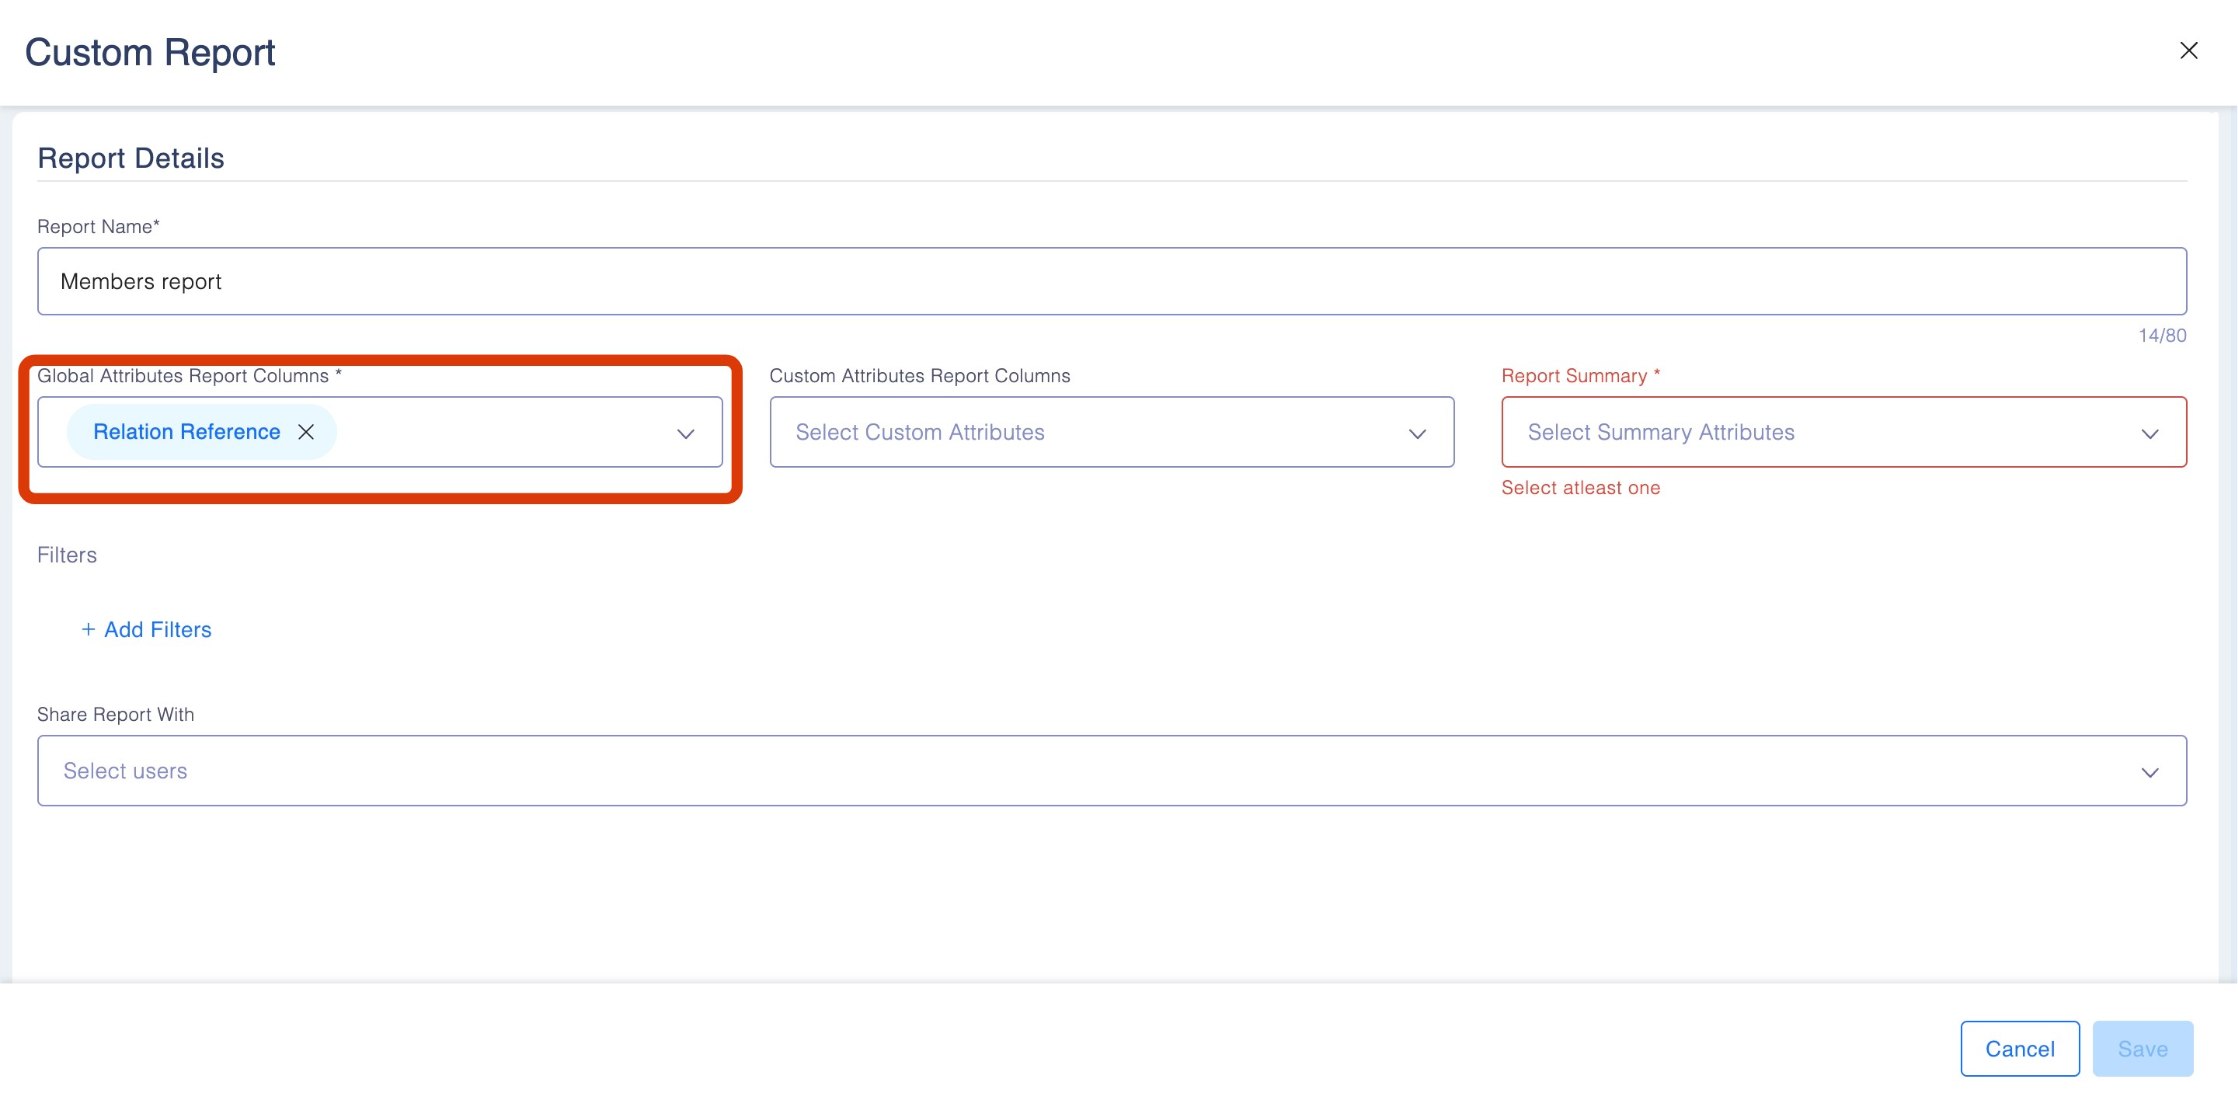
2.3.1 Available Global Attributes Report Columns
- When creating a custom member report, you can include the following columns to display relevant member data:
- Relation Reference: The reference ID associated with the member.
- Enrollment Date: The date when the member enrolled in the loyalty program.
- Tier: The current loyalty tier of the member.
- Status: The status of the member (active, inactive, etc.).
- Points Available: The number of points currently available for the member.
- Points Expired: The number of points that have expired for the member.
- Points Redeemed: The total number of points redeemed by the member.
- Last Transaction: The date of the member's most recent transaction.
- Total Transactions: The total number of transactions made by the member.
- Activated Date: The date when the member's account was activated.
- 2.4Customer Member Attributes: Filter based on the custom member attributes of the member (e.g., those defined in the member module with filter enabled)
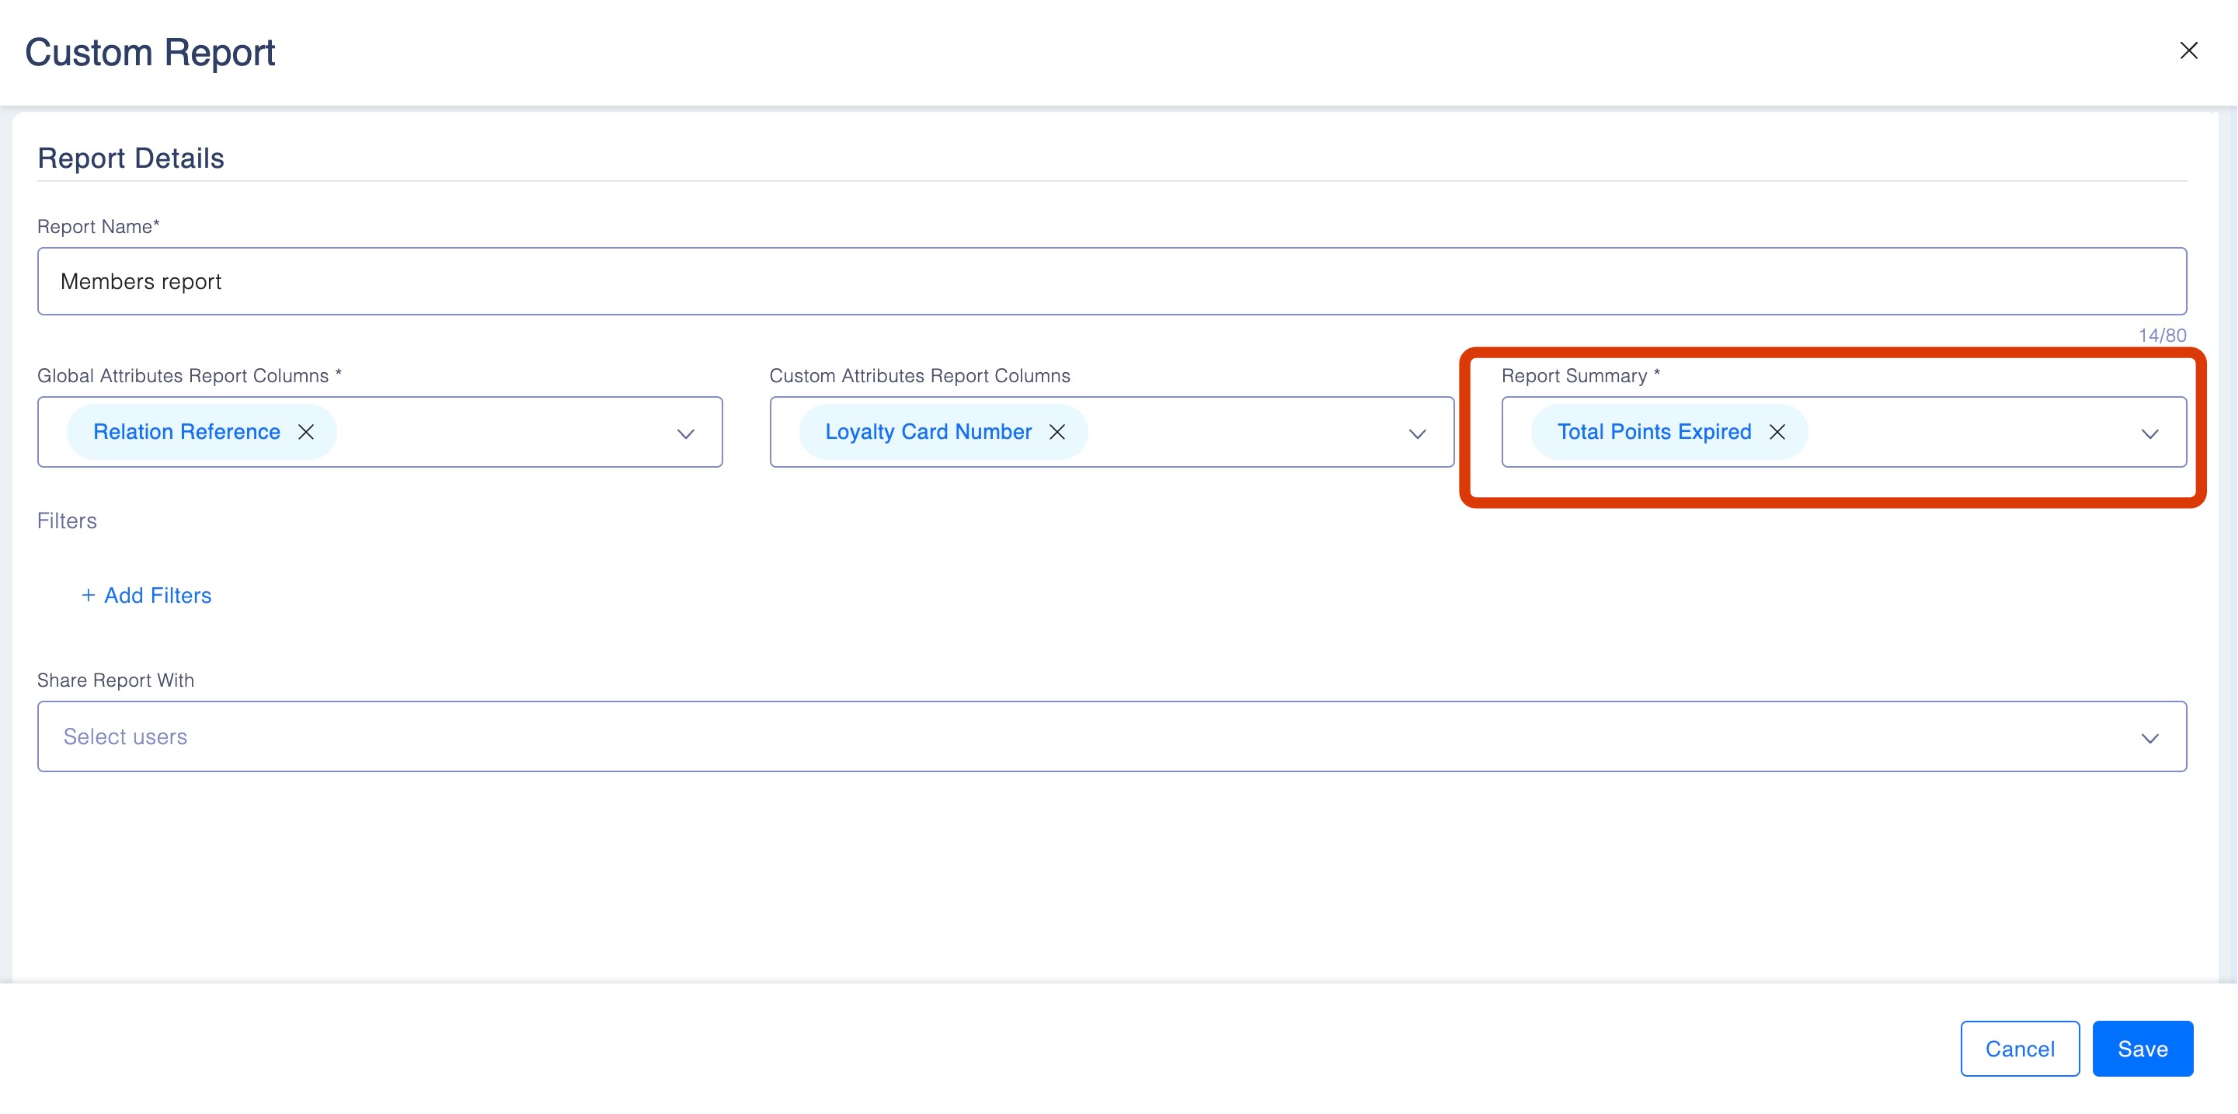
- 2.5 Reports Summary Fields: Choose summary metrics like total points issued or total members (see list below).
-
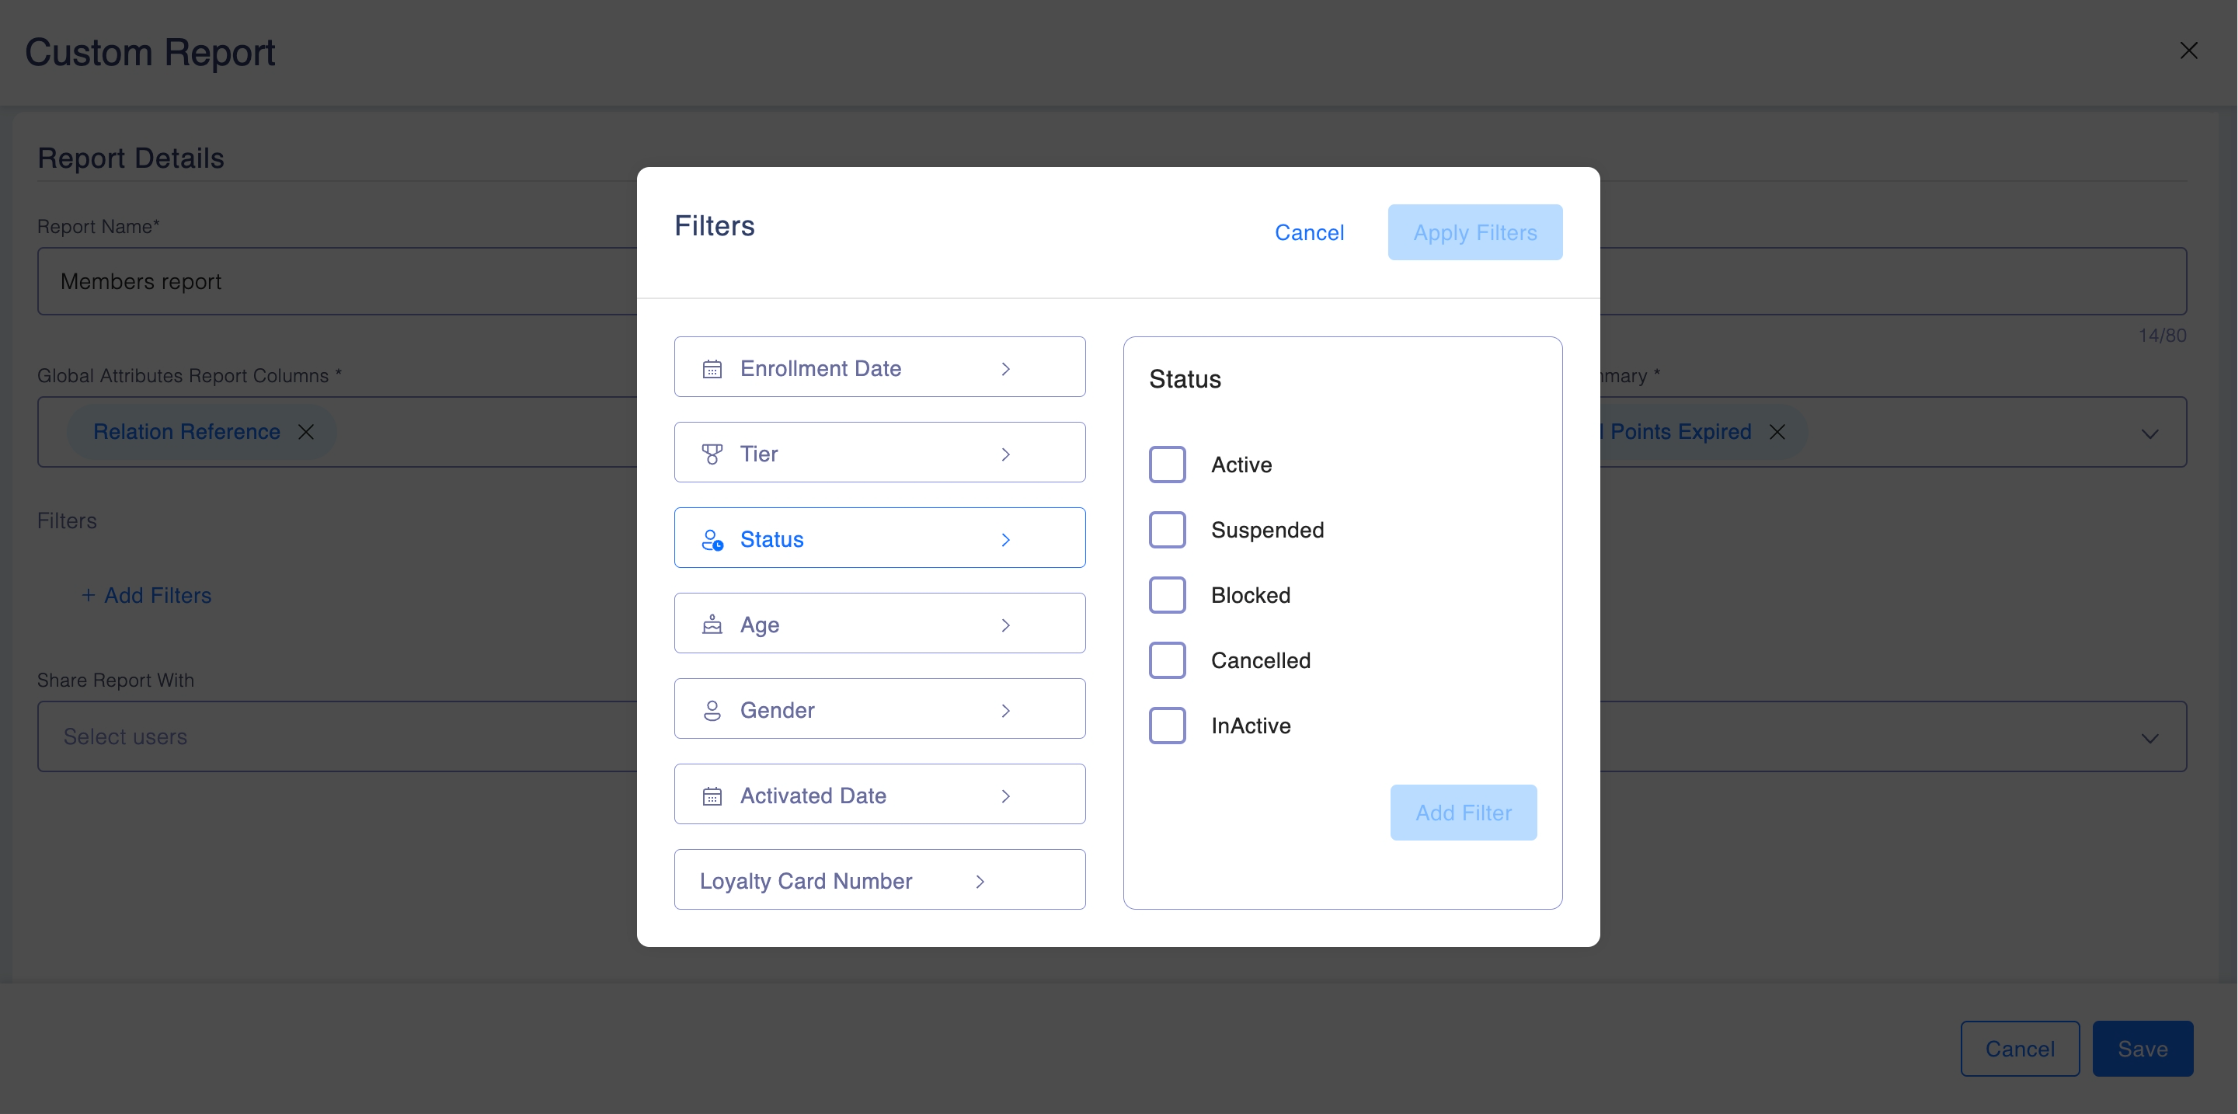
2.6 Add a Filter: Select the filter and fill out the relevant details. Several filter options are available.
-
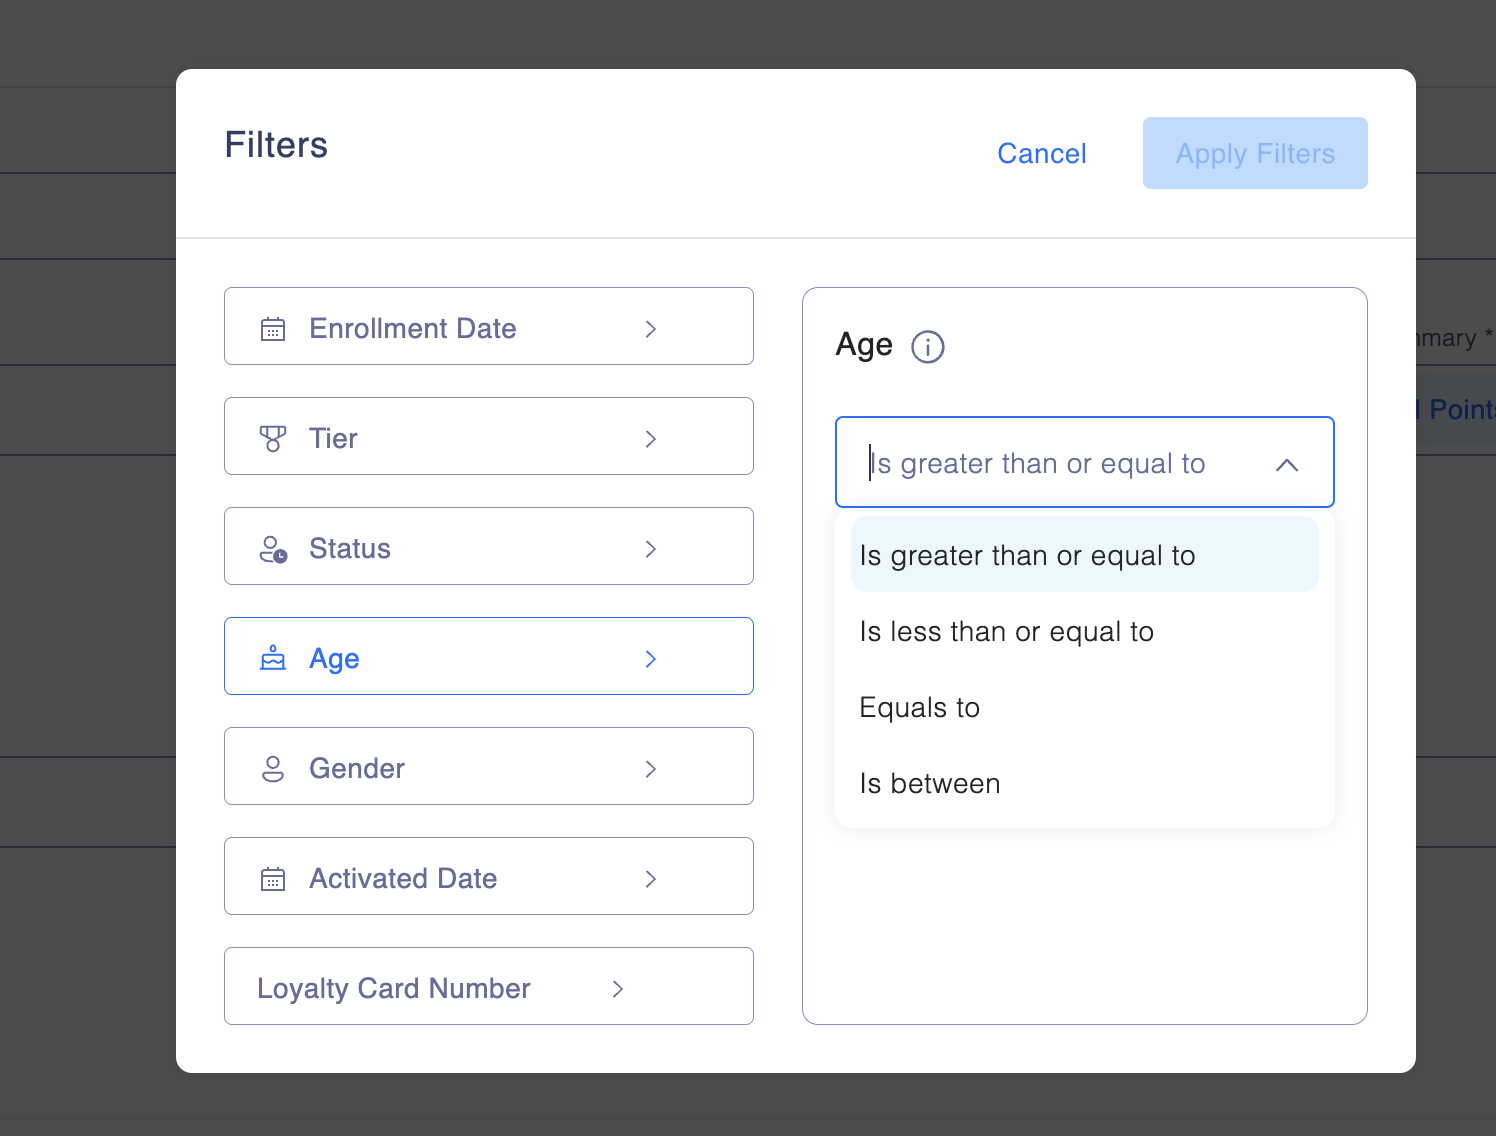
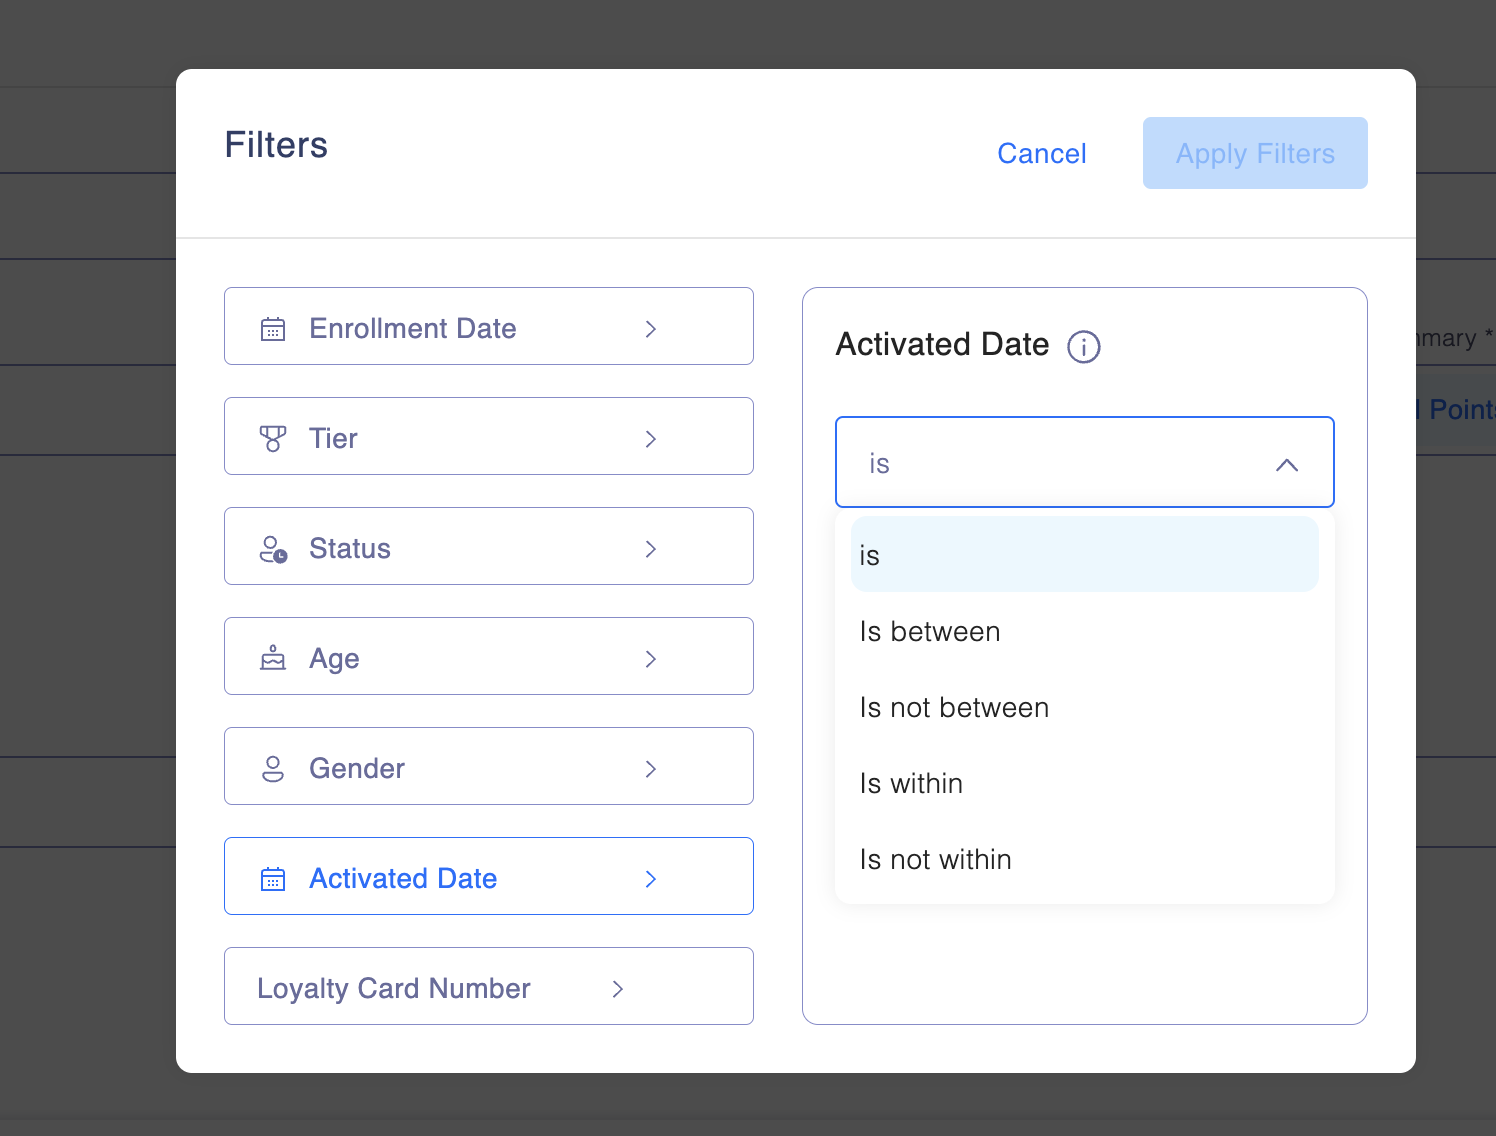
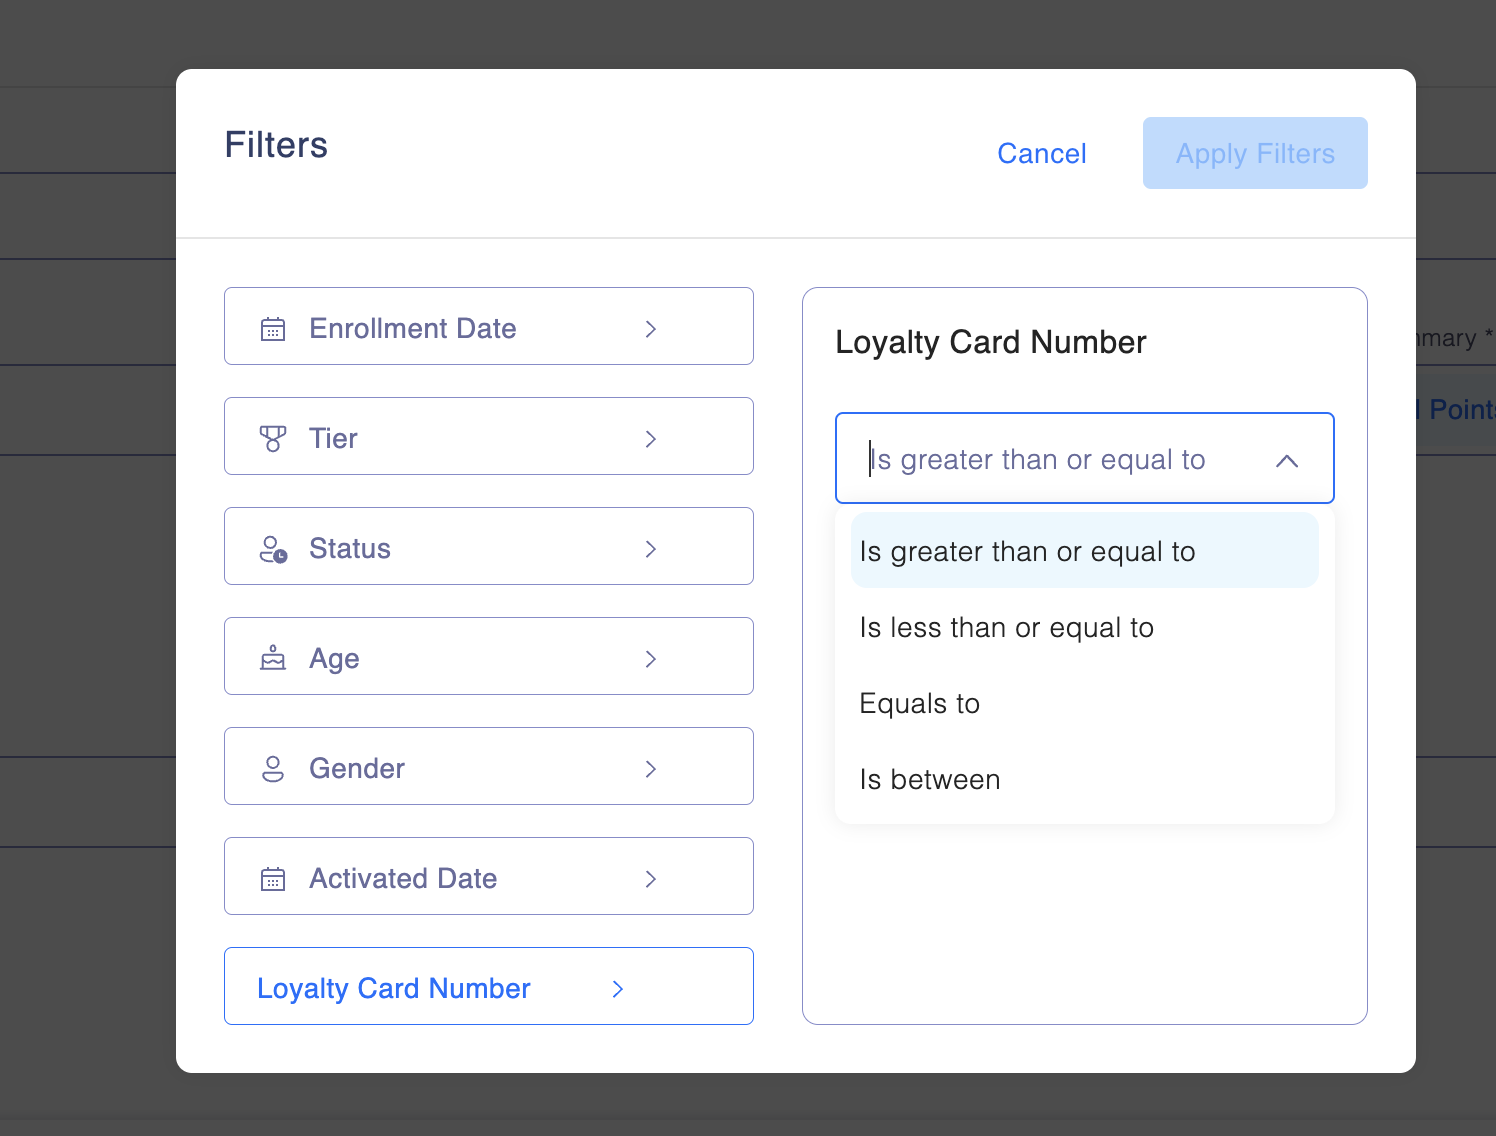
2.6.1 Available Filters
To refine your member report, the following filters are available:
- 2.6.1.1Enrollment Date: Filter by the date when the member joined the program.
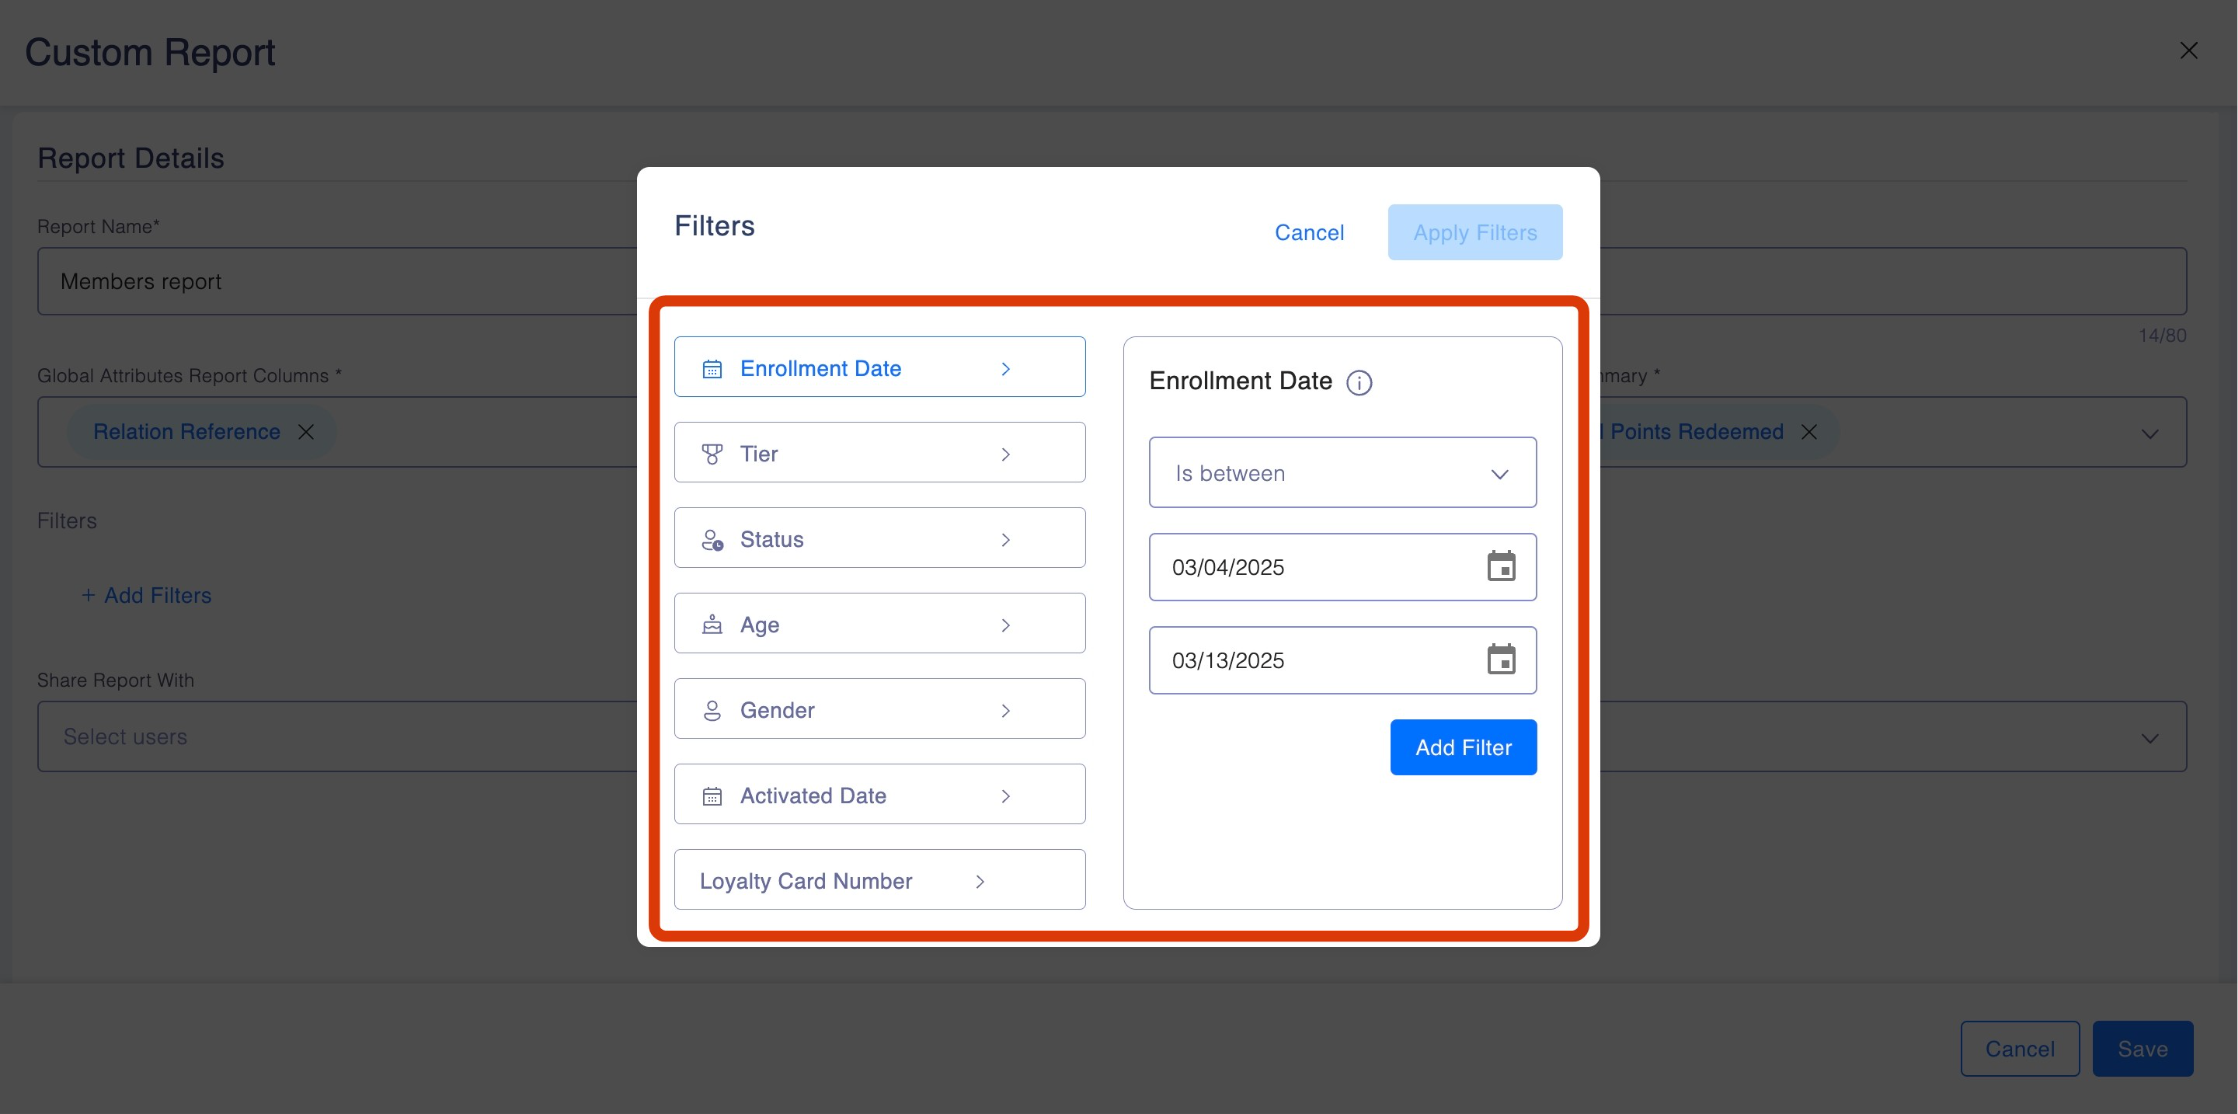
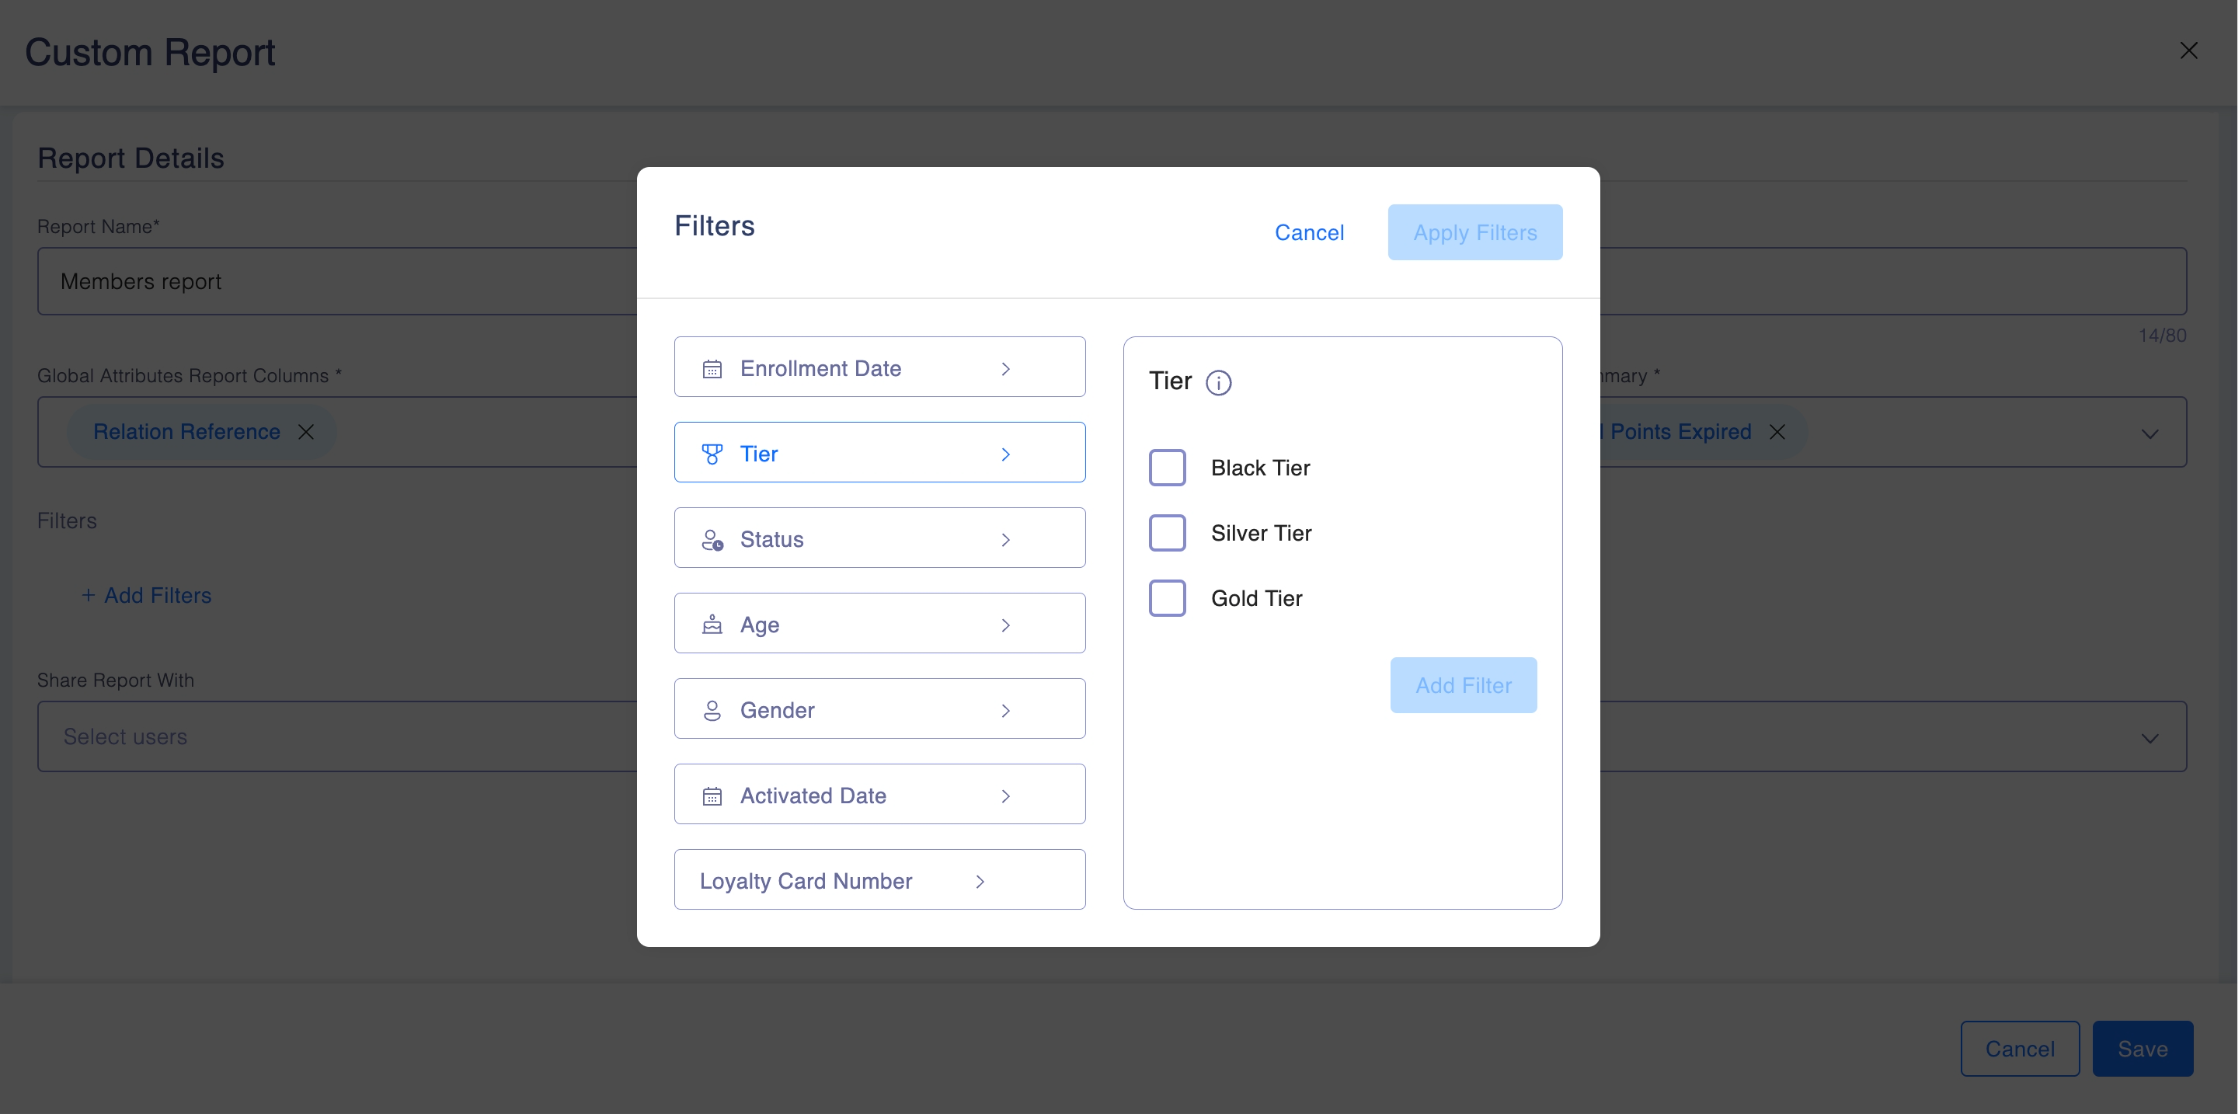
- 2.6.1.2Tier: Filter based on the member's current tier.
- 2.6.1.3Status: Filter members based on their status (active, inactive, etc.).
- 2.6.1.4Age: Filter members by their age.
- 2.6.1.5Gender: Filter based on the member's gender.

- 2.6.1.6Activated Date: Filter by the date when the member's account was activated.
- 2.6.1.7 Loyalty Card Number: Filter using the Loyalty Card number.
-
Available Report Summary Fields Available
You can add the following summary fields to get key statistics for the selected member group:
- Total Members: The total number of members in the report.
- Total Points Issued: The total number of points issued to the members in the report.
- Total Points Redeemed: The total number of points redeemed by the members.
- Total Points Expired: The total number of points that have expired for the members.
Step 3: Share the Report with: Choose the person you wish you to share the report with. Once done, click on Save.
Report Generation
Once you have selected the columns, filters, and summary fields:
-
Generate the Report:
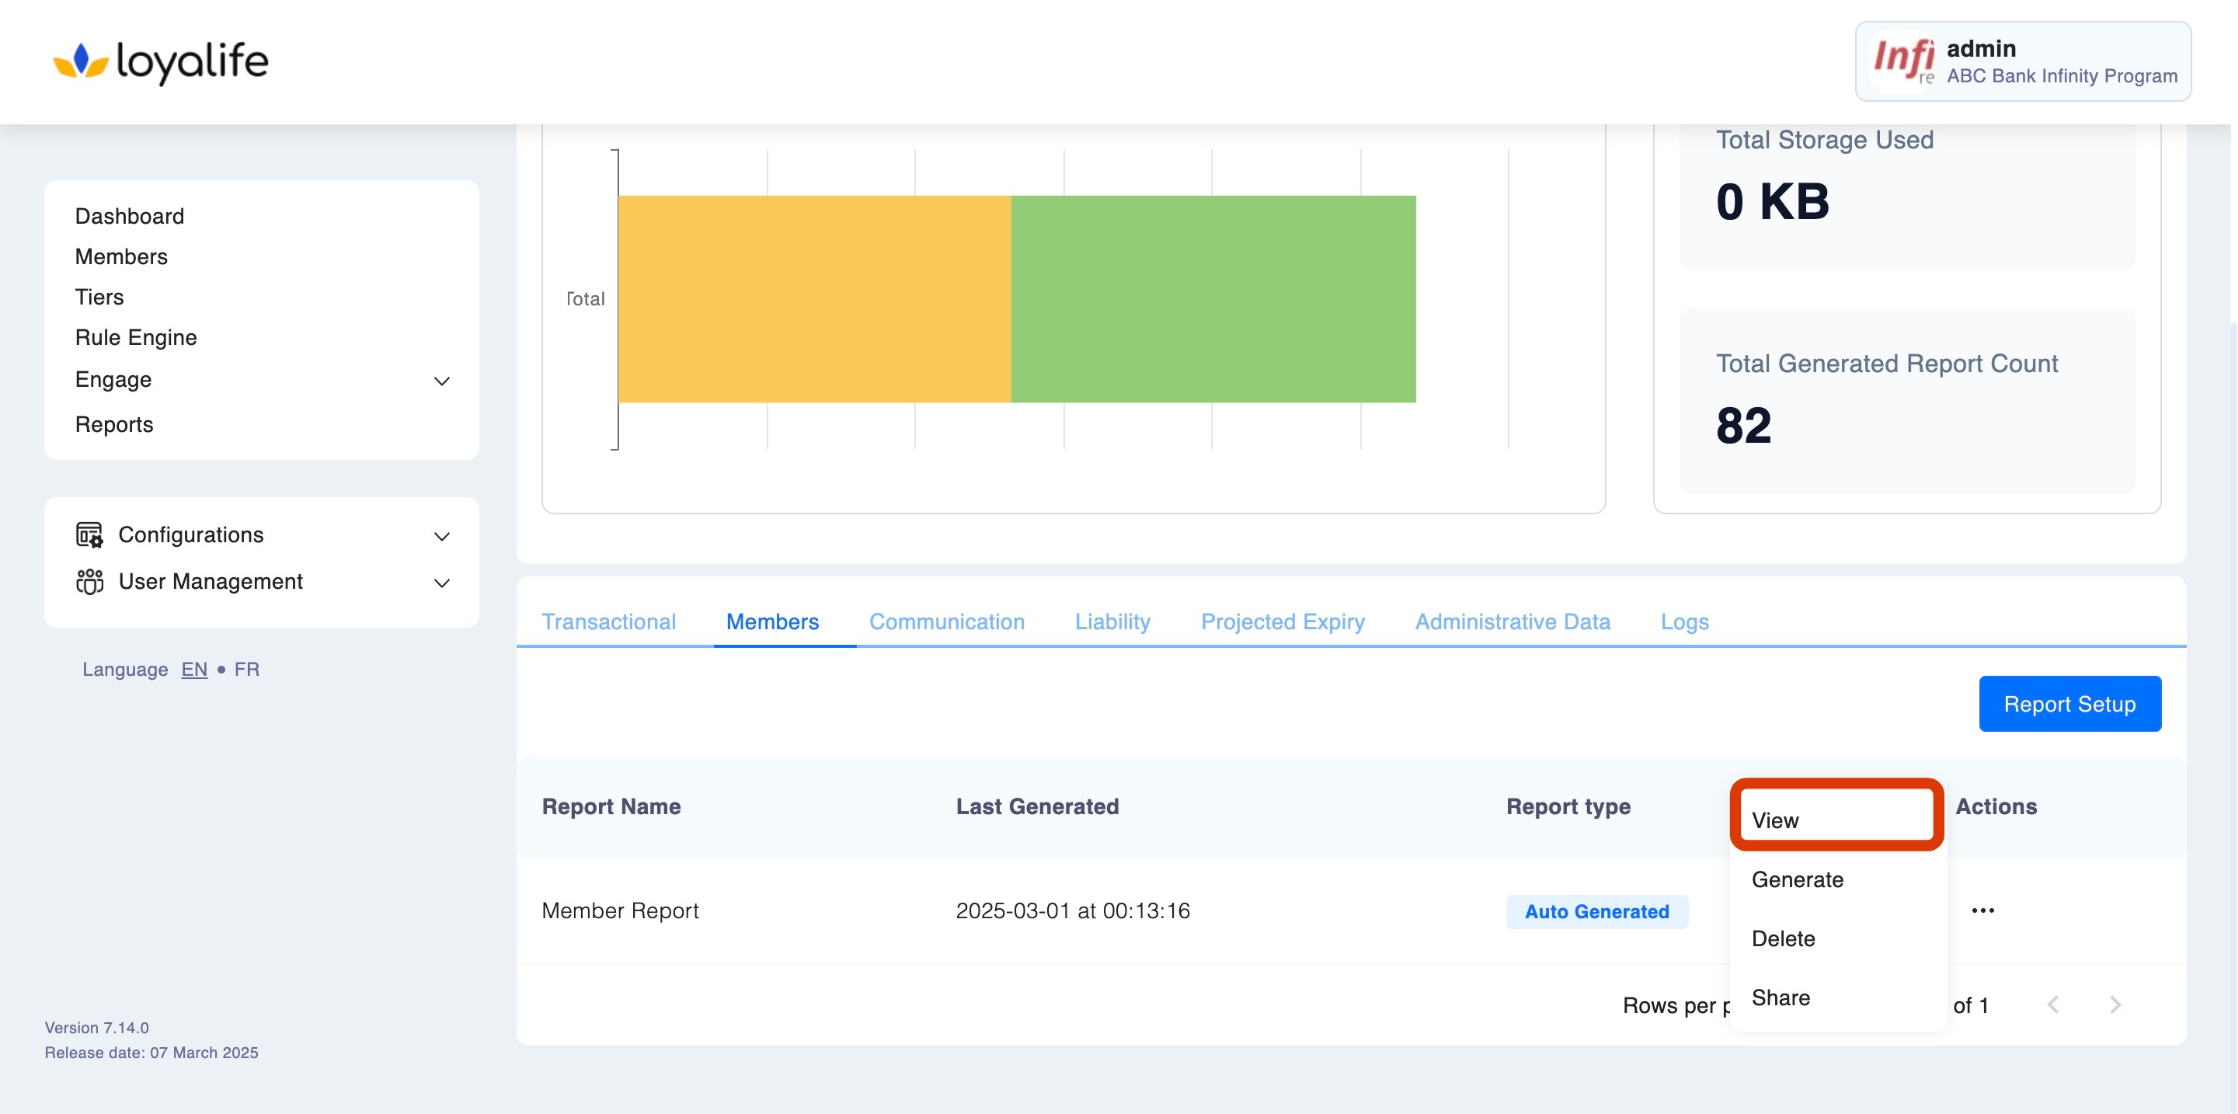
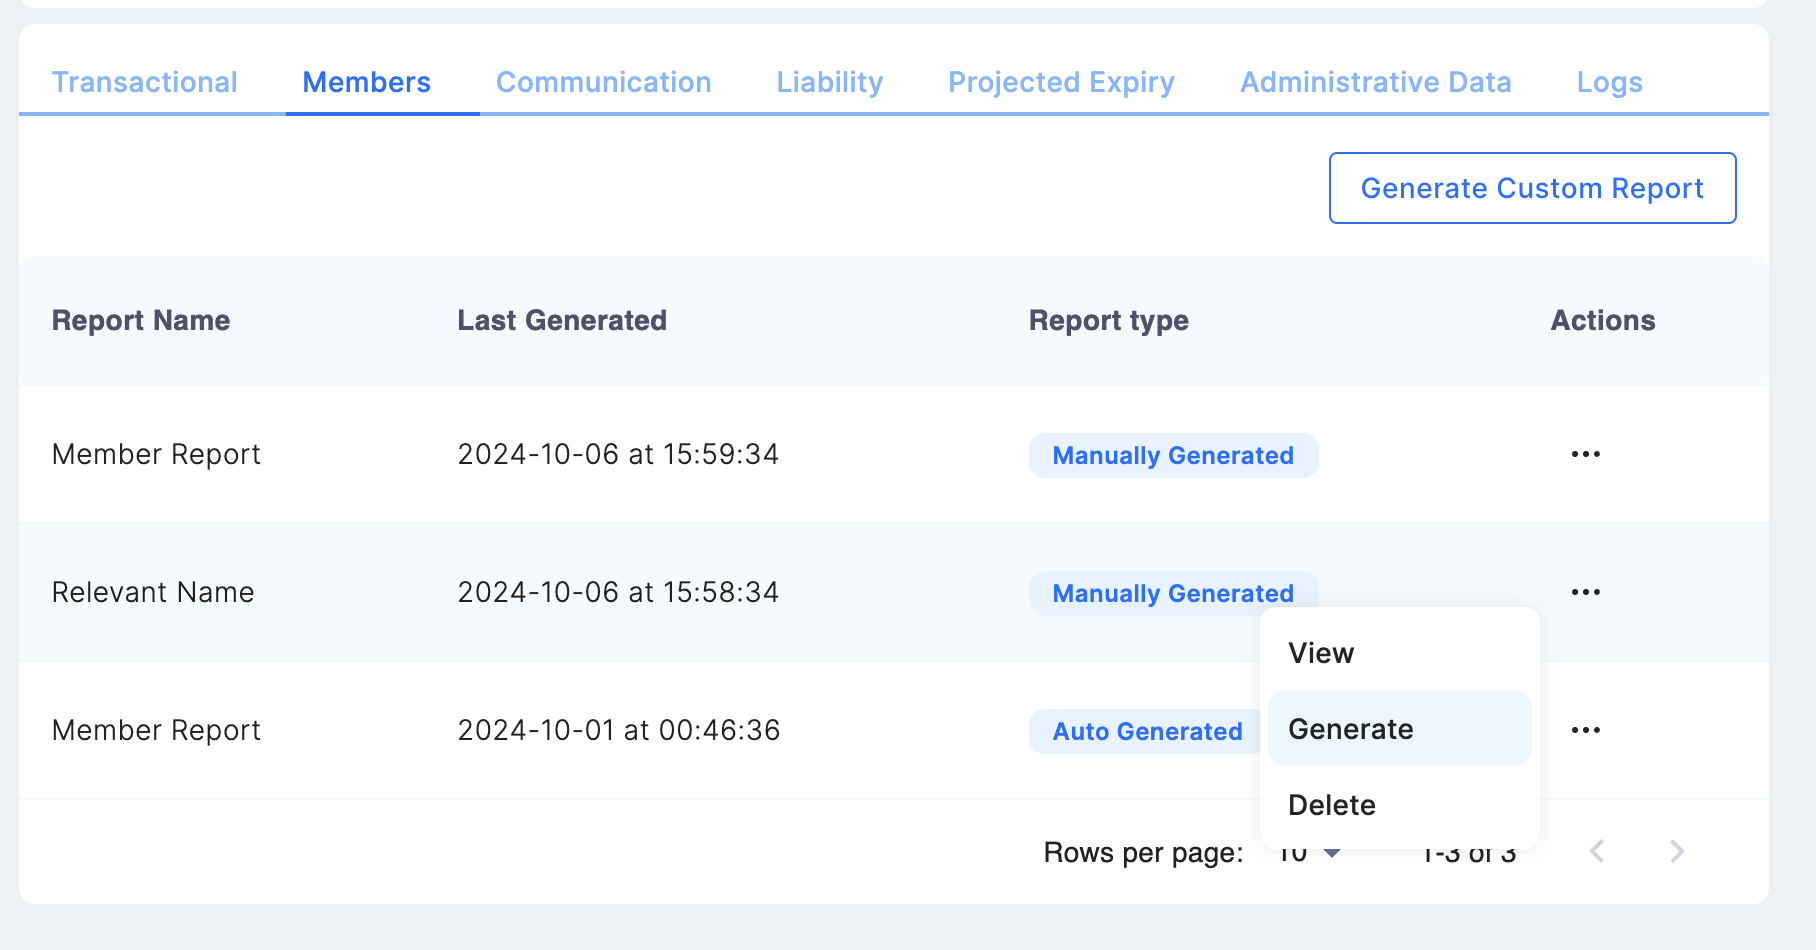
- Once saved, the report will be generated based on your selected criteria. You can access it under the Member Reports section. Click on the three dots and select "Generate".

-
Download the Report:
- After generating, you can download the report in available formats (e.g., CSV) for further analysis by entering the "View" mode and clicking "Download Report" button.

Accessing and Managing Member Reports
Once you have created a custom member report, you can access it as follows:
Select a Custom View:
- In the Member tab, you will see a list of your custom reports.
- Locate the report you want to access and click the three dots at the right and then click "View".
- The report will be generated based on the settings and filters you previously configured.
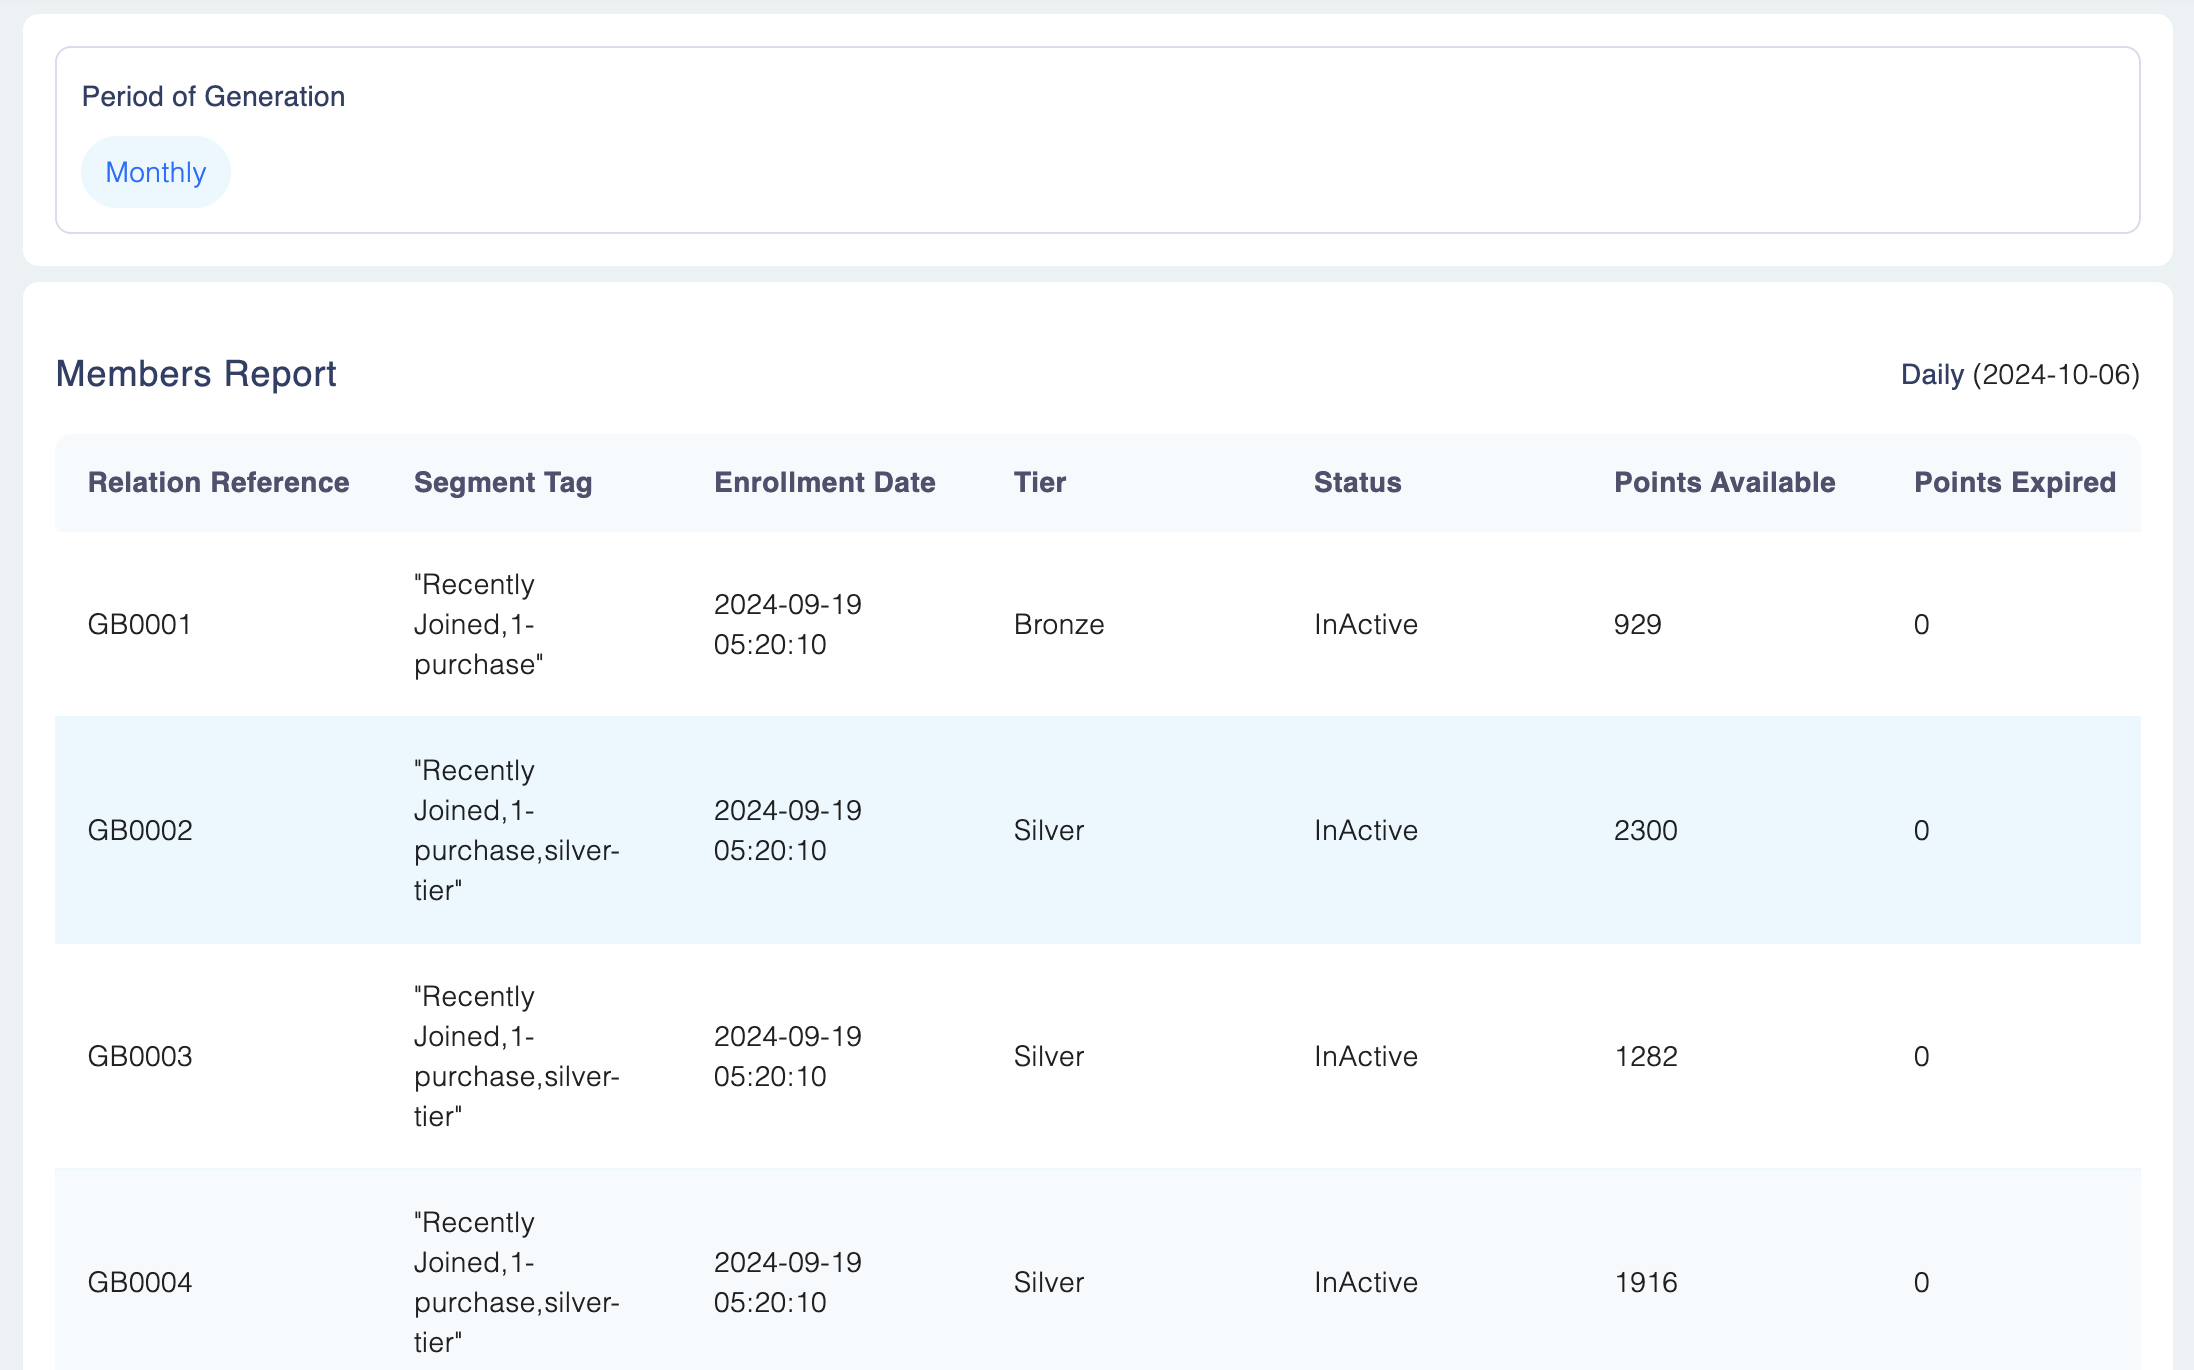
Viewing Report Data:
- Once the report is generated, you can view the member data directly within the platform, including the columns you have selected during setup.
Deleting a Custom Member Report
If you no longer need a particular custom report, follow these steps to delete it:
Select the Report to Delete:
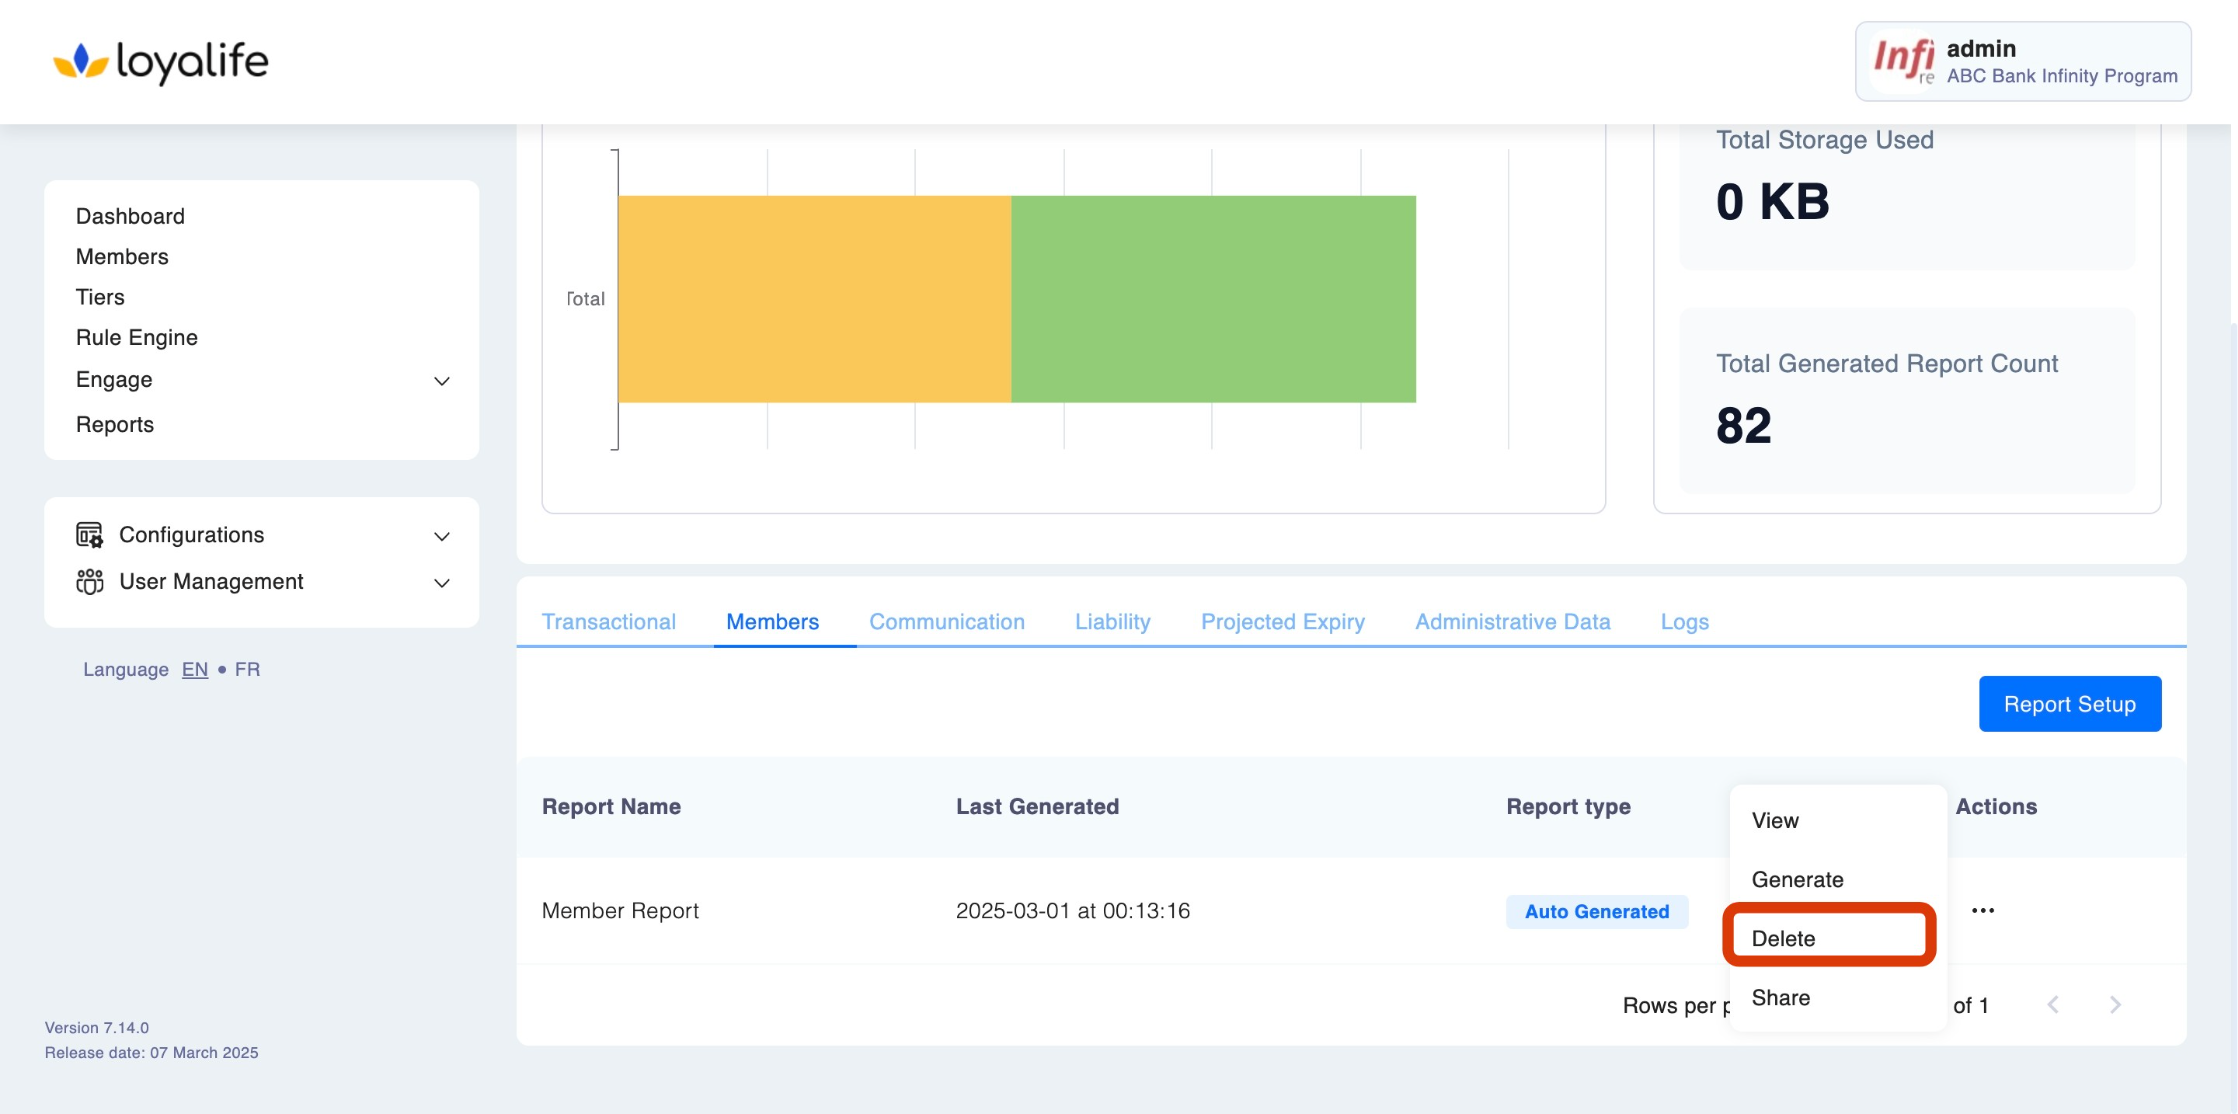
- Locate the custom report you wish to remove.
- Click the three dots at the right and click Delete next to the report.
Confirm Deletion:
- A confirmation prompt will appear. Confirm that you want to delete the report.
- The report will be permanently deleted and will no longer appear in the list.

Generating a Manual Member Report for a Specific Time Period
To manually generate a member report for a custom time period:
Navigate to Reports:
- Go to Reports > Member tab, select the auto-generated report view and click generate
Select the Date Range:
-
Choose the Start Date and End Date for which you want to generate the report.
-
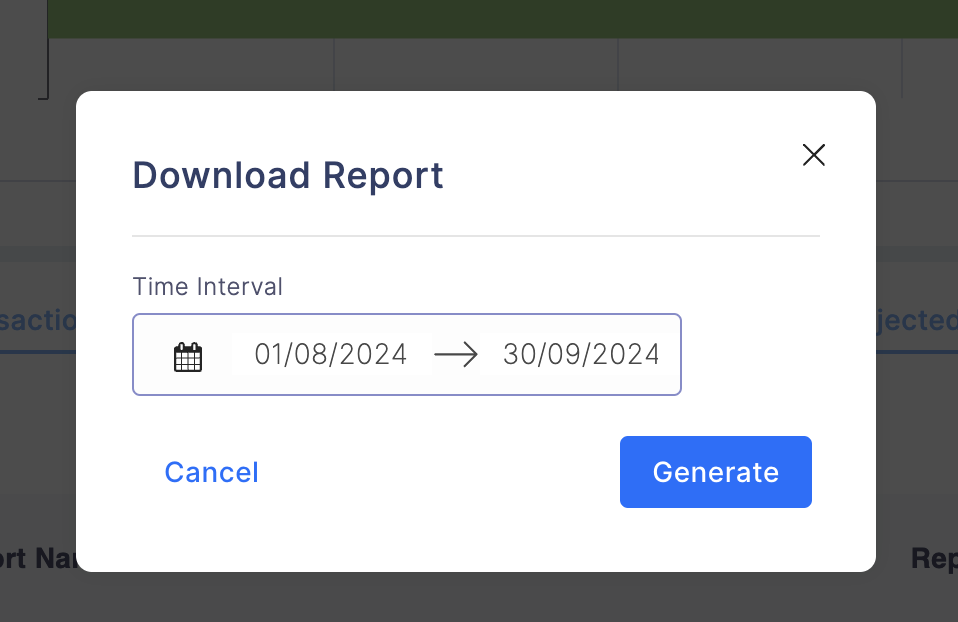
Generate Report:
- Once the date range is set, click on Generate Report.
- The system will compile member data based on your selected dates, providing a report of all members’ activities within that time frame.
Download the Report:
- After the report is generated, you can view it on the platform or download it in a CSV or other available formats.
Sharing Reports Data
If you need to share a particular members report, follow these steps to share it:
Select the View to Share:
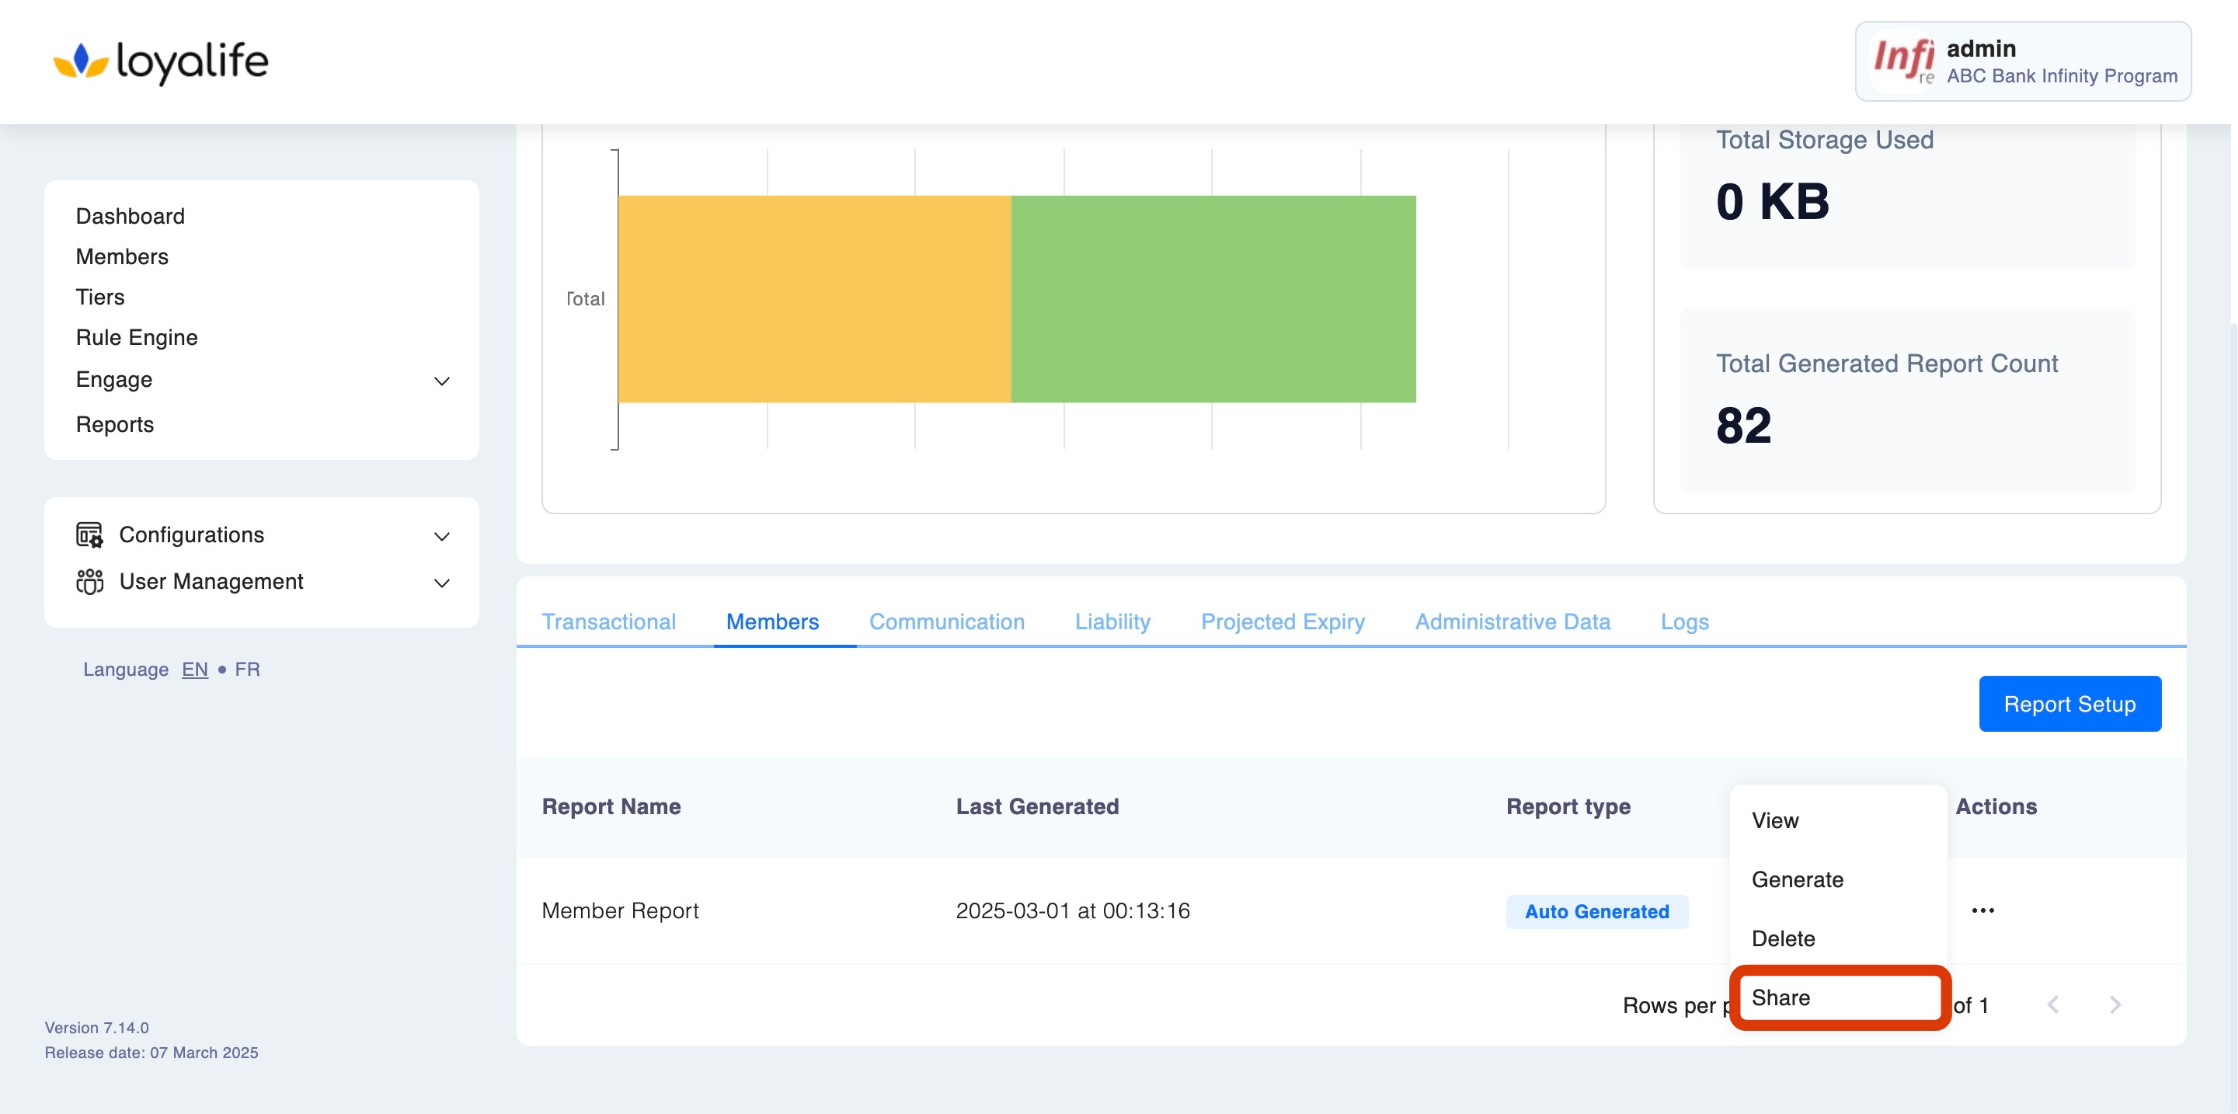
- Find the custom view you want to share.
- Click the three-dot menu on the right side of the view and select Share.
- In the dropdown menu, select the user you want to share the view with.
- Click Share to grant access.
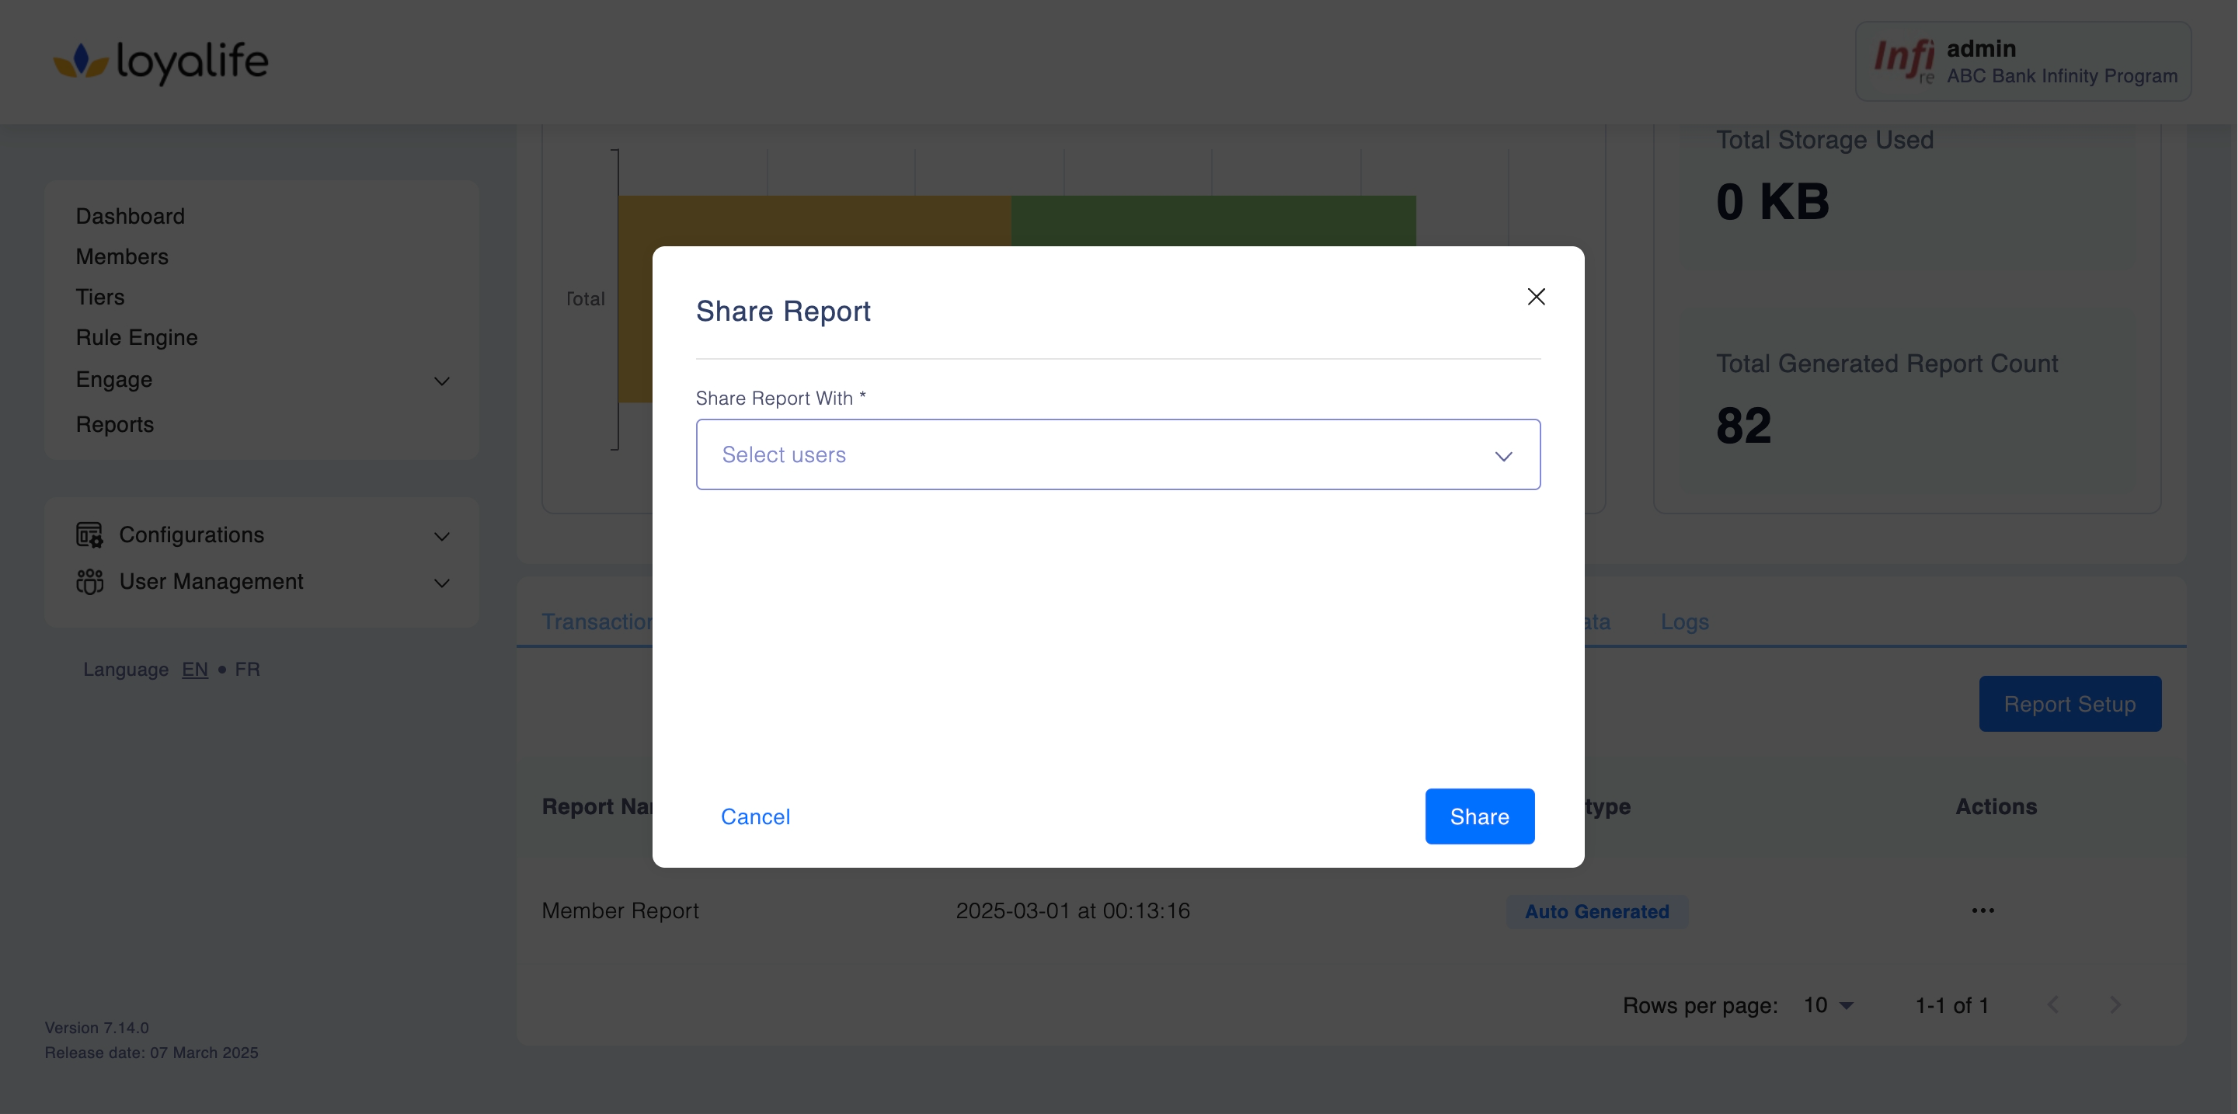
Note: Sharing with a specific user is only available if their access settings allow it.
Updated 2 months ago