
Member Communication
Learn how to access the member communications details.
Overview
The Communication Tab in Loyalife provides a detailed log of all communications sent to an individual member via various channels such as SMS and Email. This tab is essential for tracking campaign-related messages, transactional notifications, and account-related communications.
Admins can view or resend communications from this interface. Sensitive information such as OTPs, password reset links, and voucher details is stored in an encrypted format and is not directly visible for security reasons.
Accessing the Communication Tab
Step 1: Navigate to the Member Profile:
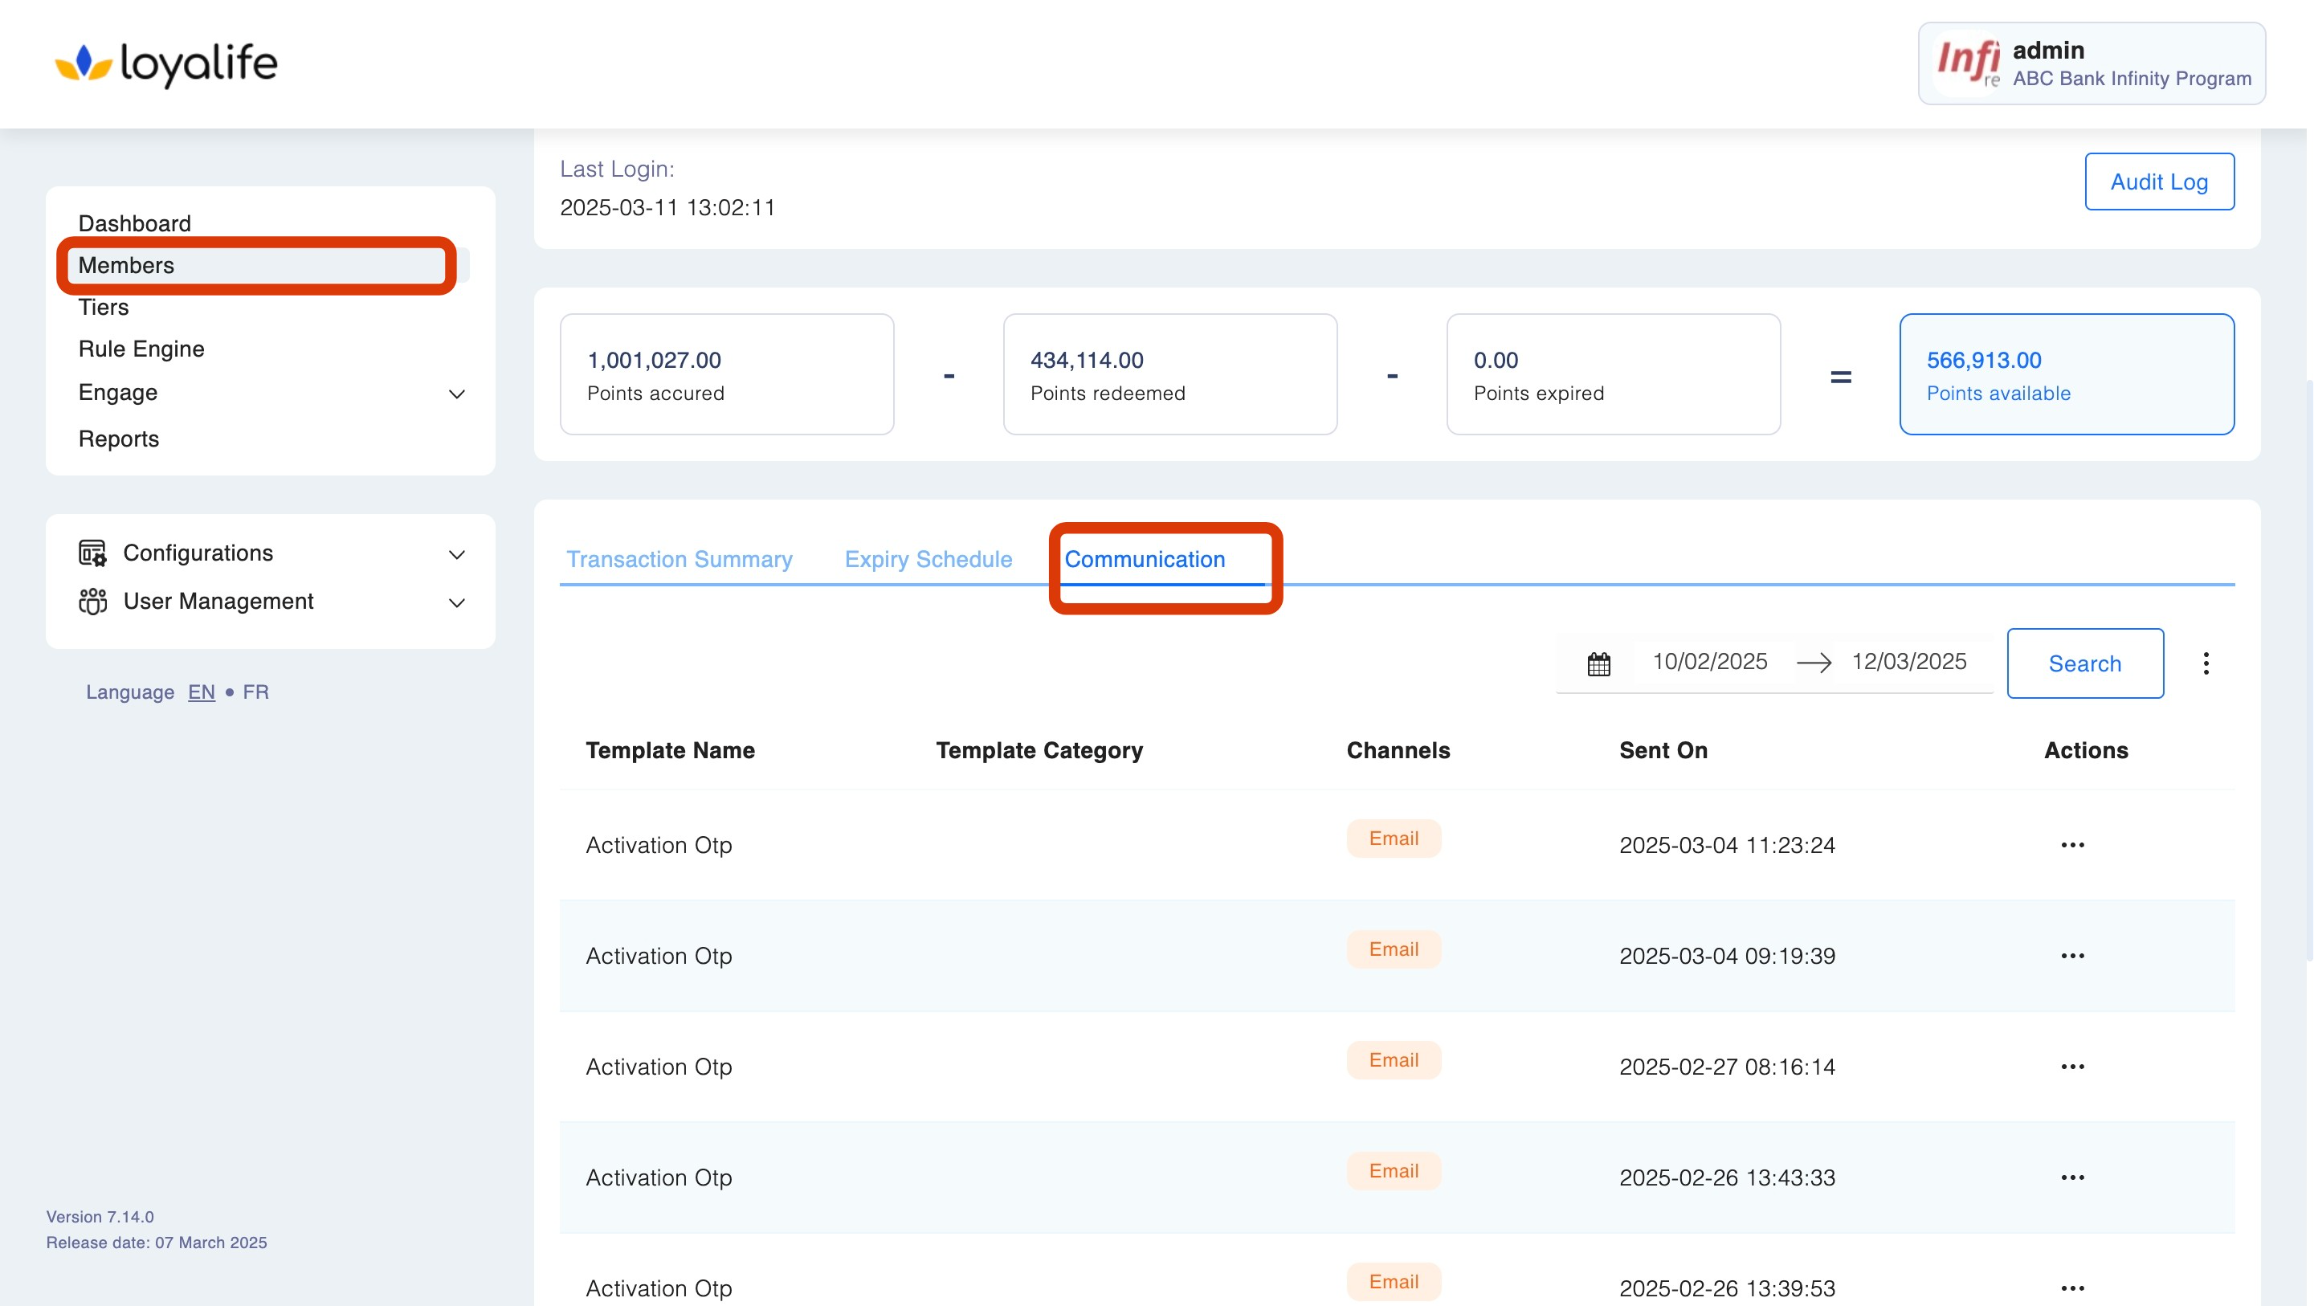
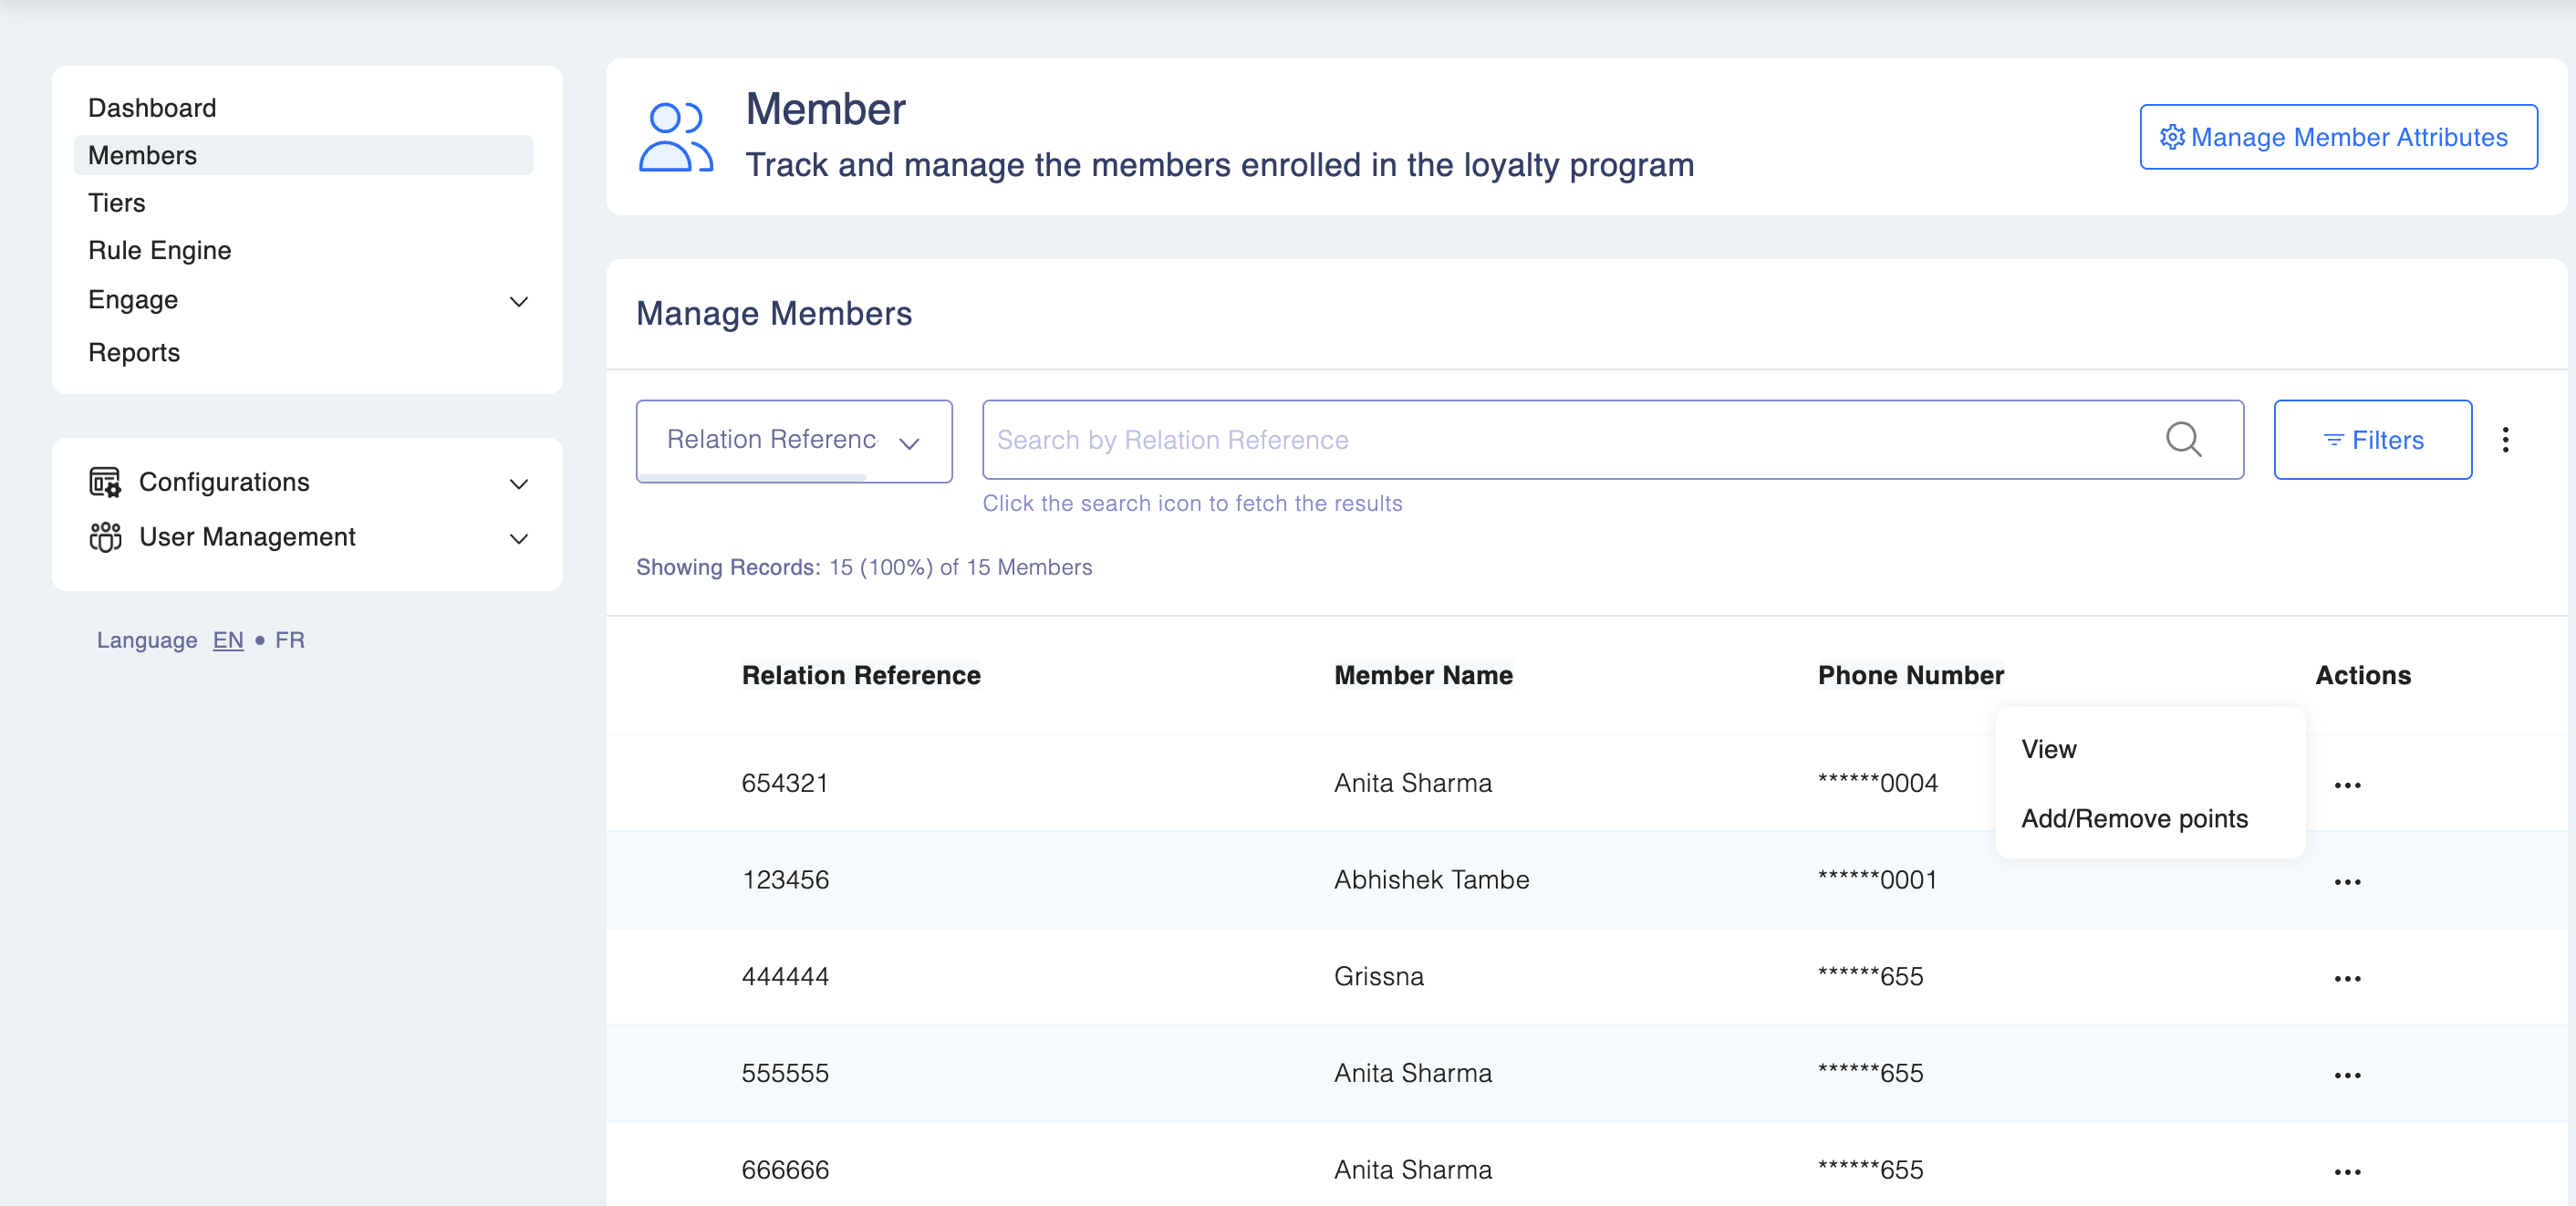
- From the main dashboard, go to Members in the left-hand menu.
- Use the search bar to find the member by Relation Reference, Name, Phone Number, or Email.
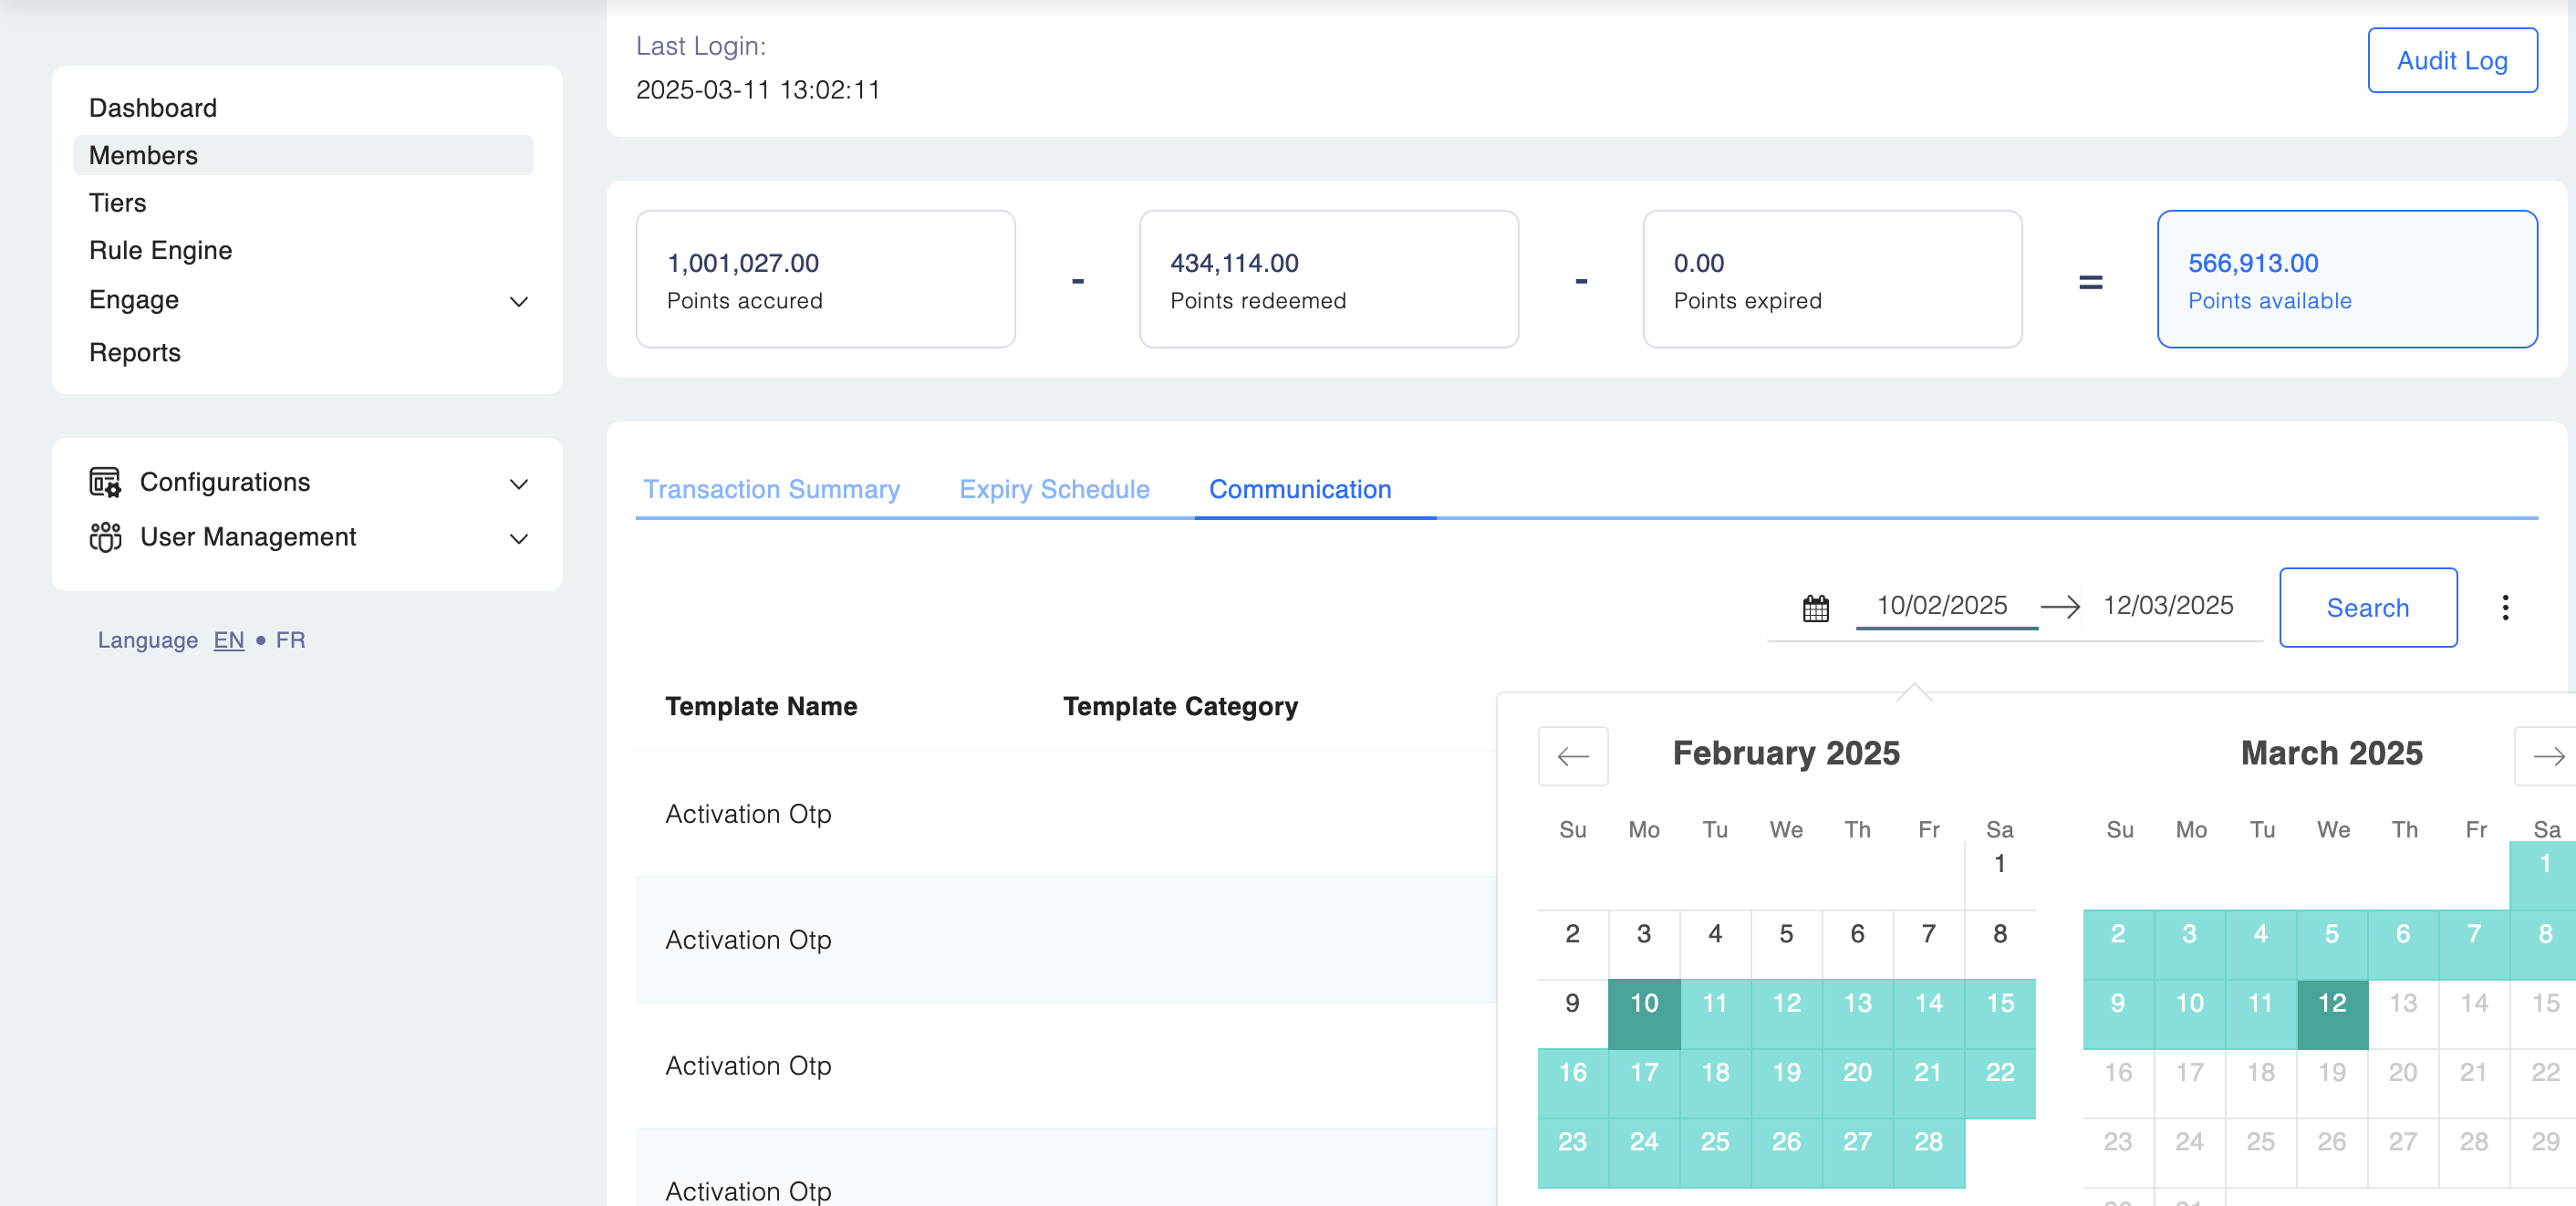
Step 2: Go to the Communication Tab:
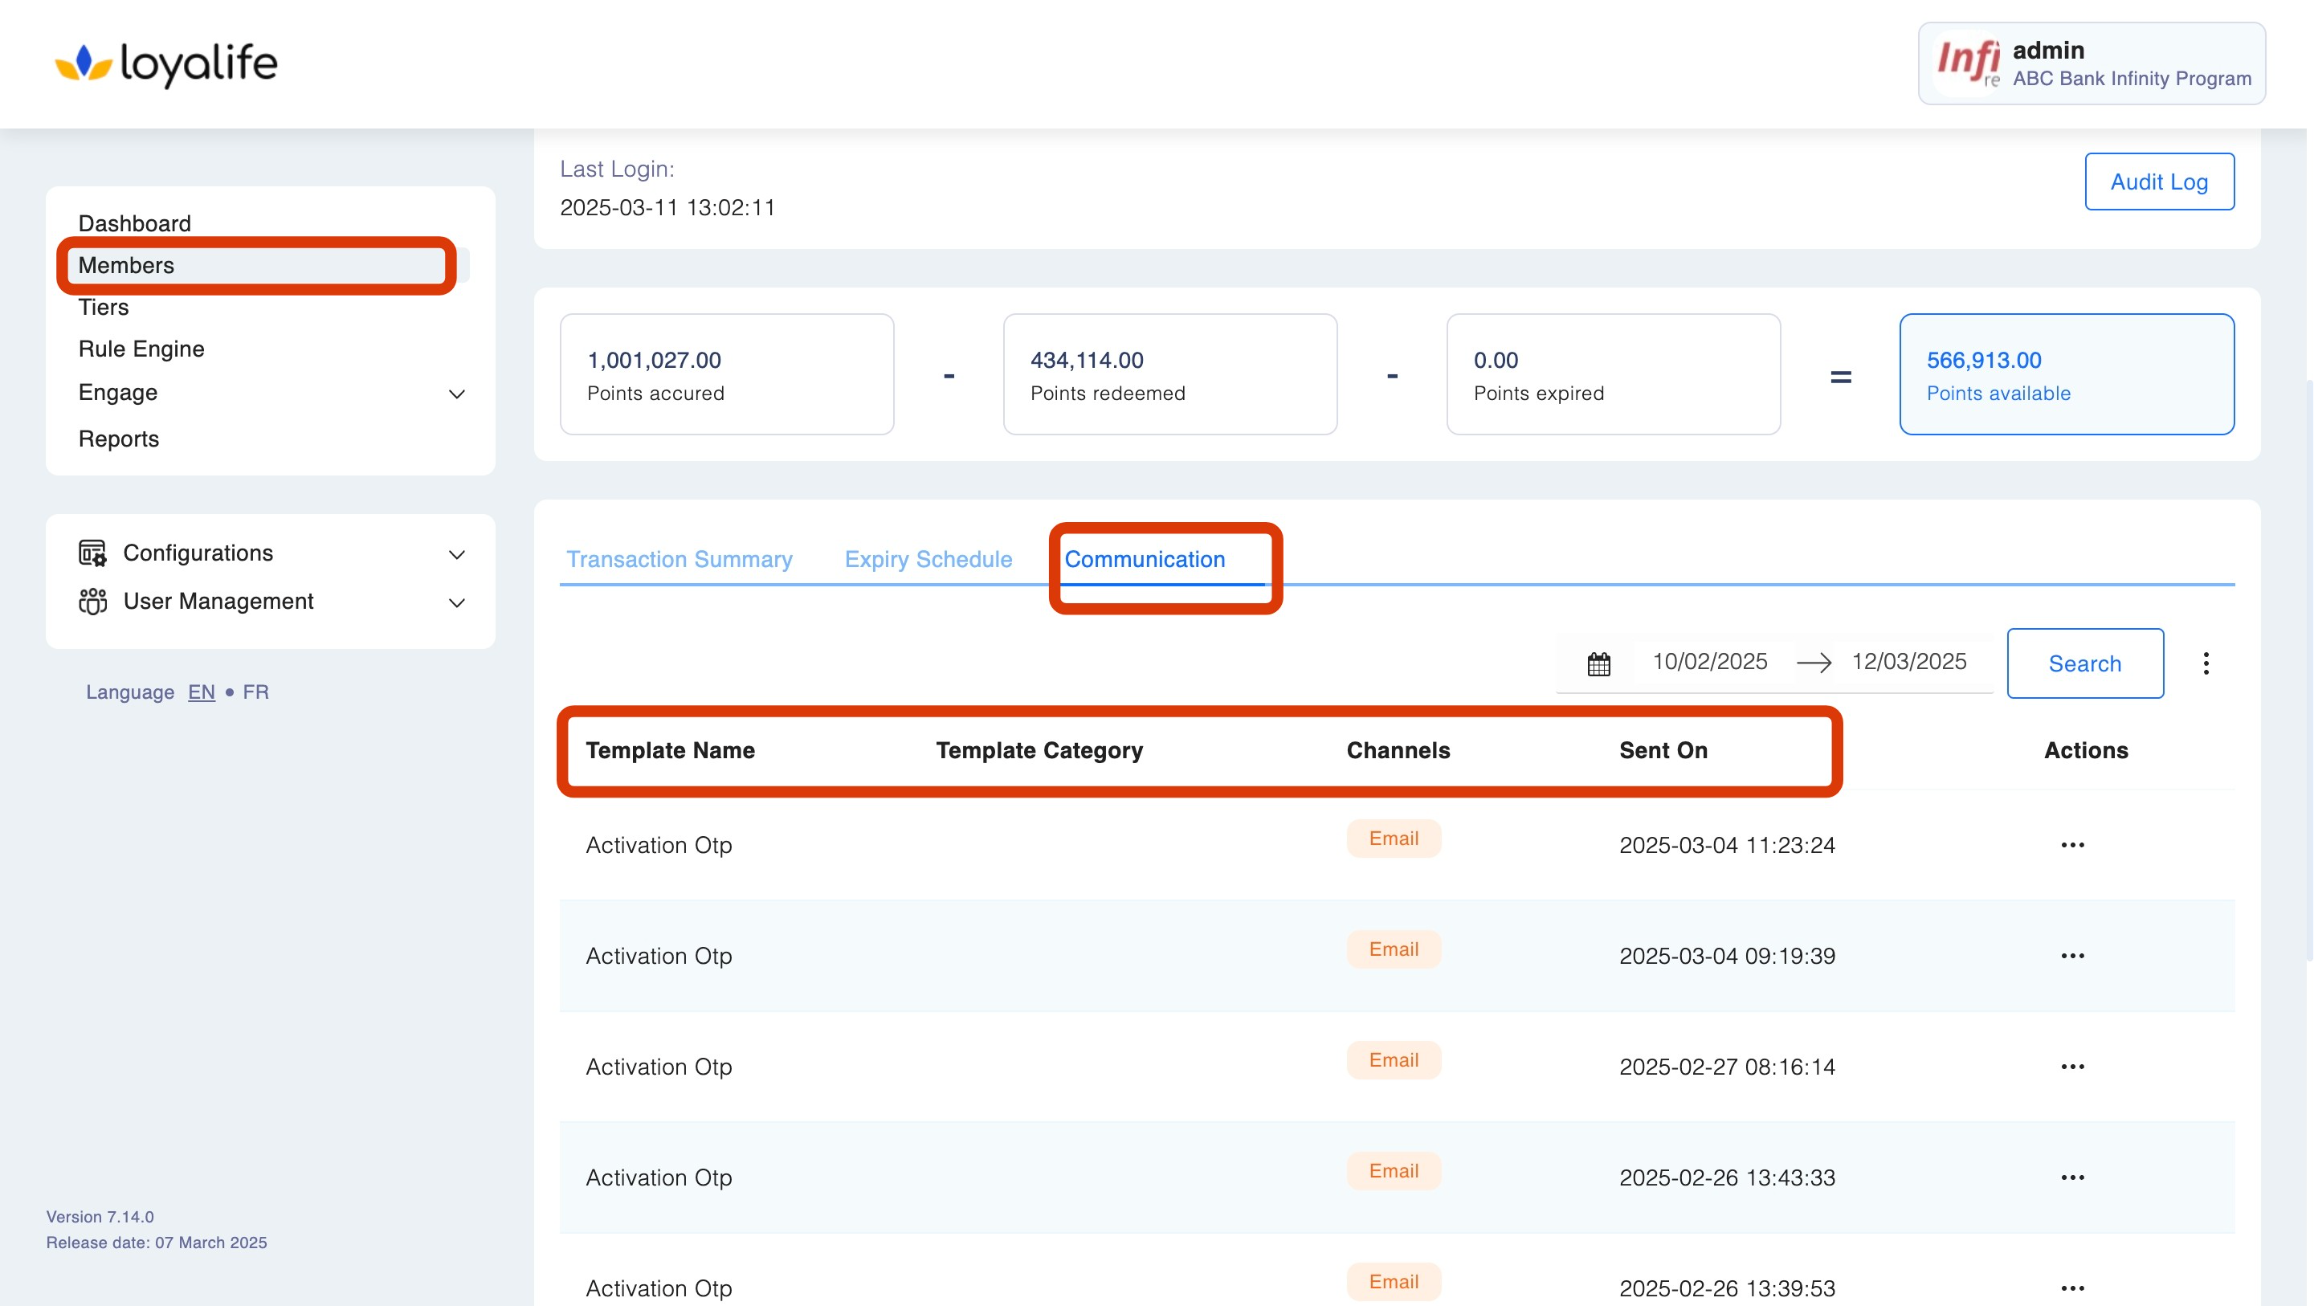
- In the member profile, navigate to the Communication tab as shown in the screenshot.
- This tab displays a log of all communications sent to the member, including details like the Template Name, Template Category, Channels used (SMS/Email), the date the message was Sent On, and Actions available for each communication.
Communication Details
-
Template Name:
The name of the message template used for the communication, such as Bonus Points Campaign, Redemption, or Welcome Communication. -
Template Category:
The category of the template, which helps to identify the purpose of the communication. Categories can include:- Campaigns: Messages related to promotional activities such as bonus points or exclusive offers.
- Default: Standard notifications such as redemption confirmation or welcome messages.
-
Channels:
The communication medium used, such as SMS or Email. Multiple channels may be used for a single communication. -
Sent On:
The date and time when the message was sent to the member.
Actions in the Communication Tab
Step 1: For each communication log entry, the following actions are available via the Actions button (three-dot icon):
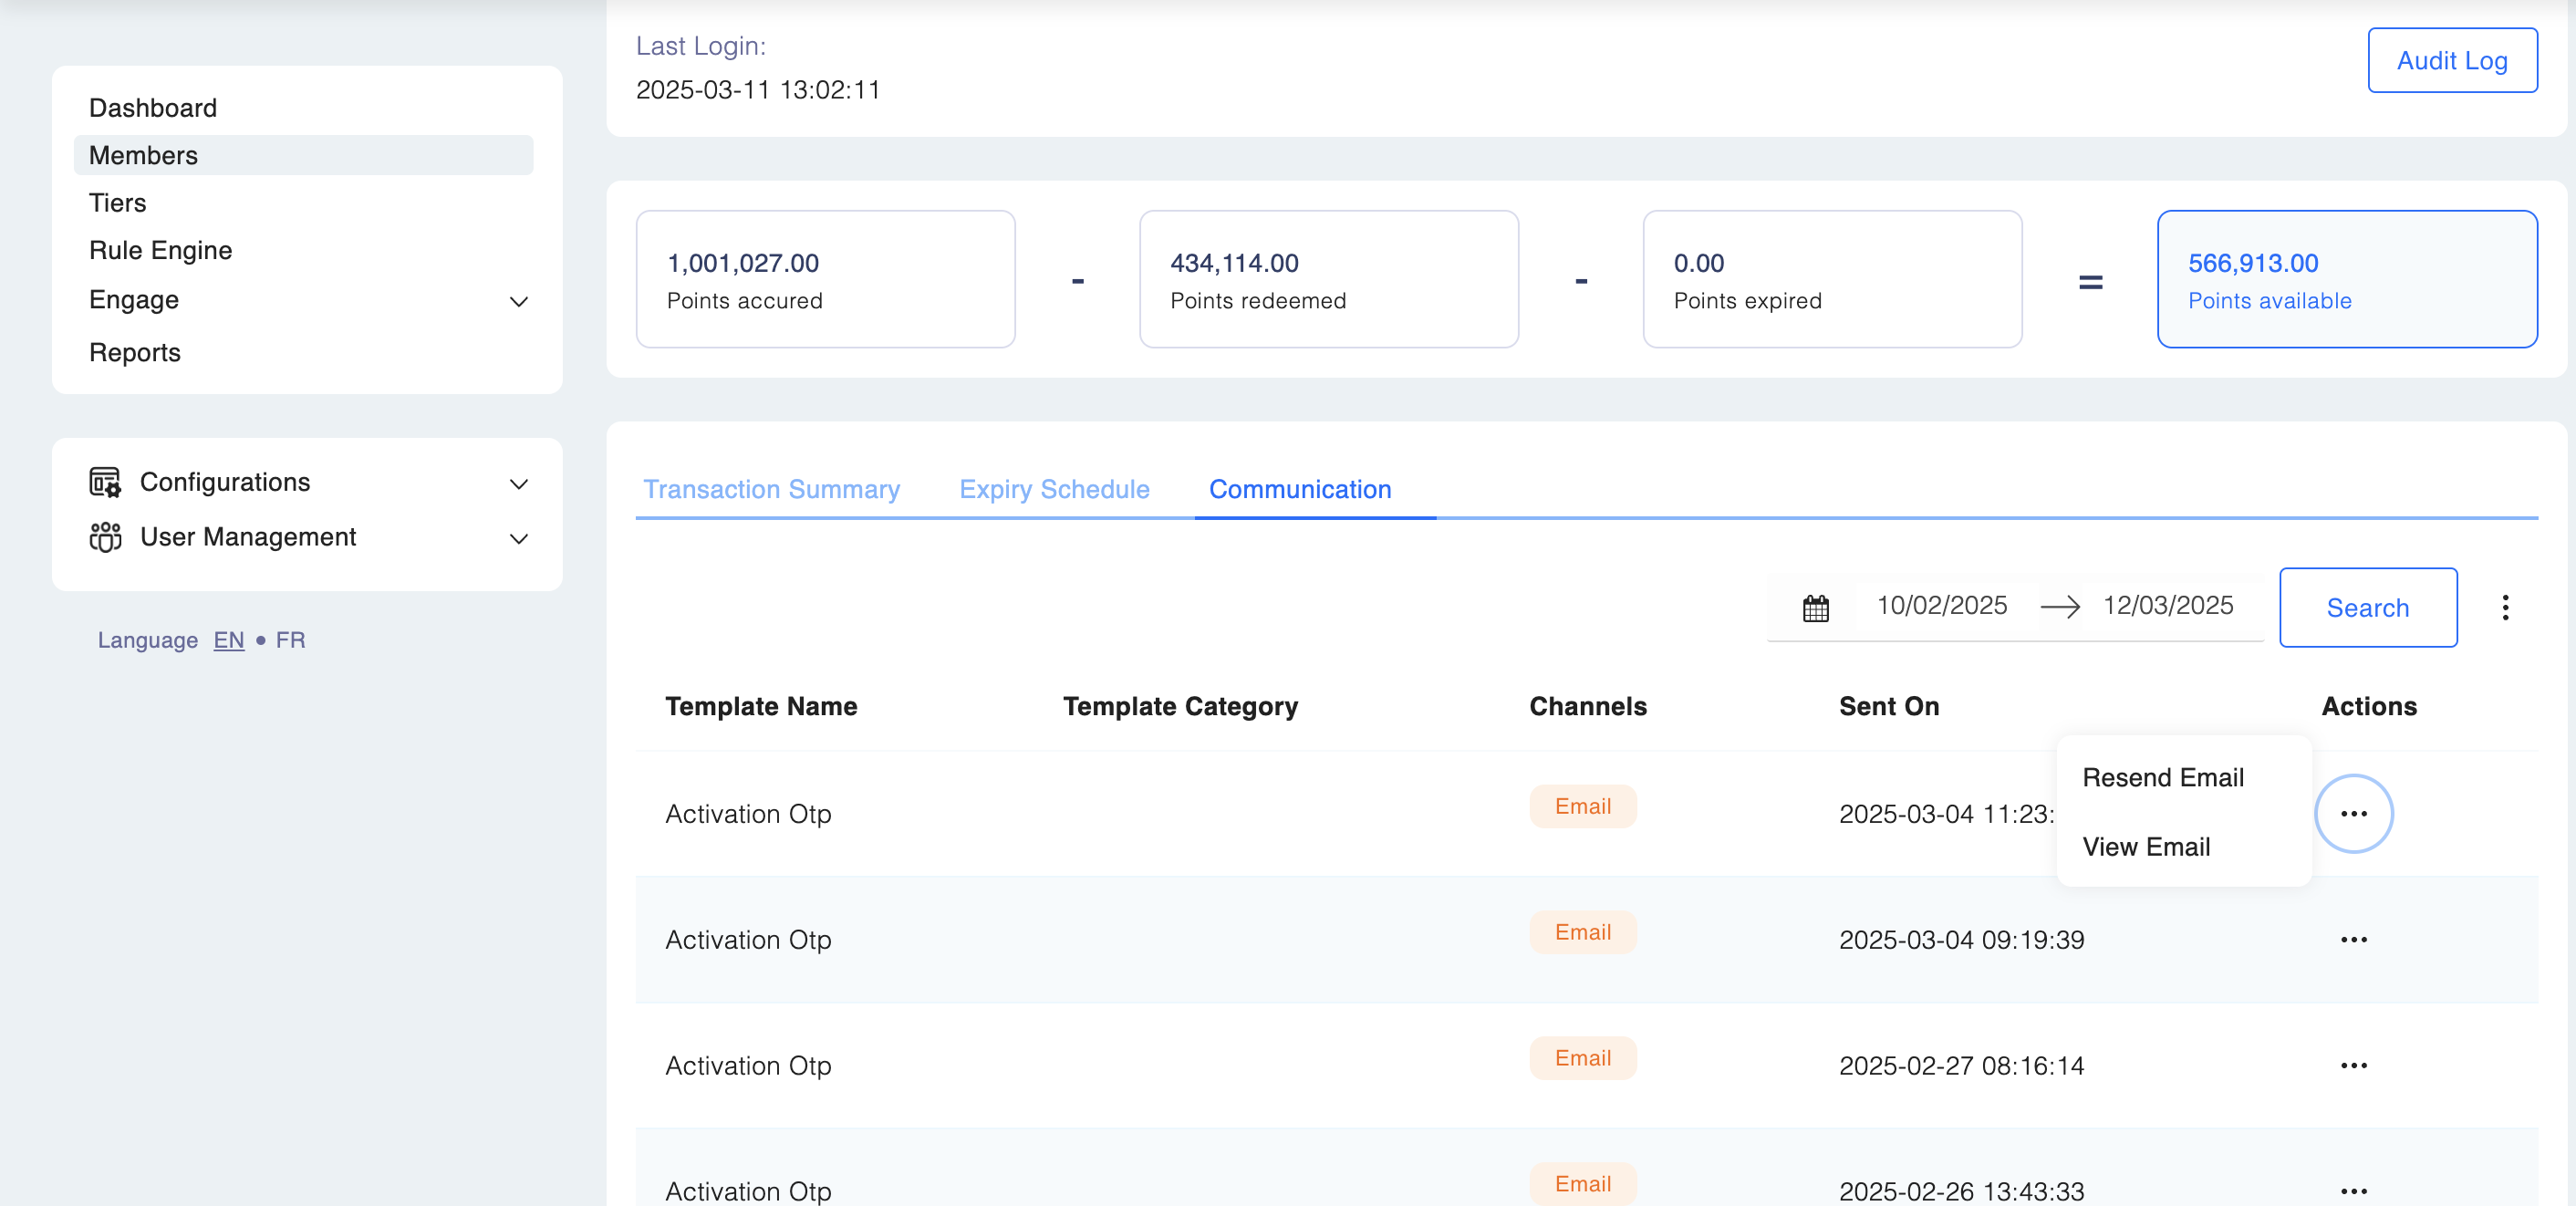
Let's know more about both the options below:
1.1 View Communication:
- Click on View Email or SMS: You can view a summary of the communication sent to the member. This includes non-sensitive information such as the template name, category, and status of the message.
-
Note: Sensitive information such as OTPs, password reset links, or voucher details will not be visible in the view, as this data is stored in an encrypted format to maintain security and privacy.
1.2 Resend Communication:
-
You can resend the communication to the member using the same template and channel (SMS/Email).
-
The resend functionality is useful in cases where a member did not receive the message due to technical issues or if they request the information again.
-
To resend, click Resend from the Actions menu. The system will prompt for confirmation, and upon confirmation, the communication will be re-sent to the member.
Sensitive Information and Security
- Encrypted Data:
Communications involving sensitive information such as:- OTP (One-Time Passwords)
- Password Reset Links
- Giift Voucher Details
These sensitive pieces of information are stored in an encrypted format and are not visible when viewing the communication logs. This ensures member privacy and data security, protecting sensitive details from unauthorized access.
Step 2: You can also adjust the time-period by clicking the calendar icon and adding the required dates.
Step 3: You can export data for review, sharing, or audit purposes.
- Steps to Export:
- Use filters to narrow the Expiry Schedule based on Date, Points Range, Tiers, or other member-specific criteria.
- Click on the three-dot menu at the top-right corner of the Expiry Schedule table.
- Select Export Entire Table to download the complete expiry data, or Export Filtered Table to download the filtered results.
- 📂 Where to Access the Report After Export?
Once the export is completed, reports will be available for download under:- Reports Module → Communication Tab
- Scroll to find the required report (it will show the date and time of export).
- Click the three dots (ellipsis menu) next to the relevant report.
- Select Download or take further actions as per your workflow.
Updated 2 months ago