
Transaction Report
Learn all about Transaction Reports on your Loyalife Platform.
Purpose of Transaction Report
Transaction reports are designed to track all transactions related to loyalty programs, focusing on points accruals, redemptions, and other kinds of transactions. These reports are vital for monitoring transactional activities and the dynamics of loyalty points within a banking environment.
Creating a Custom Transaction View
To create a custom view that meets your specific business needs:
-
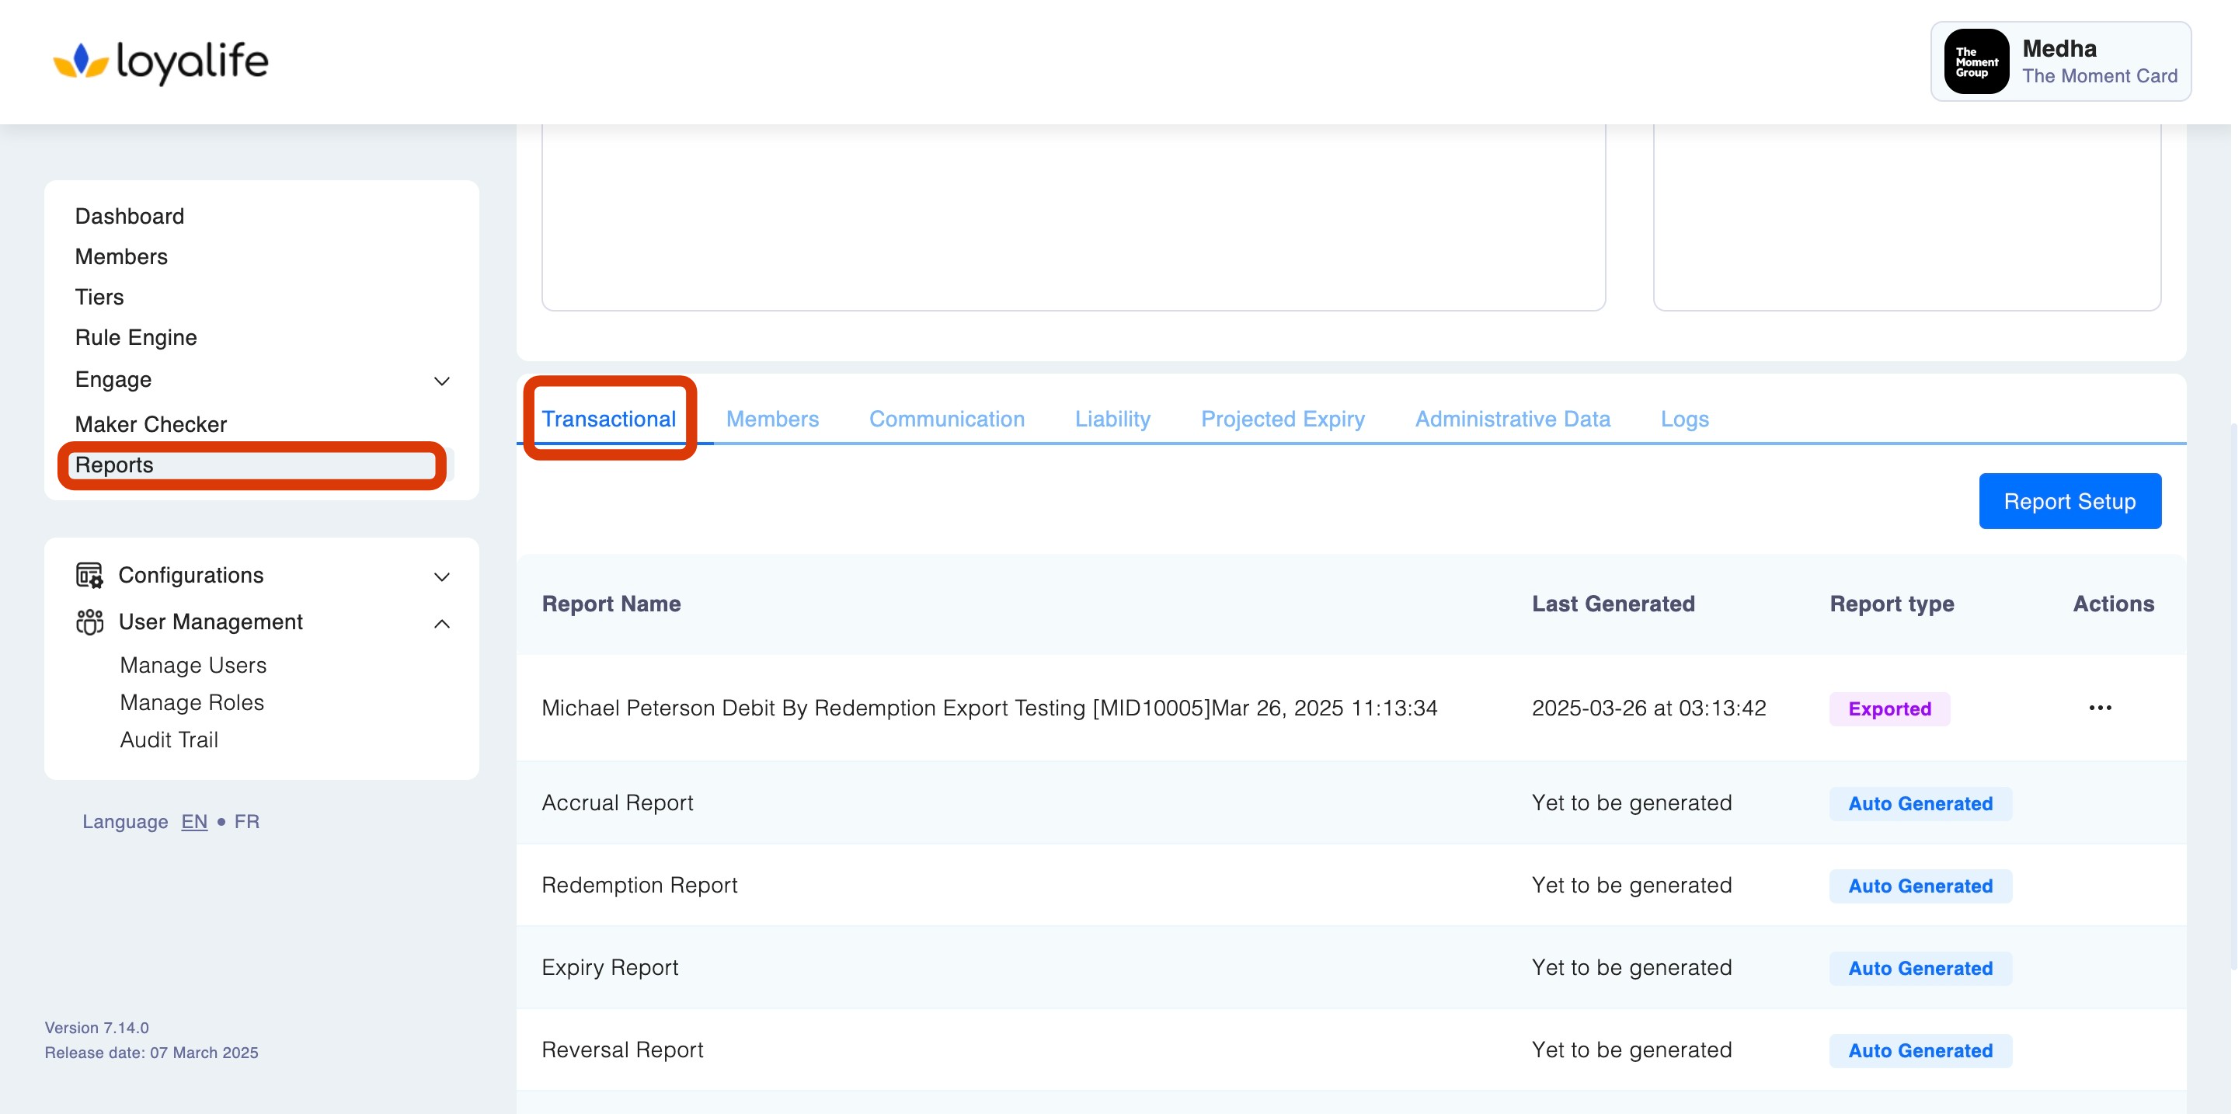
Access the Feature:
- Navigate to Reports > Transaction tab.
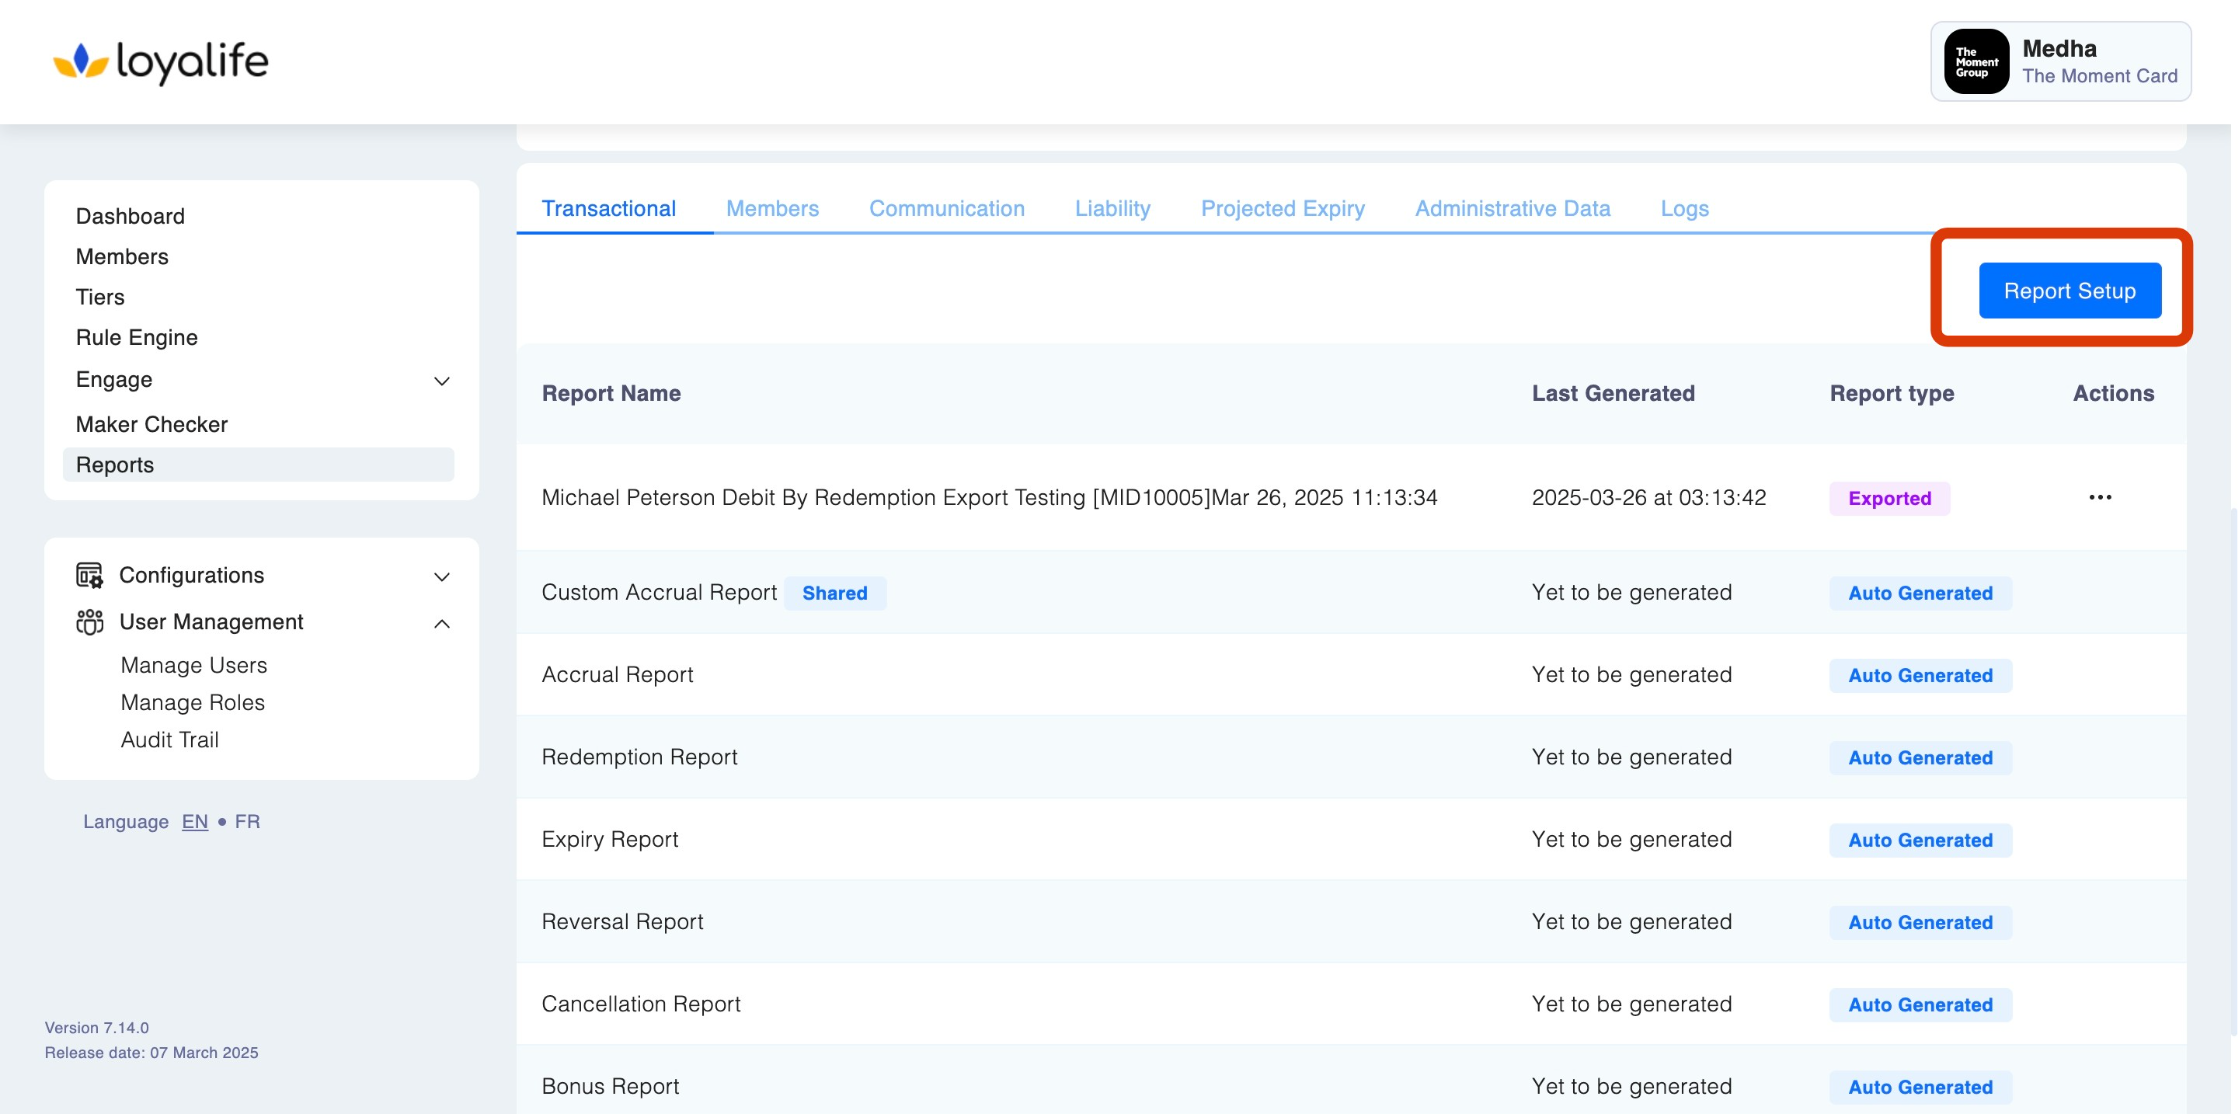
- Report Set Up:
-
Click Report Set Up and provide the following details:
- Report Name
- Assign a clear and identifiable name to the report, such as "Accrual Report" or "Recent Member Transactions".
- This helps users quickly locate and retrieve reports from the system.
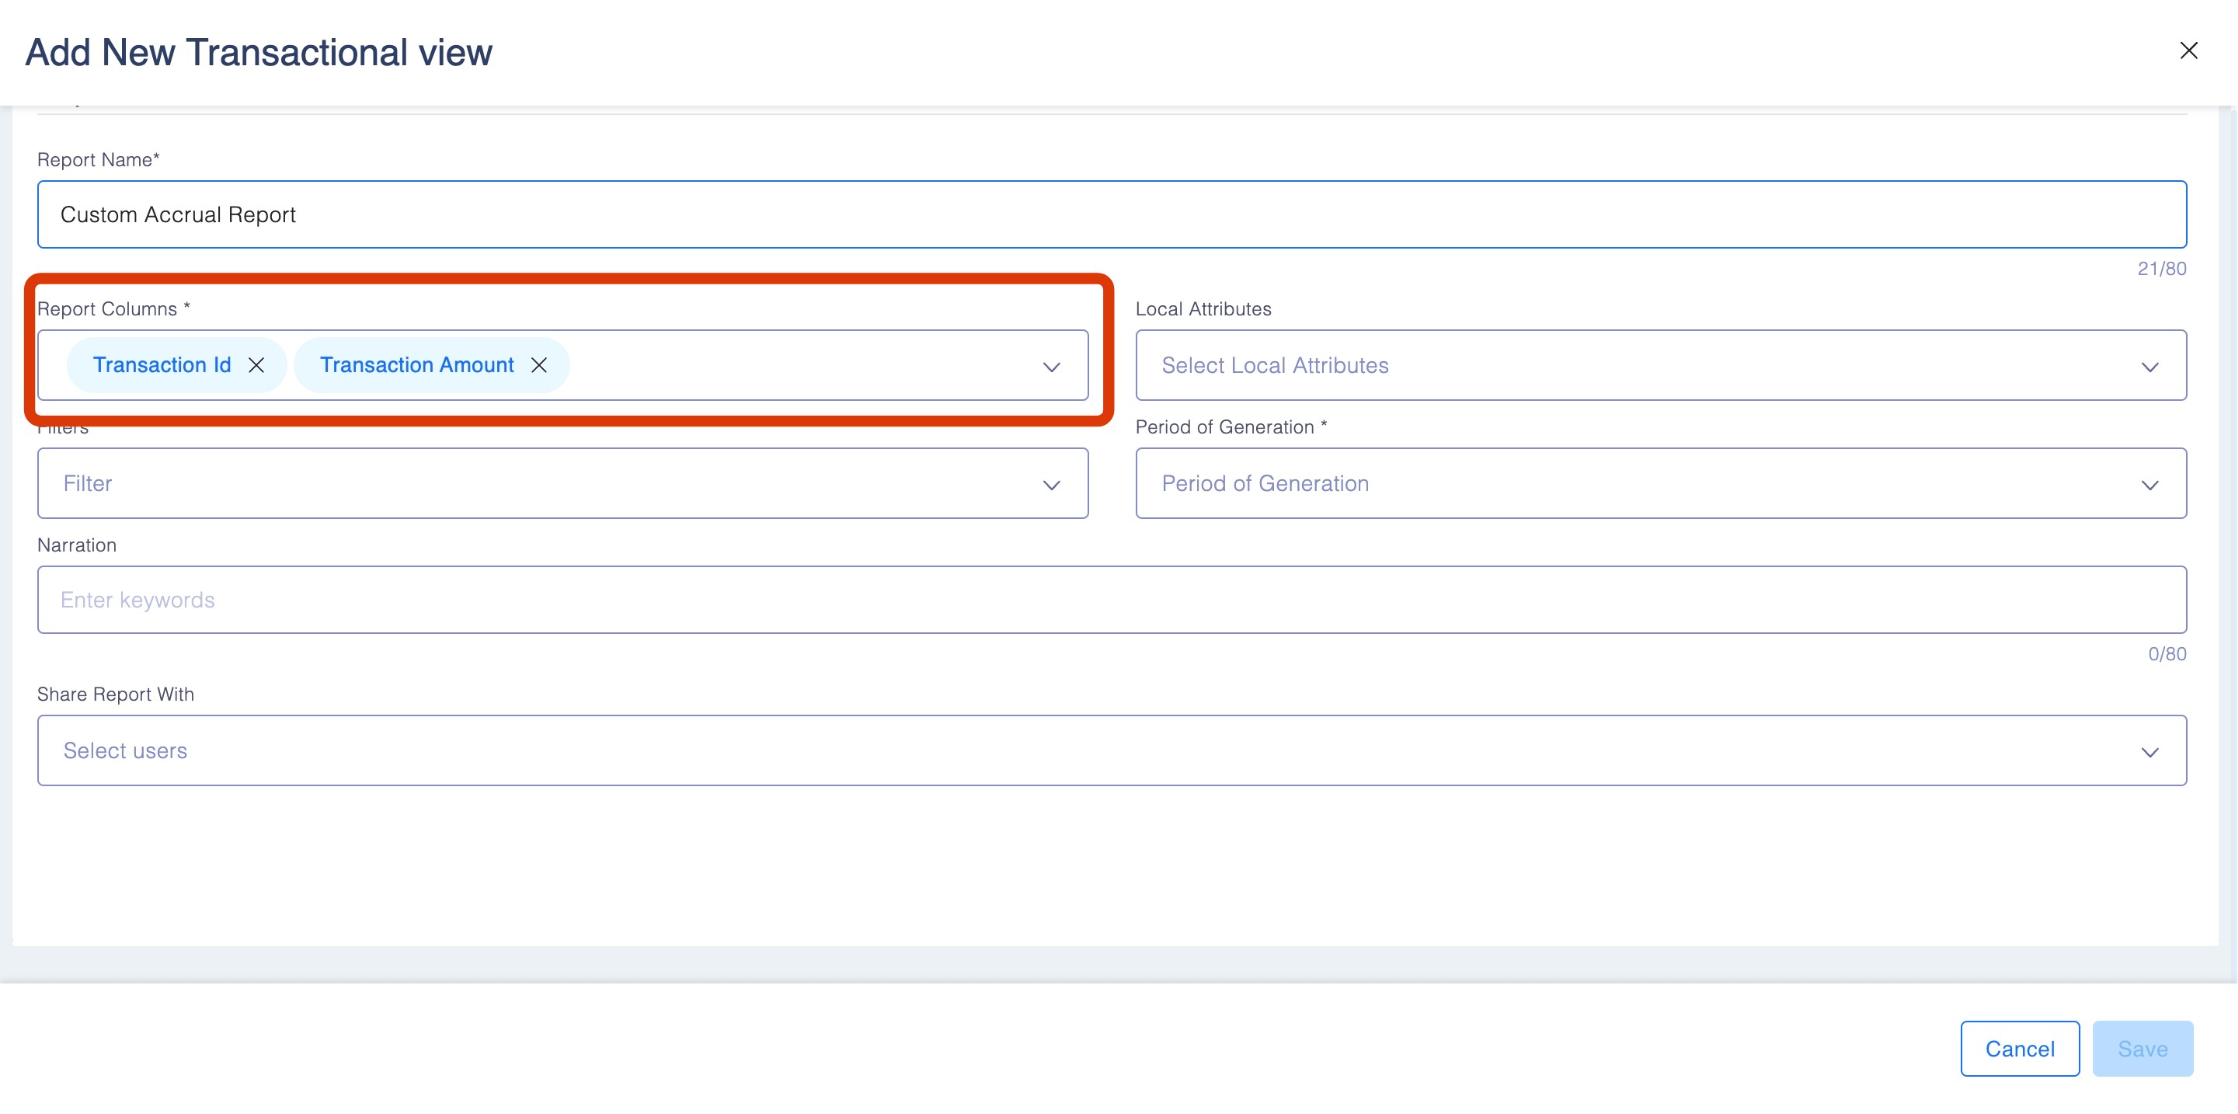
- Report Columns
Select the columns that should be included in the report. Use the drop-down menu to select one or more of the standard columns.
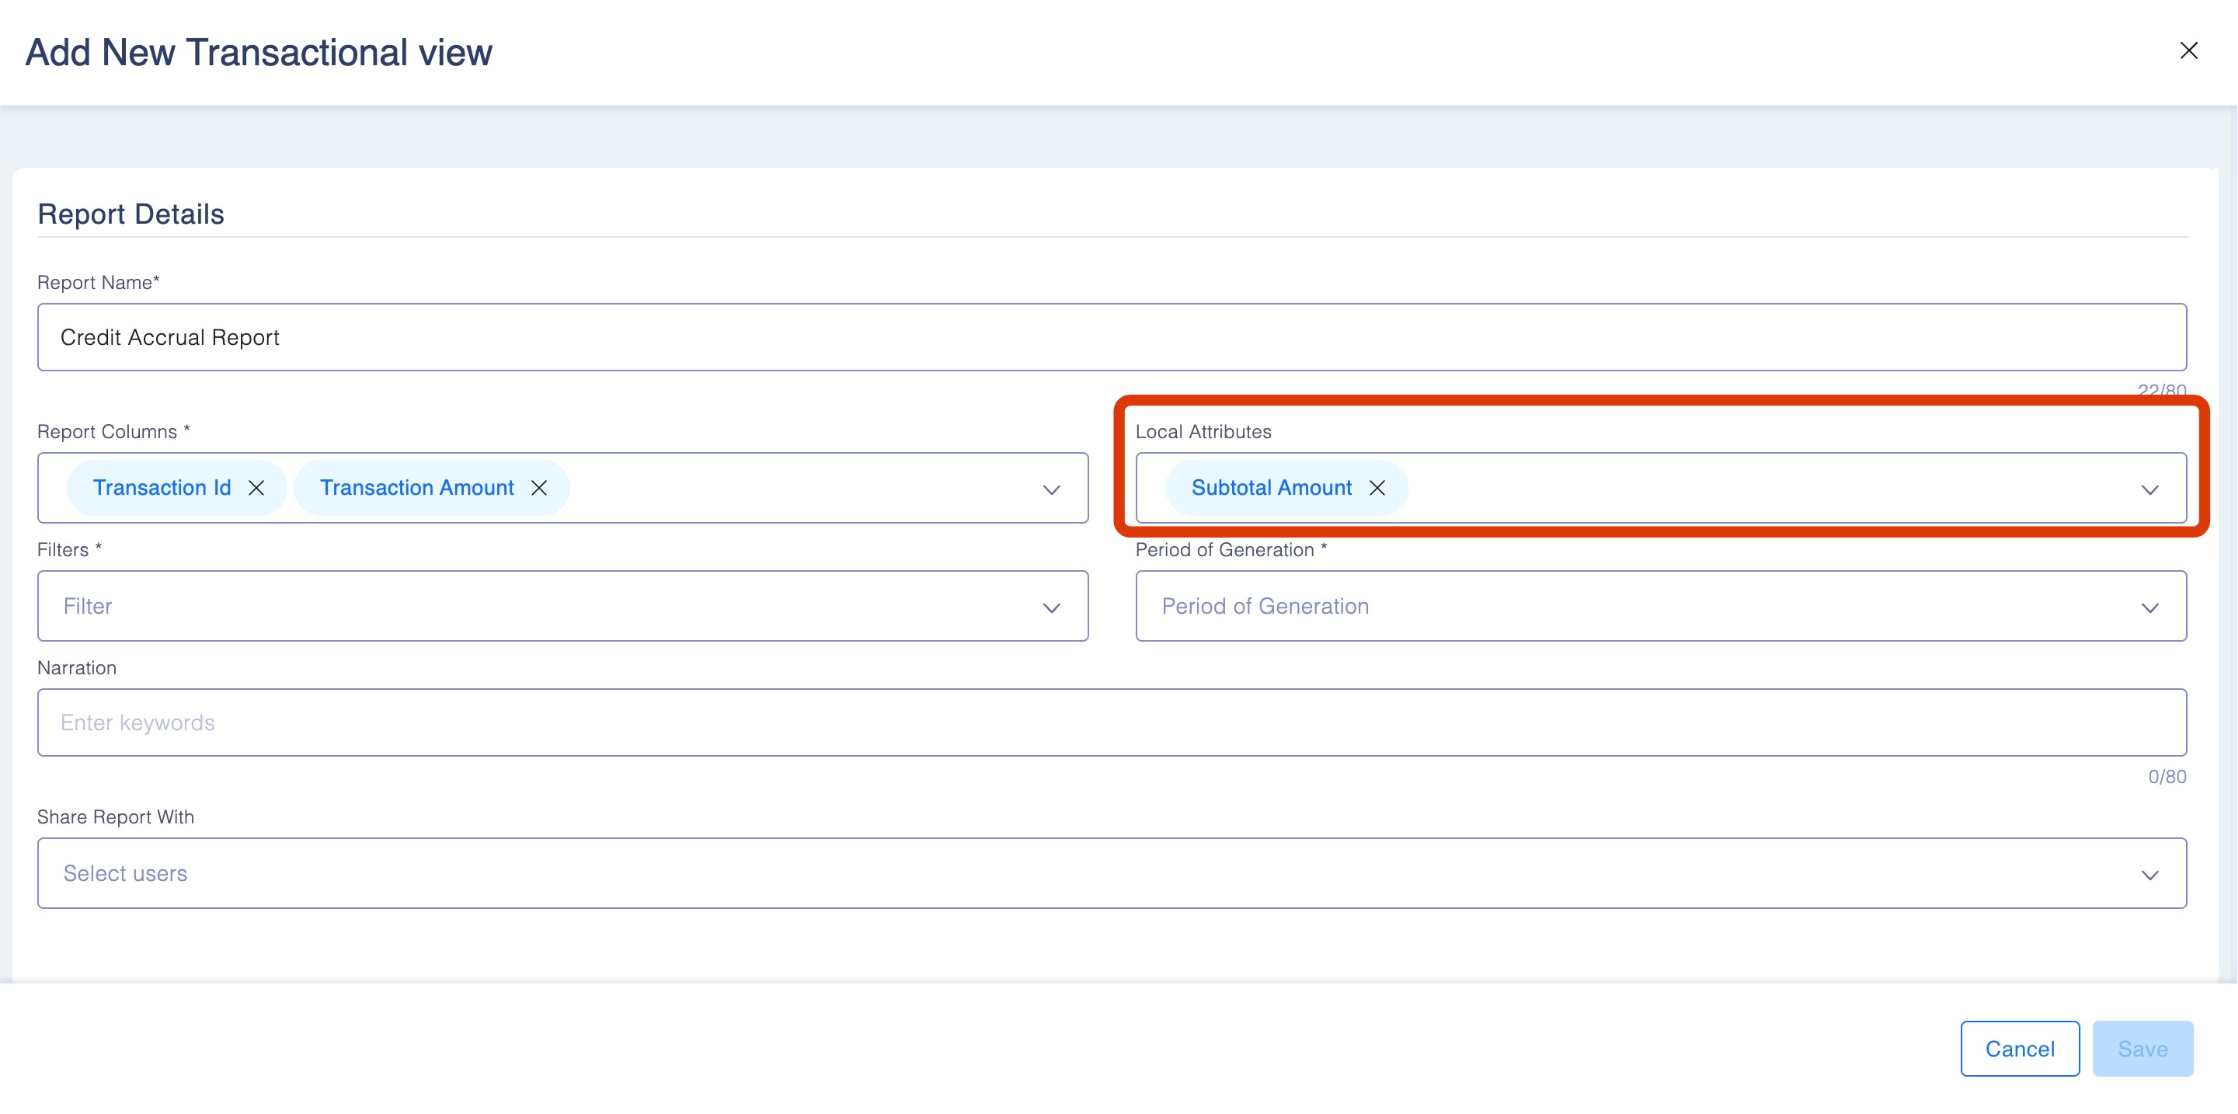
- Local Attributes
Local attributes are custom data fields specific to the business logic in the Rule Engine. Examples include: Product Code / Sub-Product Code.

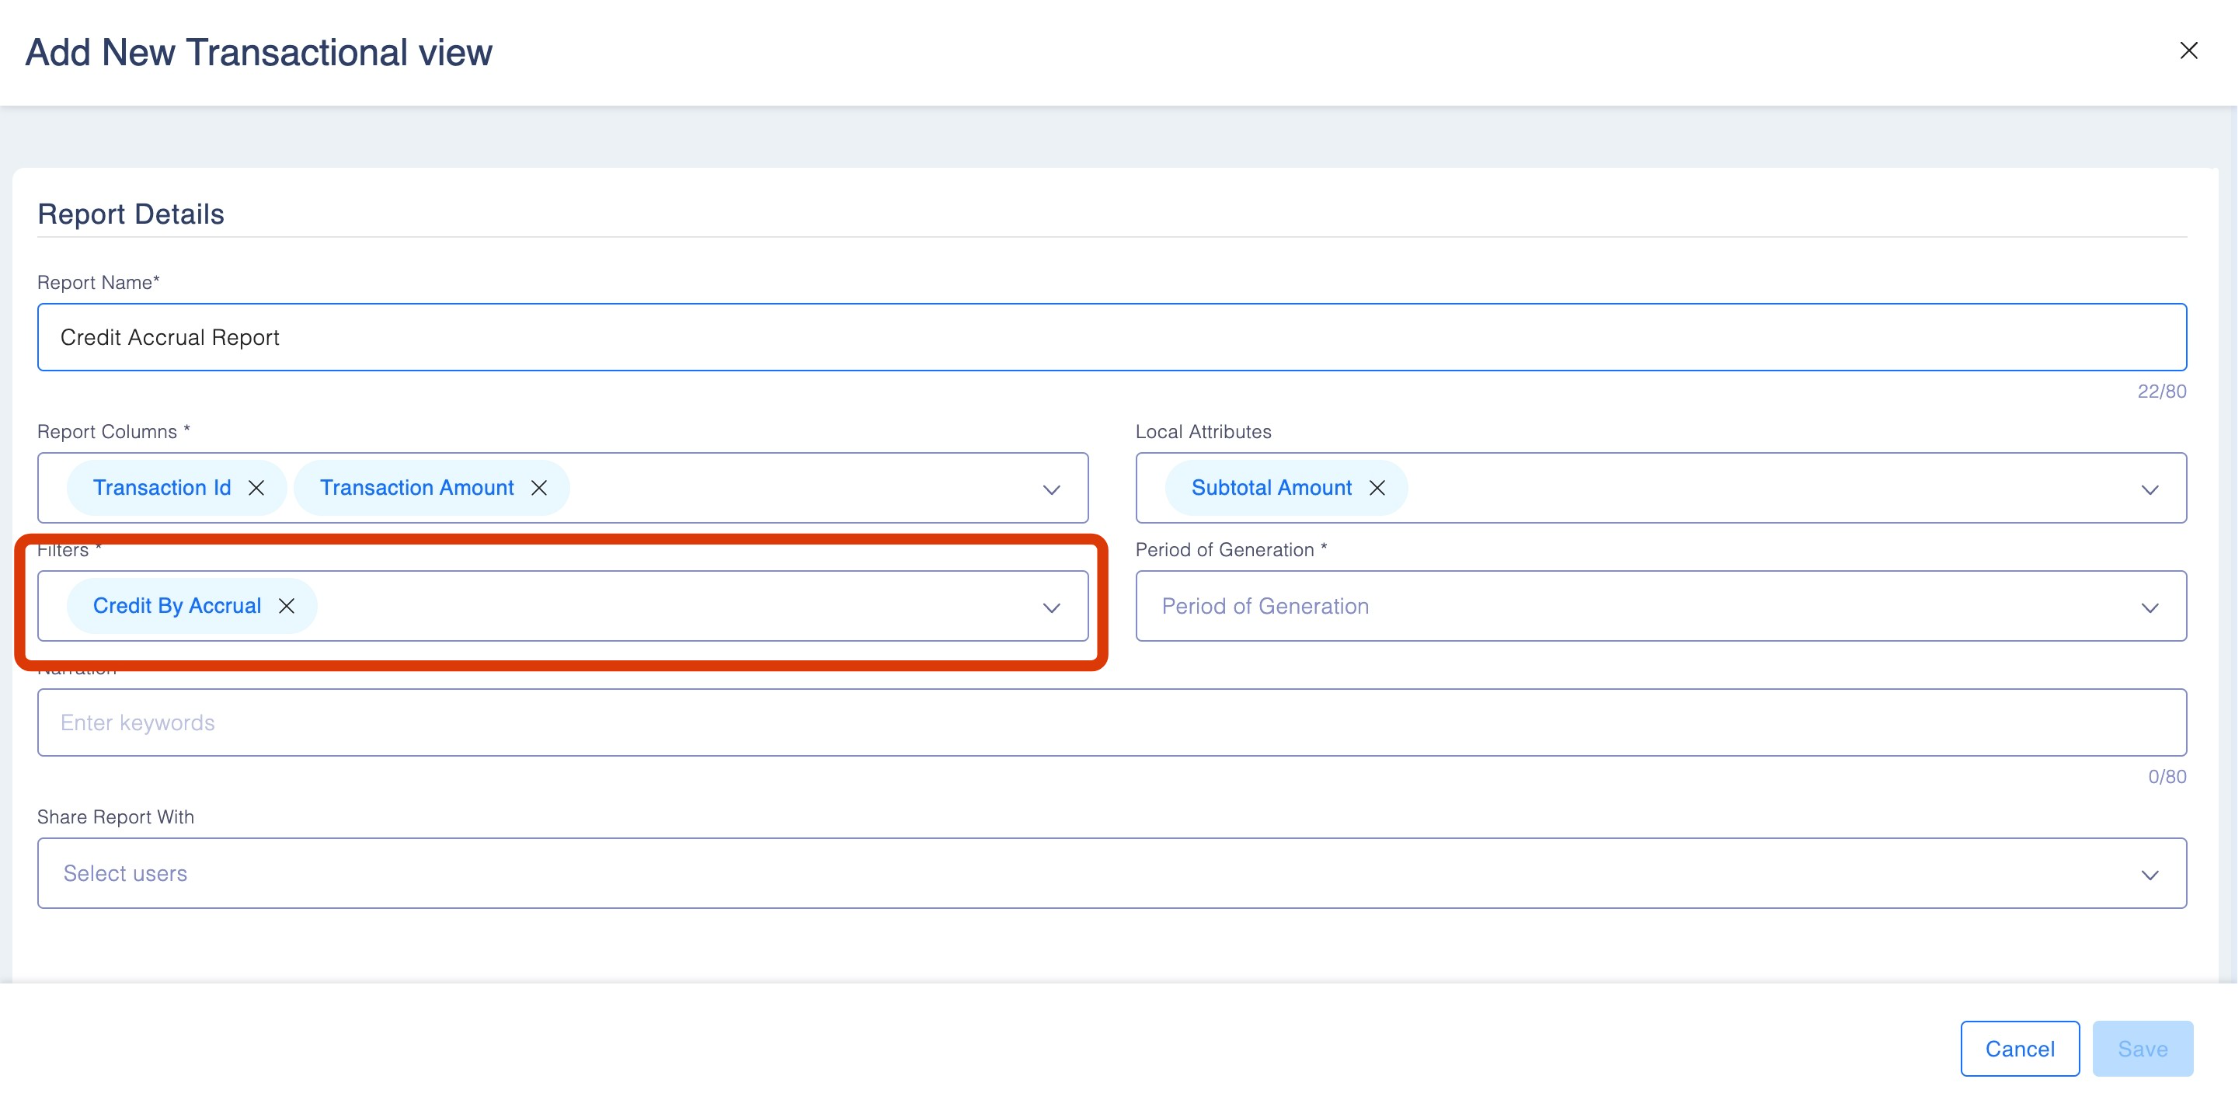
- Filters
Filters help refine the report output based on specific conditions.
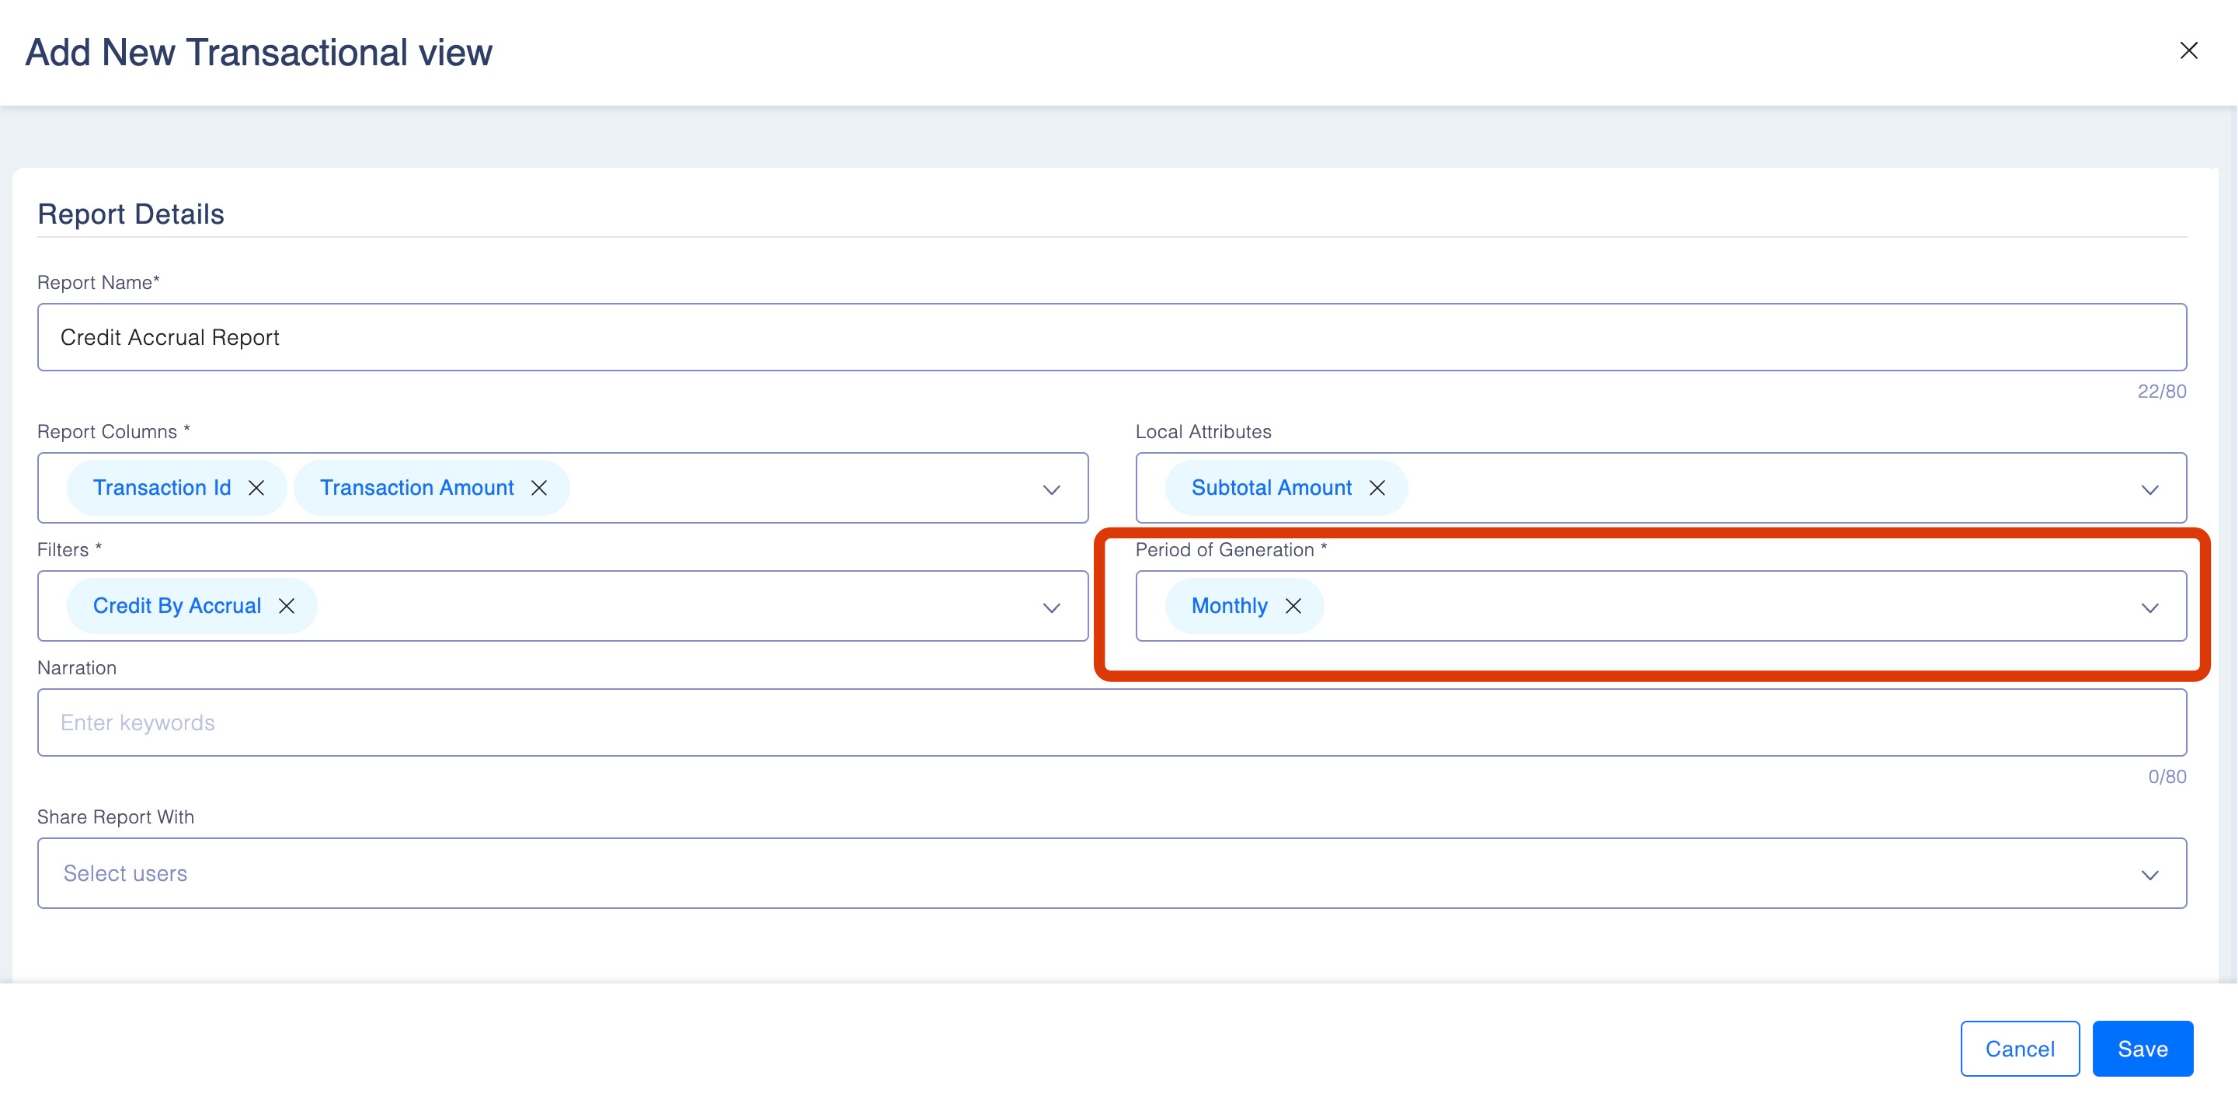
- Generation Period
Defines how frequently the report should be generated. Options include:
Daily – For real-time monitoring of new transactions.
Weekly – Provides a summary of transactions over a week.
Monthly, Quarterly and Annually – Useful for trend analysis and financial reconciliation.
- Narration
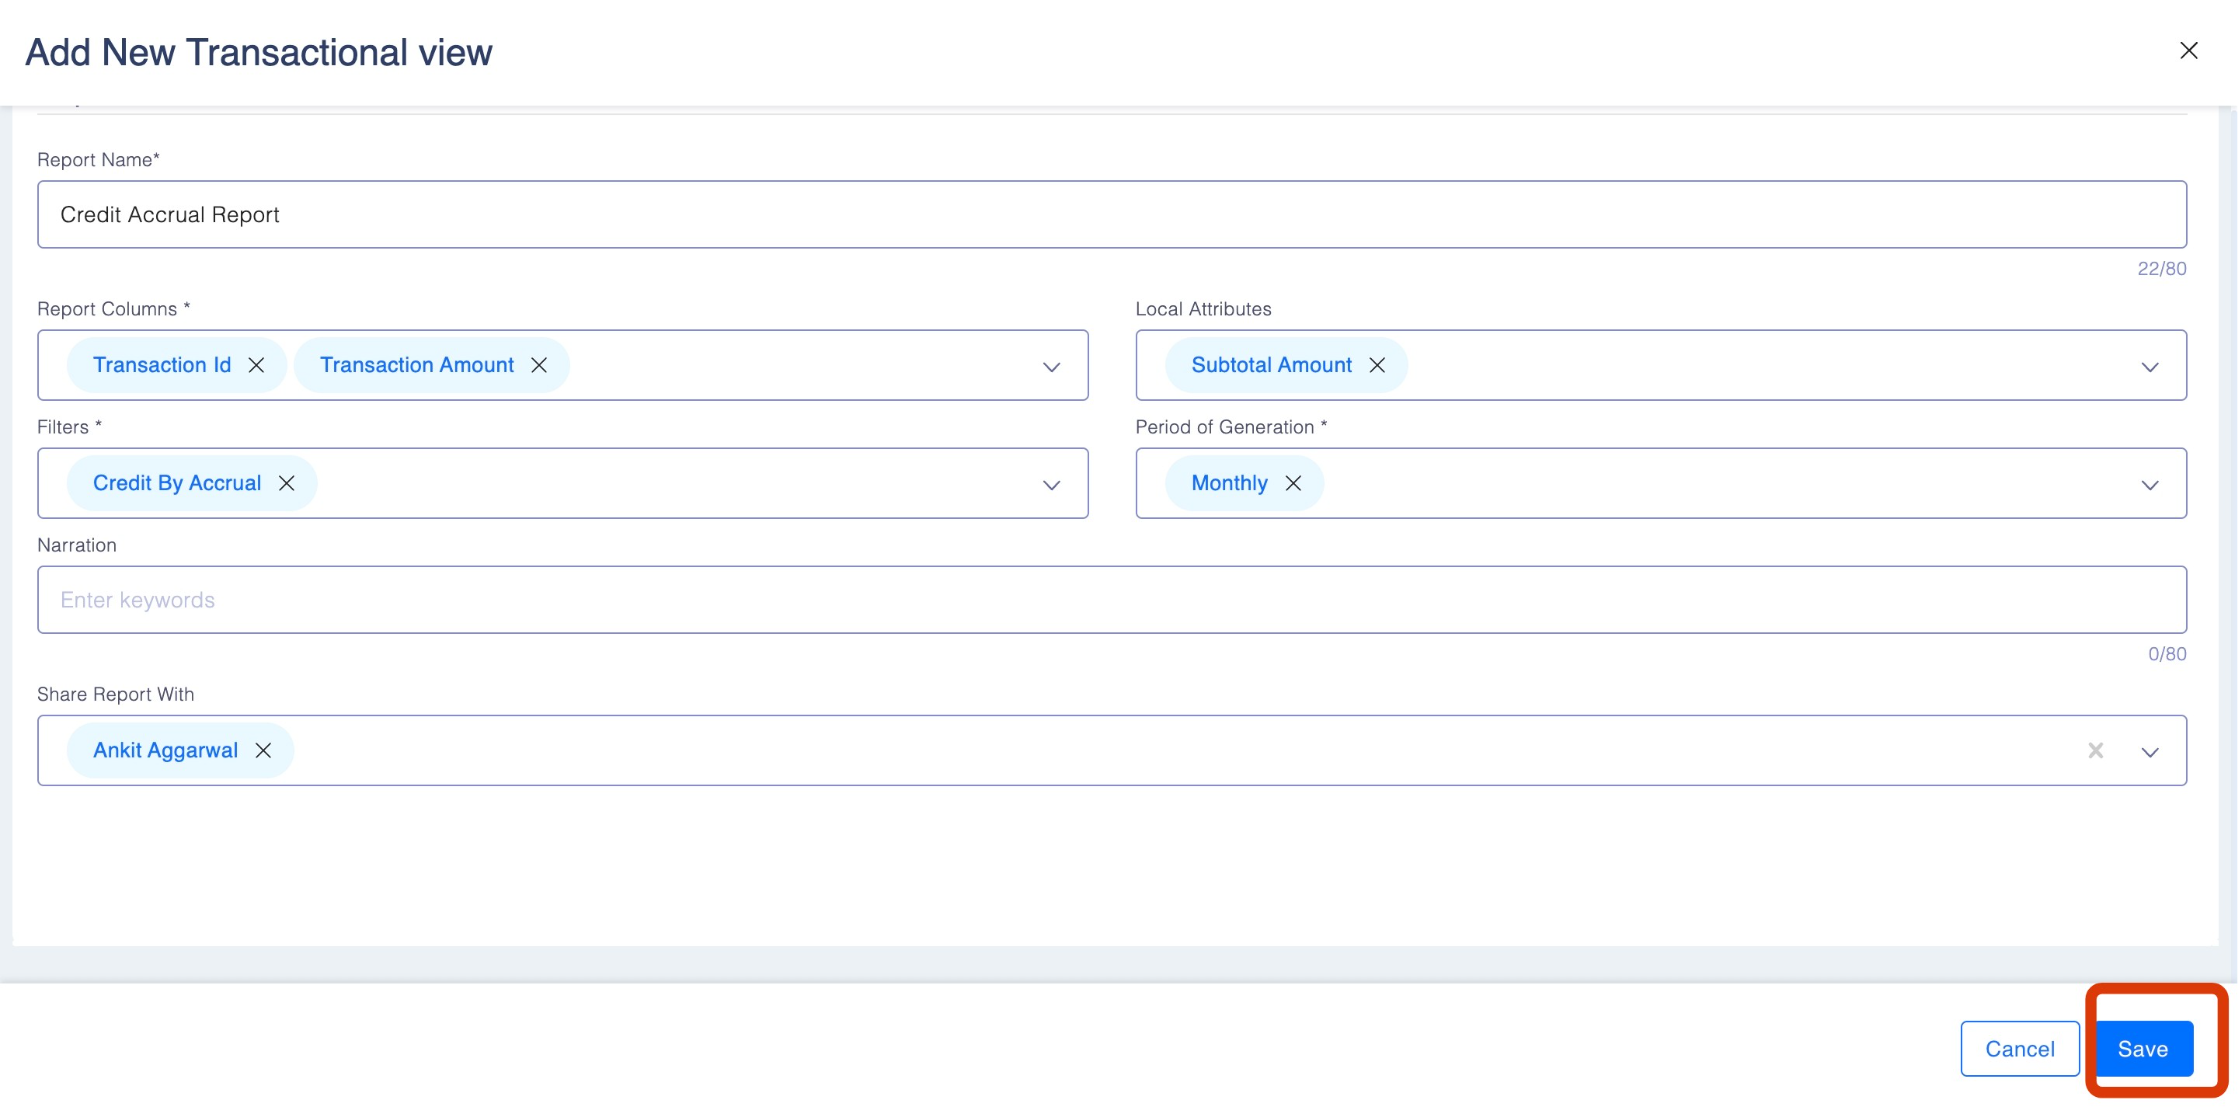
Narration provides a description or context for the transaction. It helps explain why the transaction occurred, such as: "Bonus points awarded for promotional campaign" - Share Report with
Add or select the email id of the user you wish to share the report with. Once done, click on Save.
- Report Name
Available Report Columns
When creating a custom view, you can include the following columns to display relevant transaction data:
- Transaction ID: Unique identifier for each transaction.
- Transaction Amount: The value of the transaction.
- Relation Reference: The reference ID for the relationship involved in the transaction.
- Points: Number of points issued or redeemed in the transaction.
- Transaction Date: The date when the transaction occurred.
- Processing Date: The date the transaction was processed.
- Type: The type of transaction (e.g., credit or debit).
- Product Code: The code associated with the product involved in the transaction.
- Sub Product Code: The code for the sub-product involved in the transaction.
- Narration: A description or note about the transaction.
- Points Spoiled: The number of points that have spoiled due to round-off.
- Redemption Attributes: Specific attributes related to redemptions.
- On Behalf User: The user who performed the transaction on behalf of a member.
- Merchant Name: The name of the merchant where the transaction occurred.
- Created On: The date the transaction was created.
- Created By: The user who created the transaction for manual transactions.
- Approved On: The date the transaction was approved for manual transactions.
- Approved By: The user who approved the transaction for manual transactions.
- Rule Id: The unique identifier for the rule in the system.
- Rule Name: The descriptive name associated with the rule.
Available Filters
You can use the following filters to refine your transaction reports:
- Credit By Accrual: Points are credited to a member’s account when they complete an accrual-type transaction, such as making a qualifying purchase or performing an eligible action..
- Debit By Redemption: Points are debited from a member’s account when they use their points to redeem rewards, such as gift cards, vouchers, or other products.
- Credit By Bonus: Bonus points awarded to members as part of campaigns and promotions are credited to their accounts.
- Debit By Expiration: Points that have reached their expiration date are debited from a member’s account as per the program’s validity rules.
- Debit By Bonus: Previously awarded bonus points are debited if they need to be retracted, such as in cases of bonus reversals or program adjustments.
- Debit By Reversal: Points earned through accrual transactions are reversed and debited if the original transaction is cancelled or deemed ineligible.
- Debit By Cancellation: This is triggered when a member is removed or leaves the program, causing all points to expire and be debited from their account.
- Credit By Reversal: Points are credited back to a member’s account if a previous redemption is reversed, such as in cases of failed or cancelled redemptions.
- Debit By On Behalf Redemption: Points are debited from a member’s account when the customer service team redeems points on their behalf, typically for support purposes.
- Credit By Point Purchase: Members can purchase points within the program, which are credited to their accounts.
- Credit Transfer: Points transferred from another member’s account are credited to the recipient’s account.
- Redemption Reversal: If an automatic redemption reversal fails, program managers can manually add points to the member’s account to correct the balance.
Summary Fields
Summary fields allow you to aggregate and view key statistics from your transaction reports, such as:
- Transaction Count: Total number of transactions.
- Impacted Members: Number of unique members involved in transactions.
- Total Points Issued: Sum of all points issued during the specified period.
- Total Transaction Amount: Aggregate value of all transactions.
- Total Points Spoiled: Sum of all points that have been spoiled due to point round-off.
Report Generation Periods
You can customize the frequency of your report generation to meet your analysis needs. Available options include:
- Daily
- Weekly
- Monthly
- Quarterly
- Yearly
These options allow you to generate reports at regular intervals during off-hours to minimize server load.
Accessing and Managing Transaction Reports
Navigate to the Transaction Reports Section:
- Go to Reports from the main menu.
- Select the Transaction tab where all saved views are listed.
Generate a transaction report based upon custom time period:
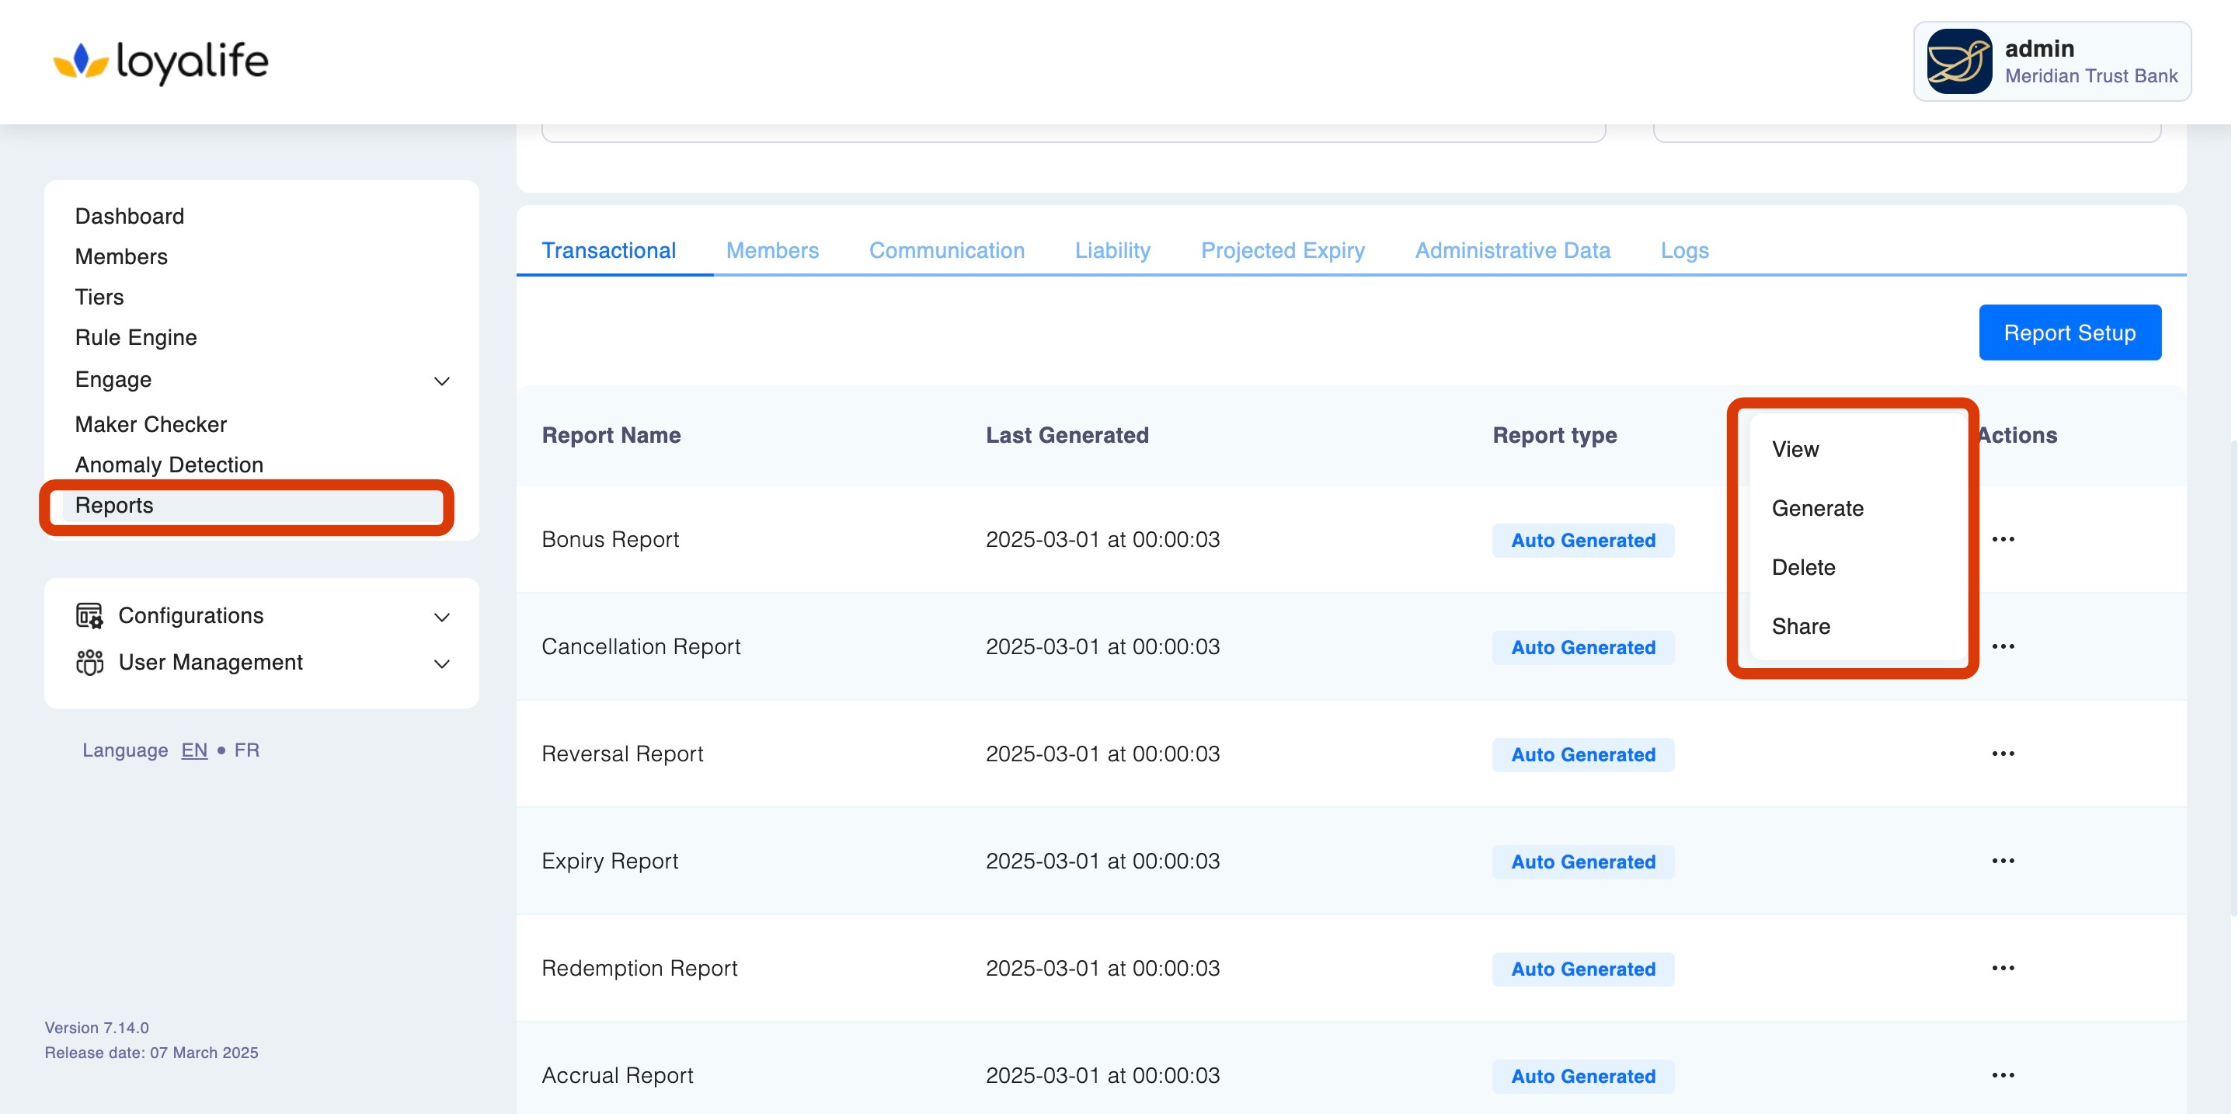
- In the Transaction tab, you will see a list of your custom views.
- Locate the view you want to access and click on the three dots at the right and then "Generate" and select the time period for which you want to generate the report.
- The report will be generated based on the settings and filters you previously configured in the view.
Viewing Report Data:
- Once the report is generated, you can view the transaction data directly within the platform, including the columns you have selected during setup.
- To view the report, locate the report you want to view, click the three dots at the right and then click "View".
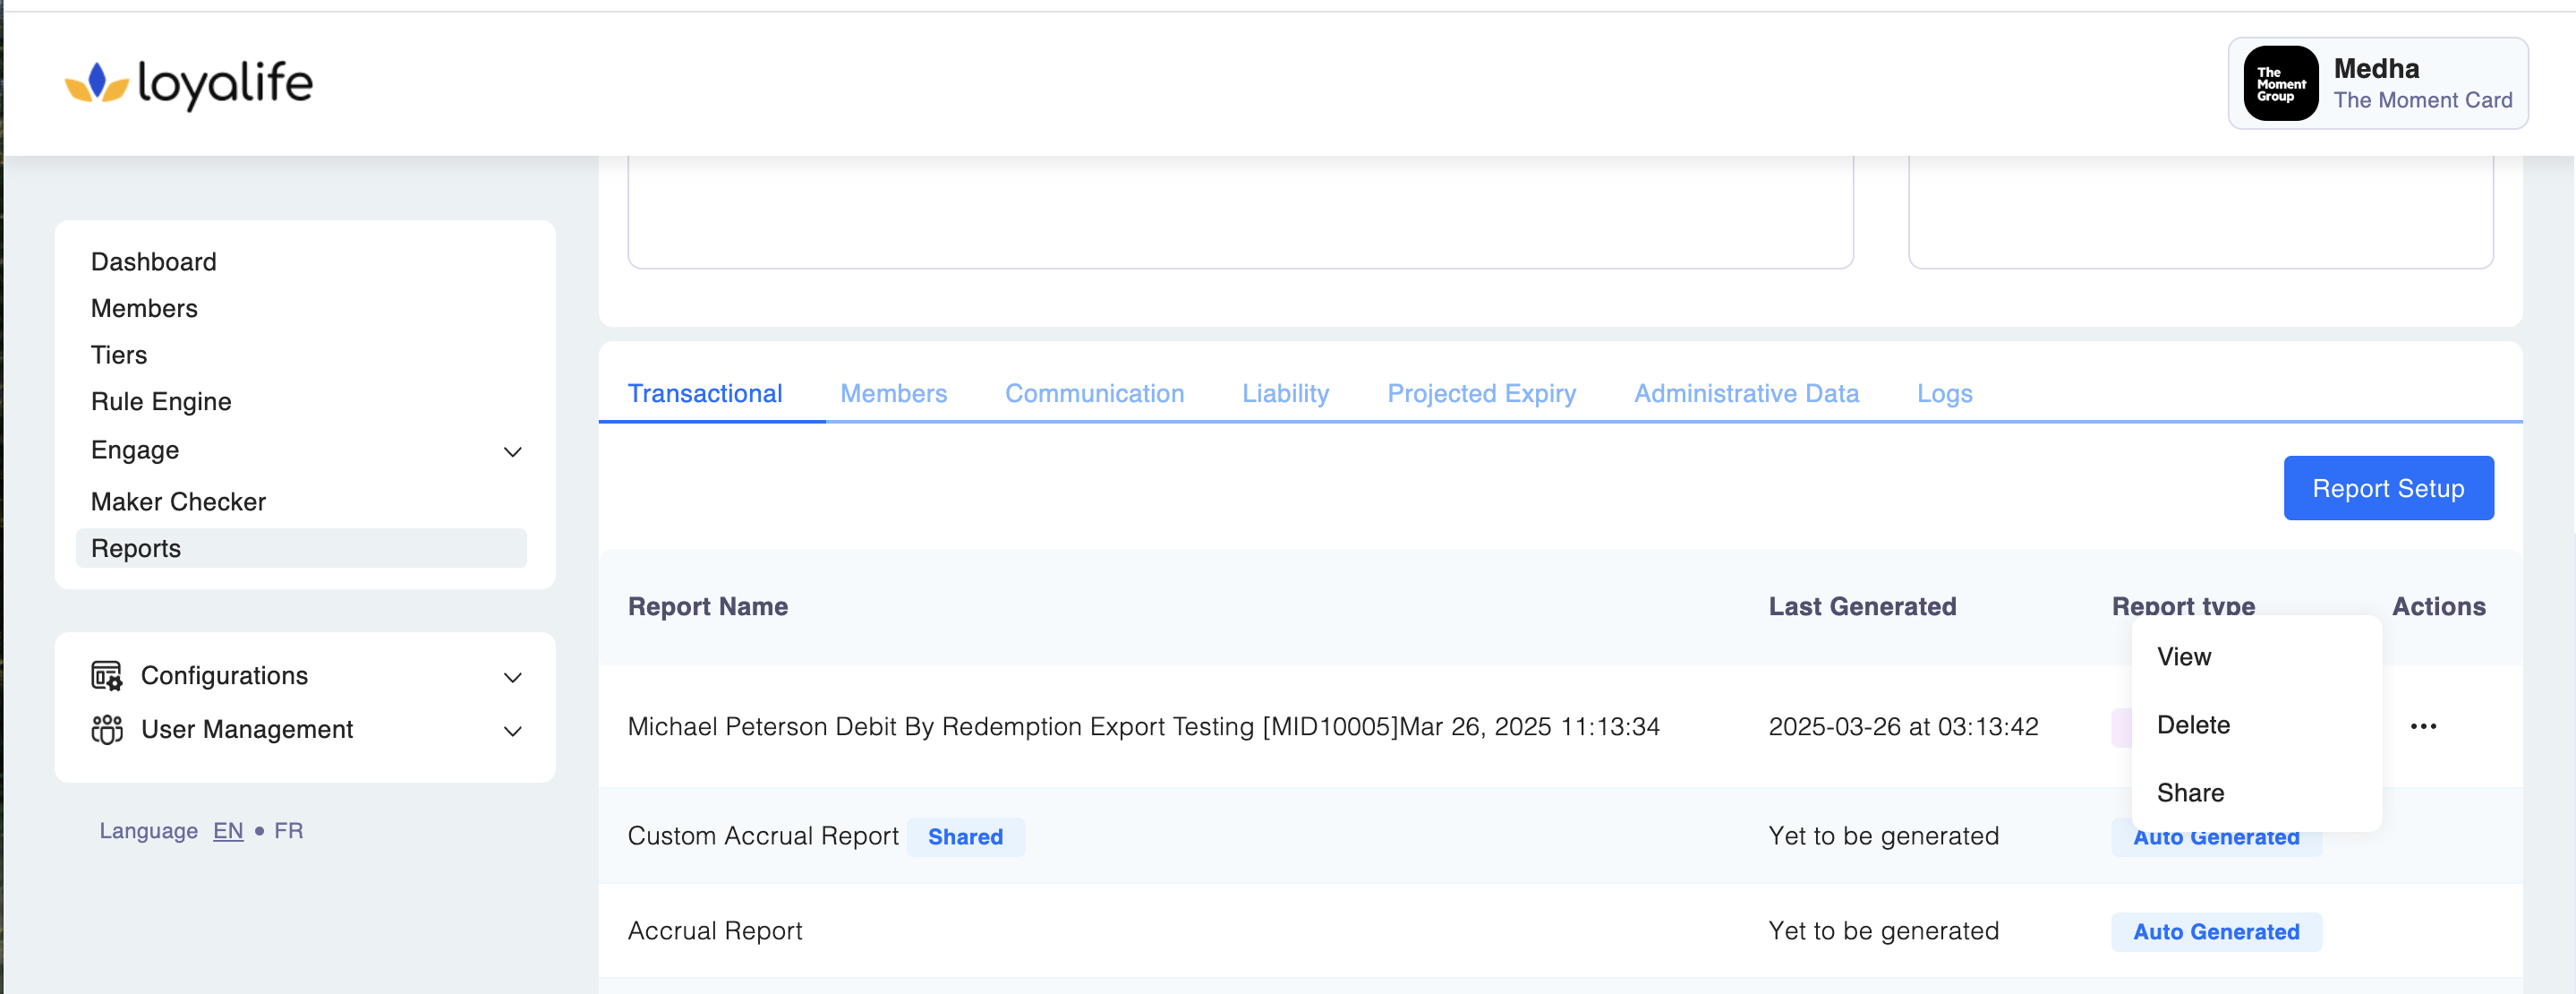
Deleting a Custom Transaction View
If you no longer need a particular custom view, follow these steps to delete it:
Select the View to Delete:
- Locate the custom view you wish to remove.
- Click the three dots at the right and click Delete next to the view.
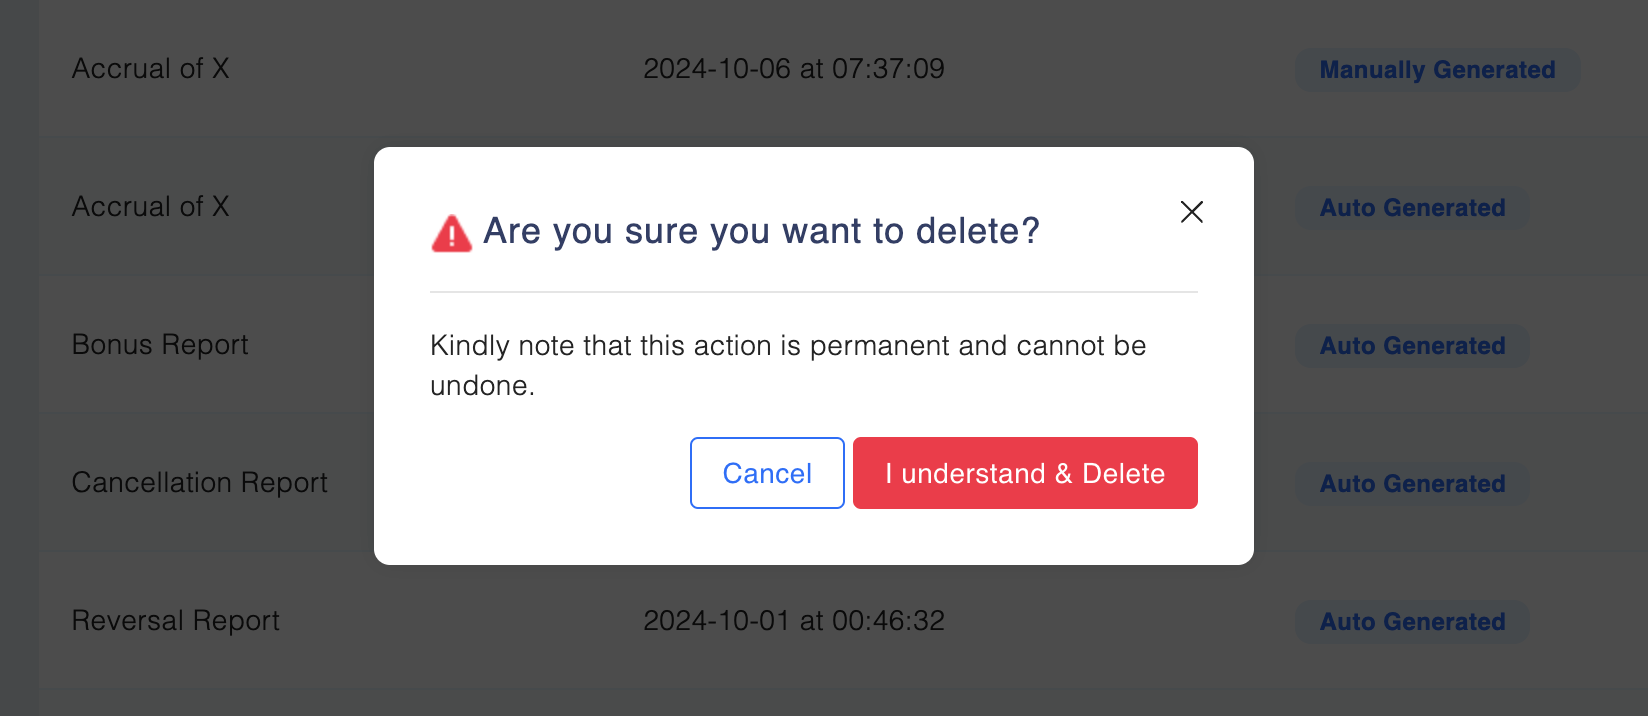
Confirm Deletion:
- A confirmation prompt will appear. Confirm that you want to delete the view.
- The view & associated reports will be permanently deleted from storage and will no longer appear in the list.
Sharing Reports Data
If you need to share a particular transaction report, follow these steps to share it:
Select the View to Share:
- Find the custom view you want to share.
- Click the three-dot menu on the right side of the view and select Share.
- In the dropdown menu, select the user you want to share the view with.
- Click Share to grant access.
Note: Sharing with a specific user is only available if their access settings allow it.
Updated 2 months ago