
Custom Member Attribute
Overview
Custom member attributes in Loyalife allow you to define additional fields to capture specific information about your members beyond the global member attributes. This flexibility helps you manage your loyalty programs by tailoring the platform to suit your organization's needs.
Adding Custom Member Attributes
Step 1:Access the Custom Member Attribute Section
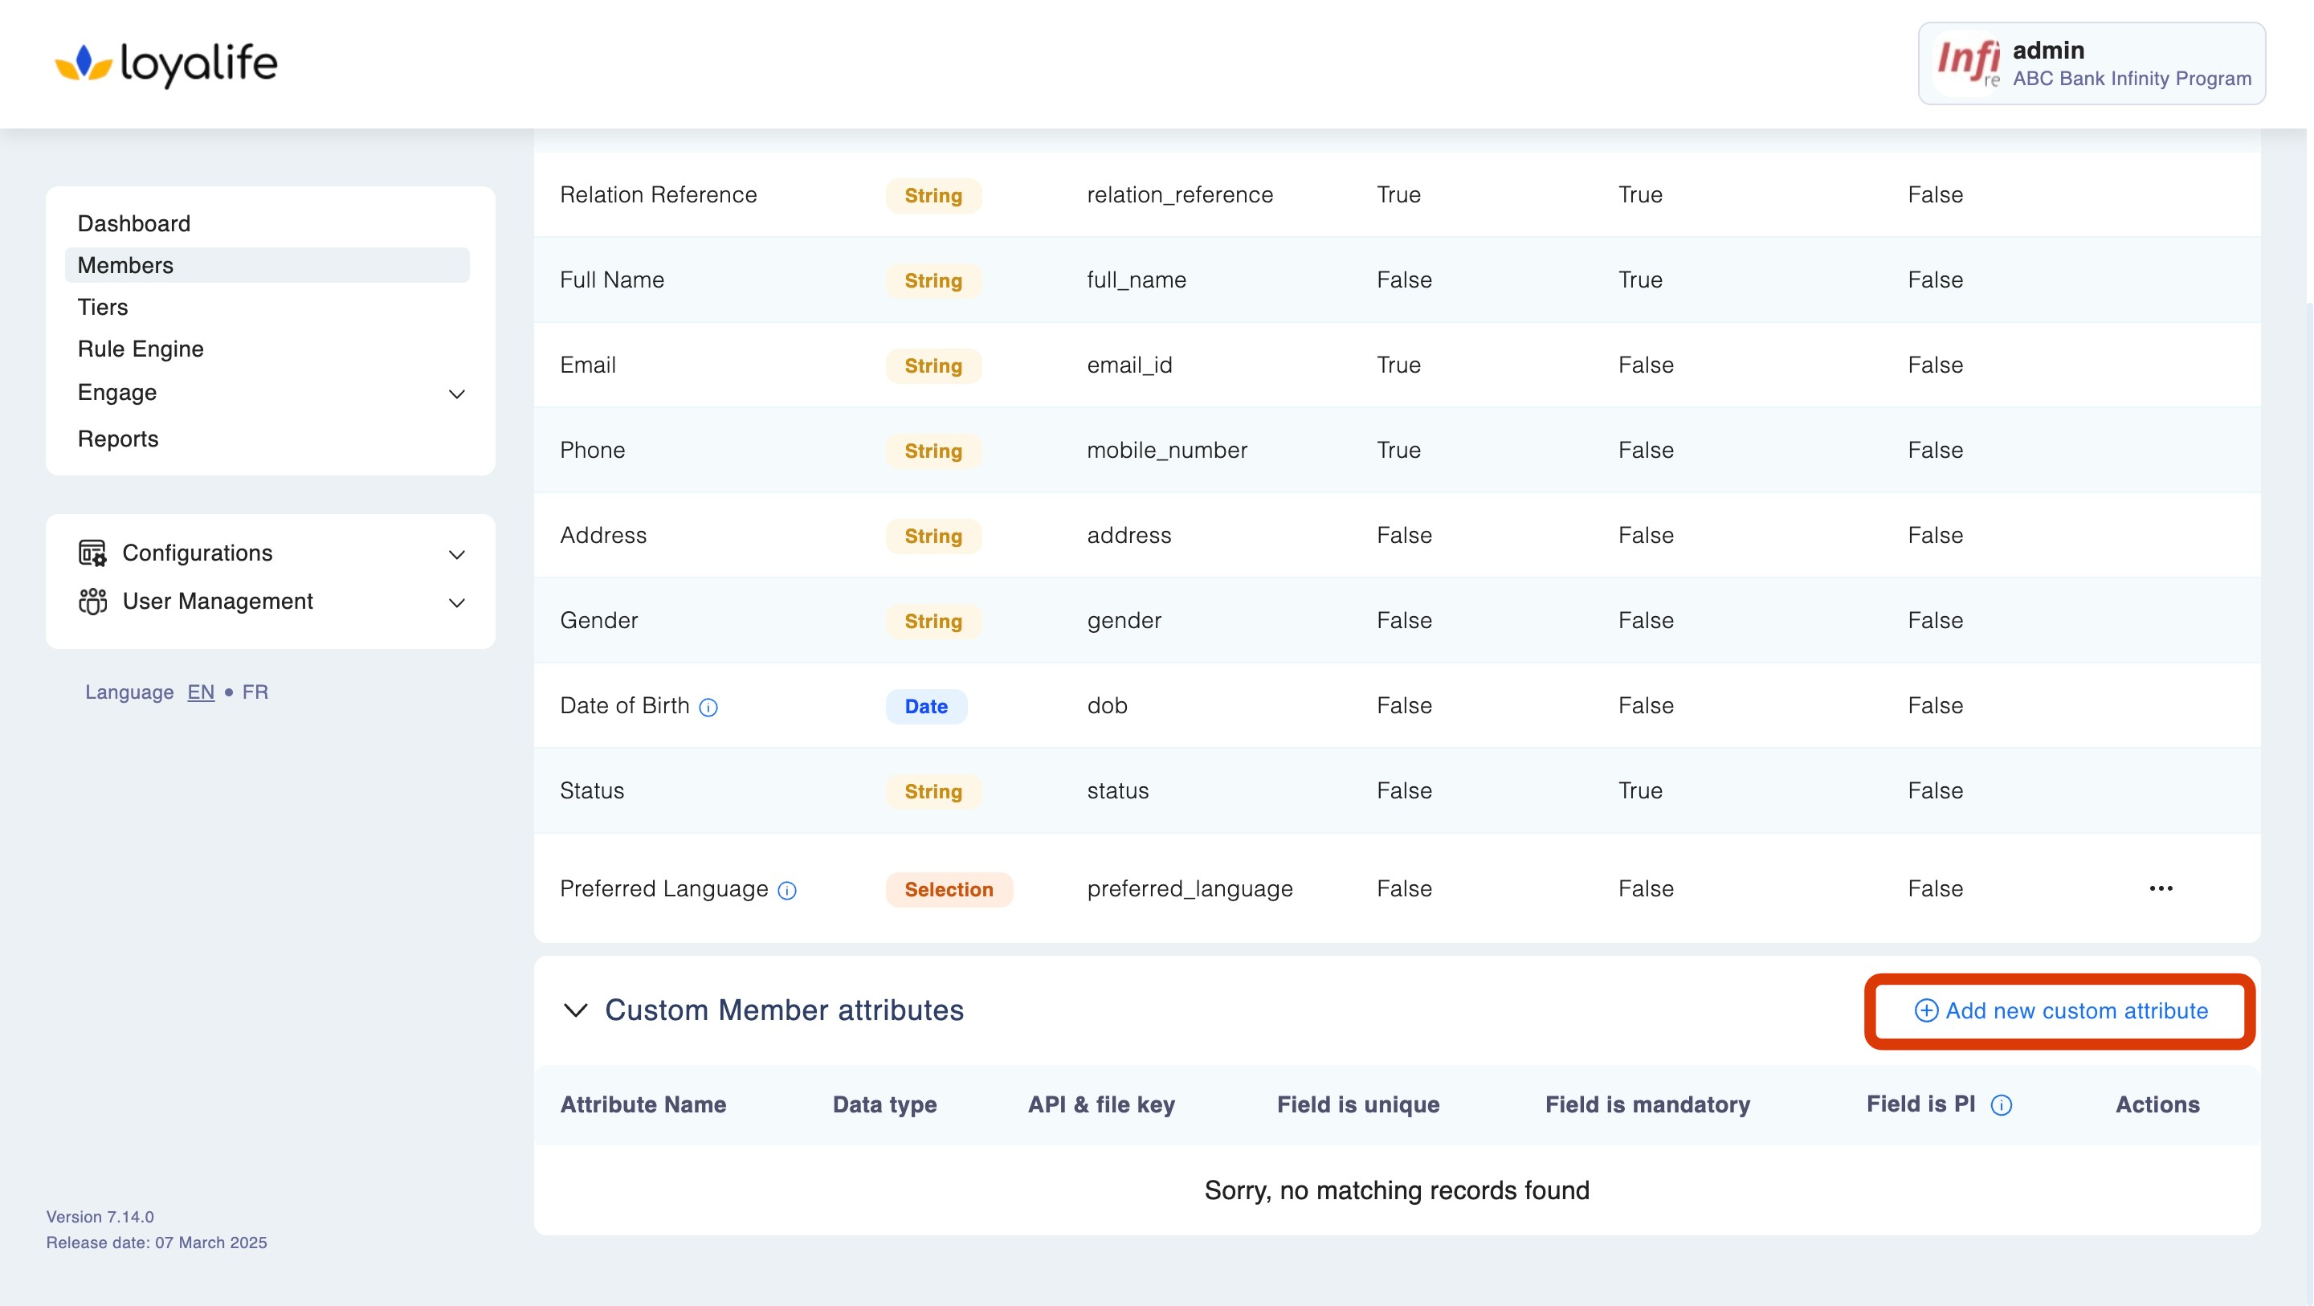
- Navigate to the Members section from the sidebar.
- Scroll down to Custom Member Attributes.
- Click on the "Add New Custom Attribute" button to start creating a custom field.
Step 2: Adding a Custom Attribute
- Upon clicking "Add New Custom Attribute", you will be presented with a form that captures key information about the custom attribute.
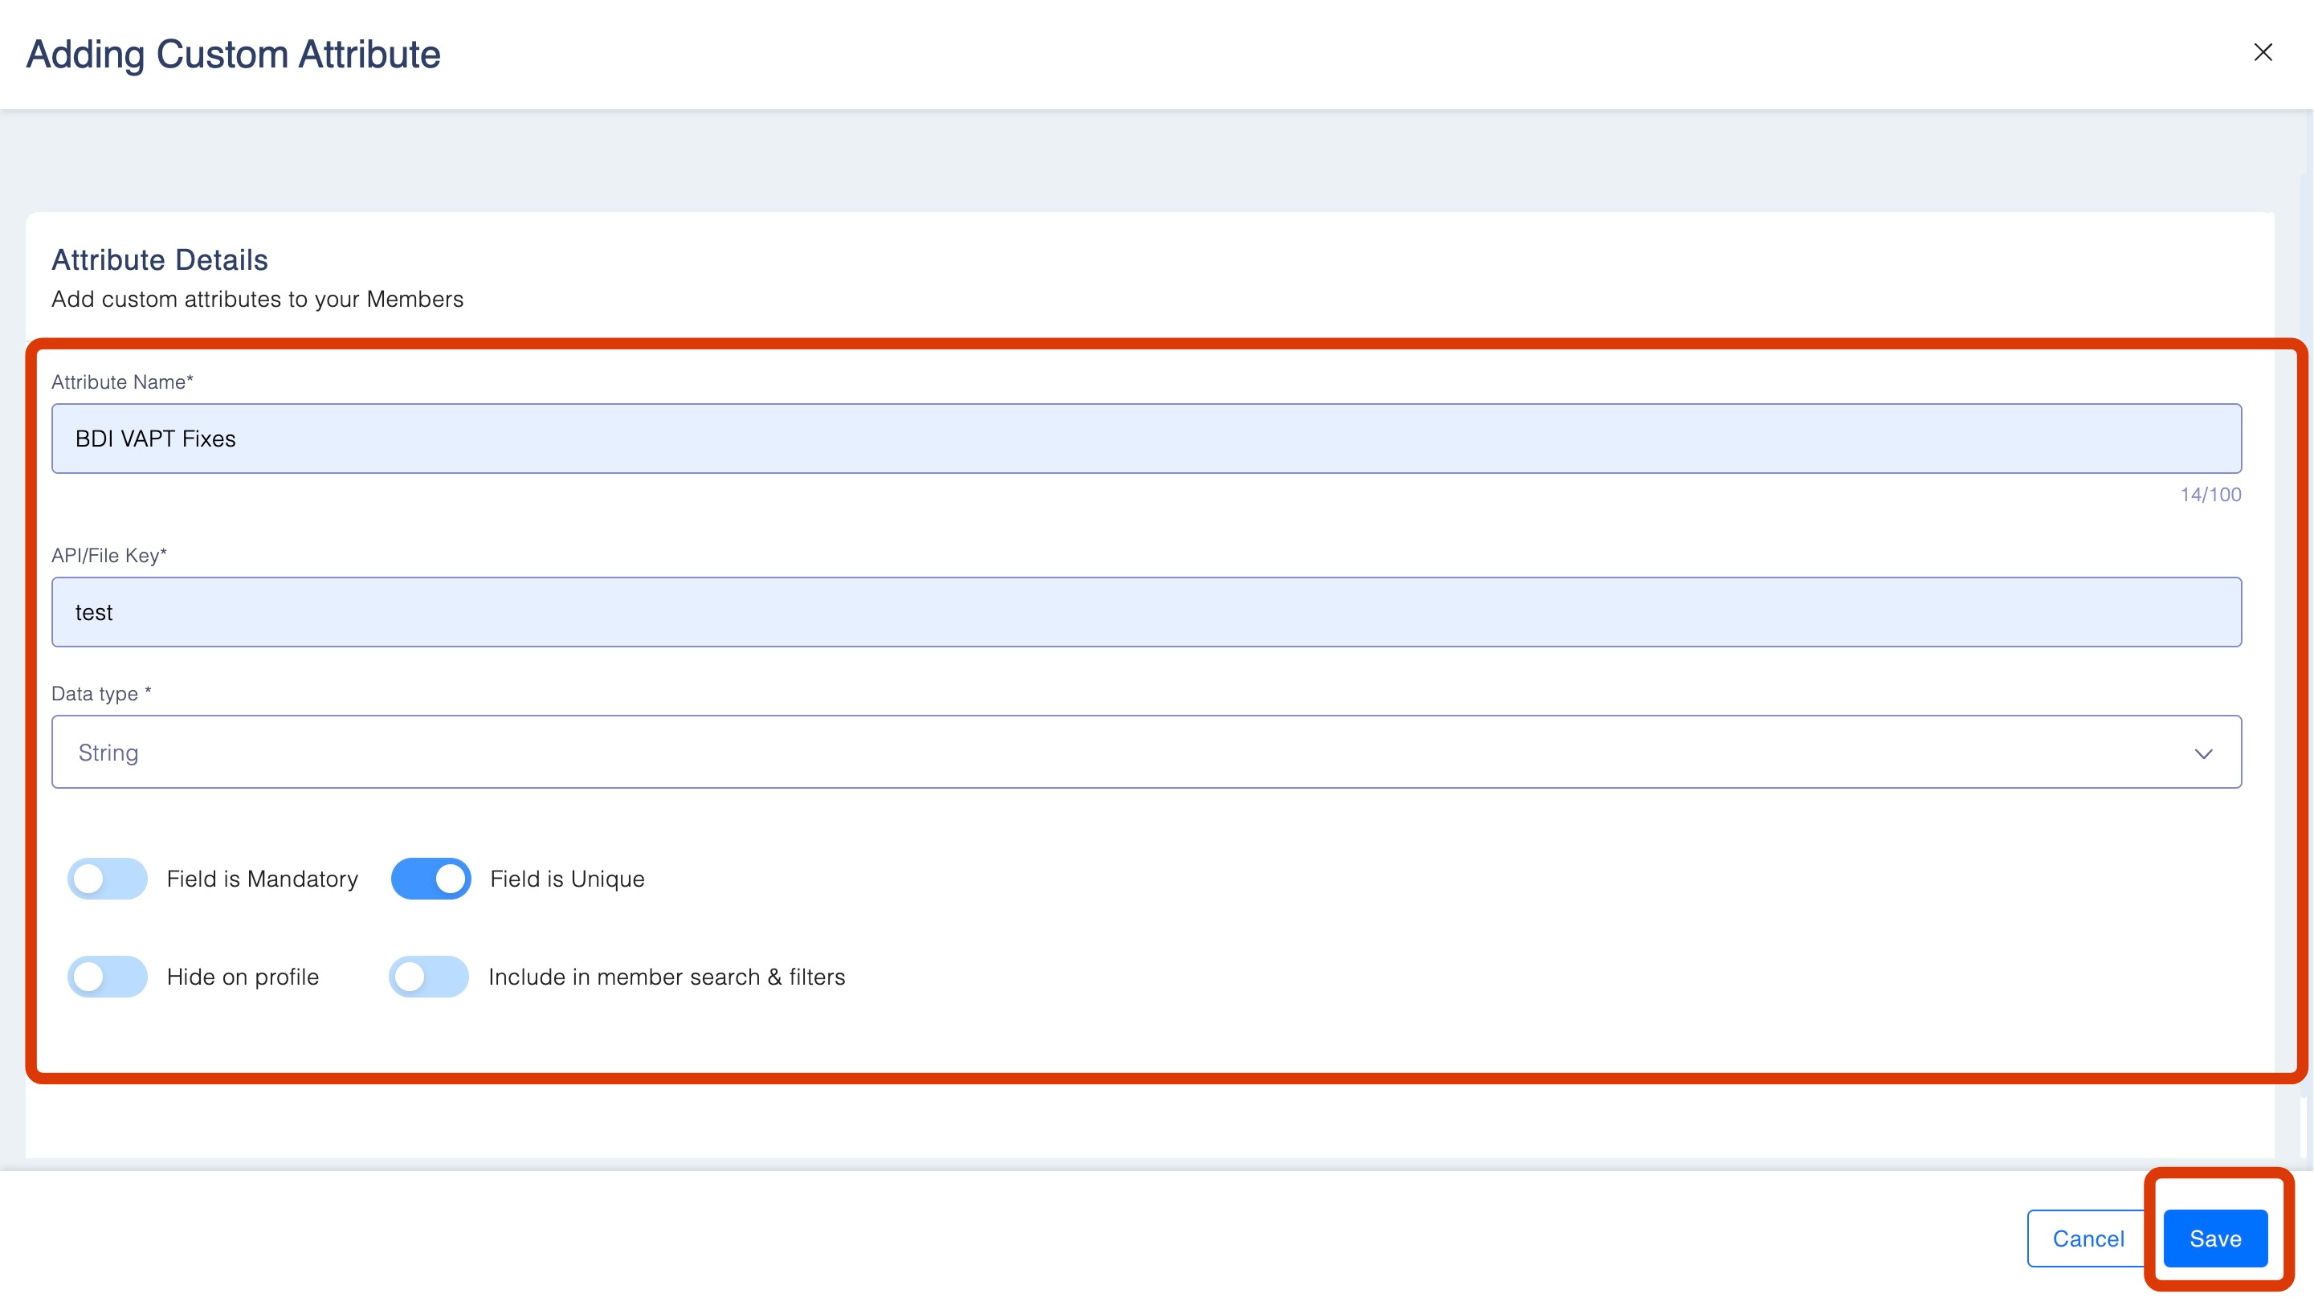
Attribute Form Fields:
-
Attribute Name:
Enter the name of the custom attribute. This field is mandatory. The name should describe the kind of data you want to store (e.g., Relationship Manager, National ID, etc.). -
API/File Key:
Define the API/File key that uniquely identifies this attribute when adding/editing member data via API/SFTP. This field is mandatory. -
Data Type:
Select the type of data that the attribute will store. The available data types are:- String: Textual data like names or locations.
- Numbers: Integer values such as counts or IDs.
- Decimals: Decimal values for numeric data with precision
- Date: Stores dates, useful for attributes like opening dates or registration dates.
-
Field Options:
You can configure additional rules for the custom attribute by selecting the following options:- Field is Mandatory: This makes the attribute a required field during data entry. If this is enabled, the API/SFTP must provide data for this attribute.
- Field is Unique: This ensures that the data entered in this field is unique across members (e.g., National ID).
- Hide on Profile: This hides the attribute from being displayed in the member profile, useful for sensitive information. Only user with permission of PI can access these data. Business users having access to PI can access these info only when they request it. On request audit will be logged.
- Include in Member Search & Filters: If selected, this attribute will be included in the search and filter options for member search.
Step 3: Saving the Custom Attribute -
After entering all the required information, click the Save button to create the attribute.
-
The newly created attribute will now appear in the Custom Member Attributes list and be available for data entry, searching, and filtering (if selected).
Managing Custom Member Attributes
Once a custom attribute is created, you can
- View: See the custom attribute's details such as its name, data type, and any rules applied.
- Edit: Modify the attribute, such as its display name, API key, or other rules (note: some configurations, like data type, may not be editable after creation). Simply navigate to the particular attribute, click on the three dots (under Action column), and click on edit.
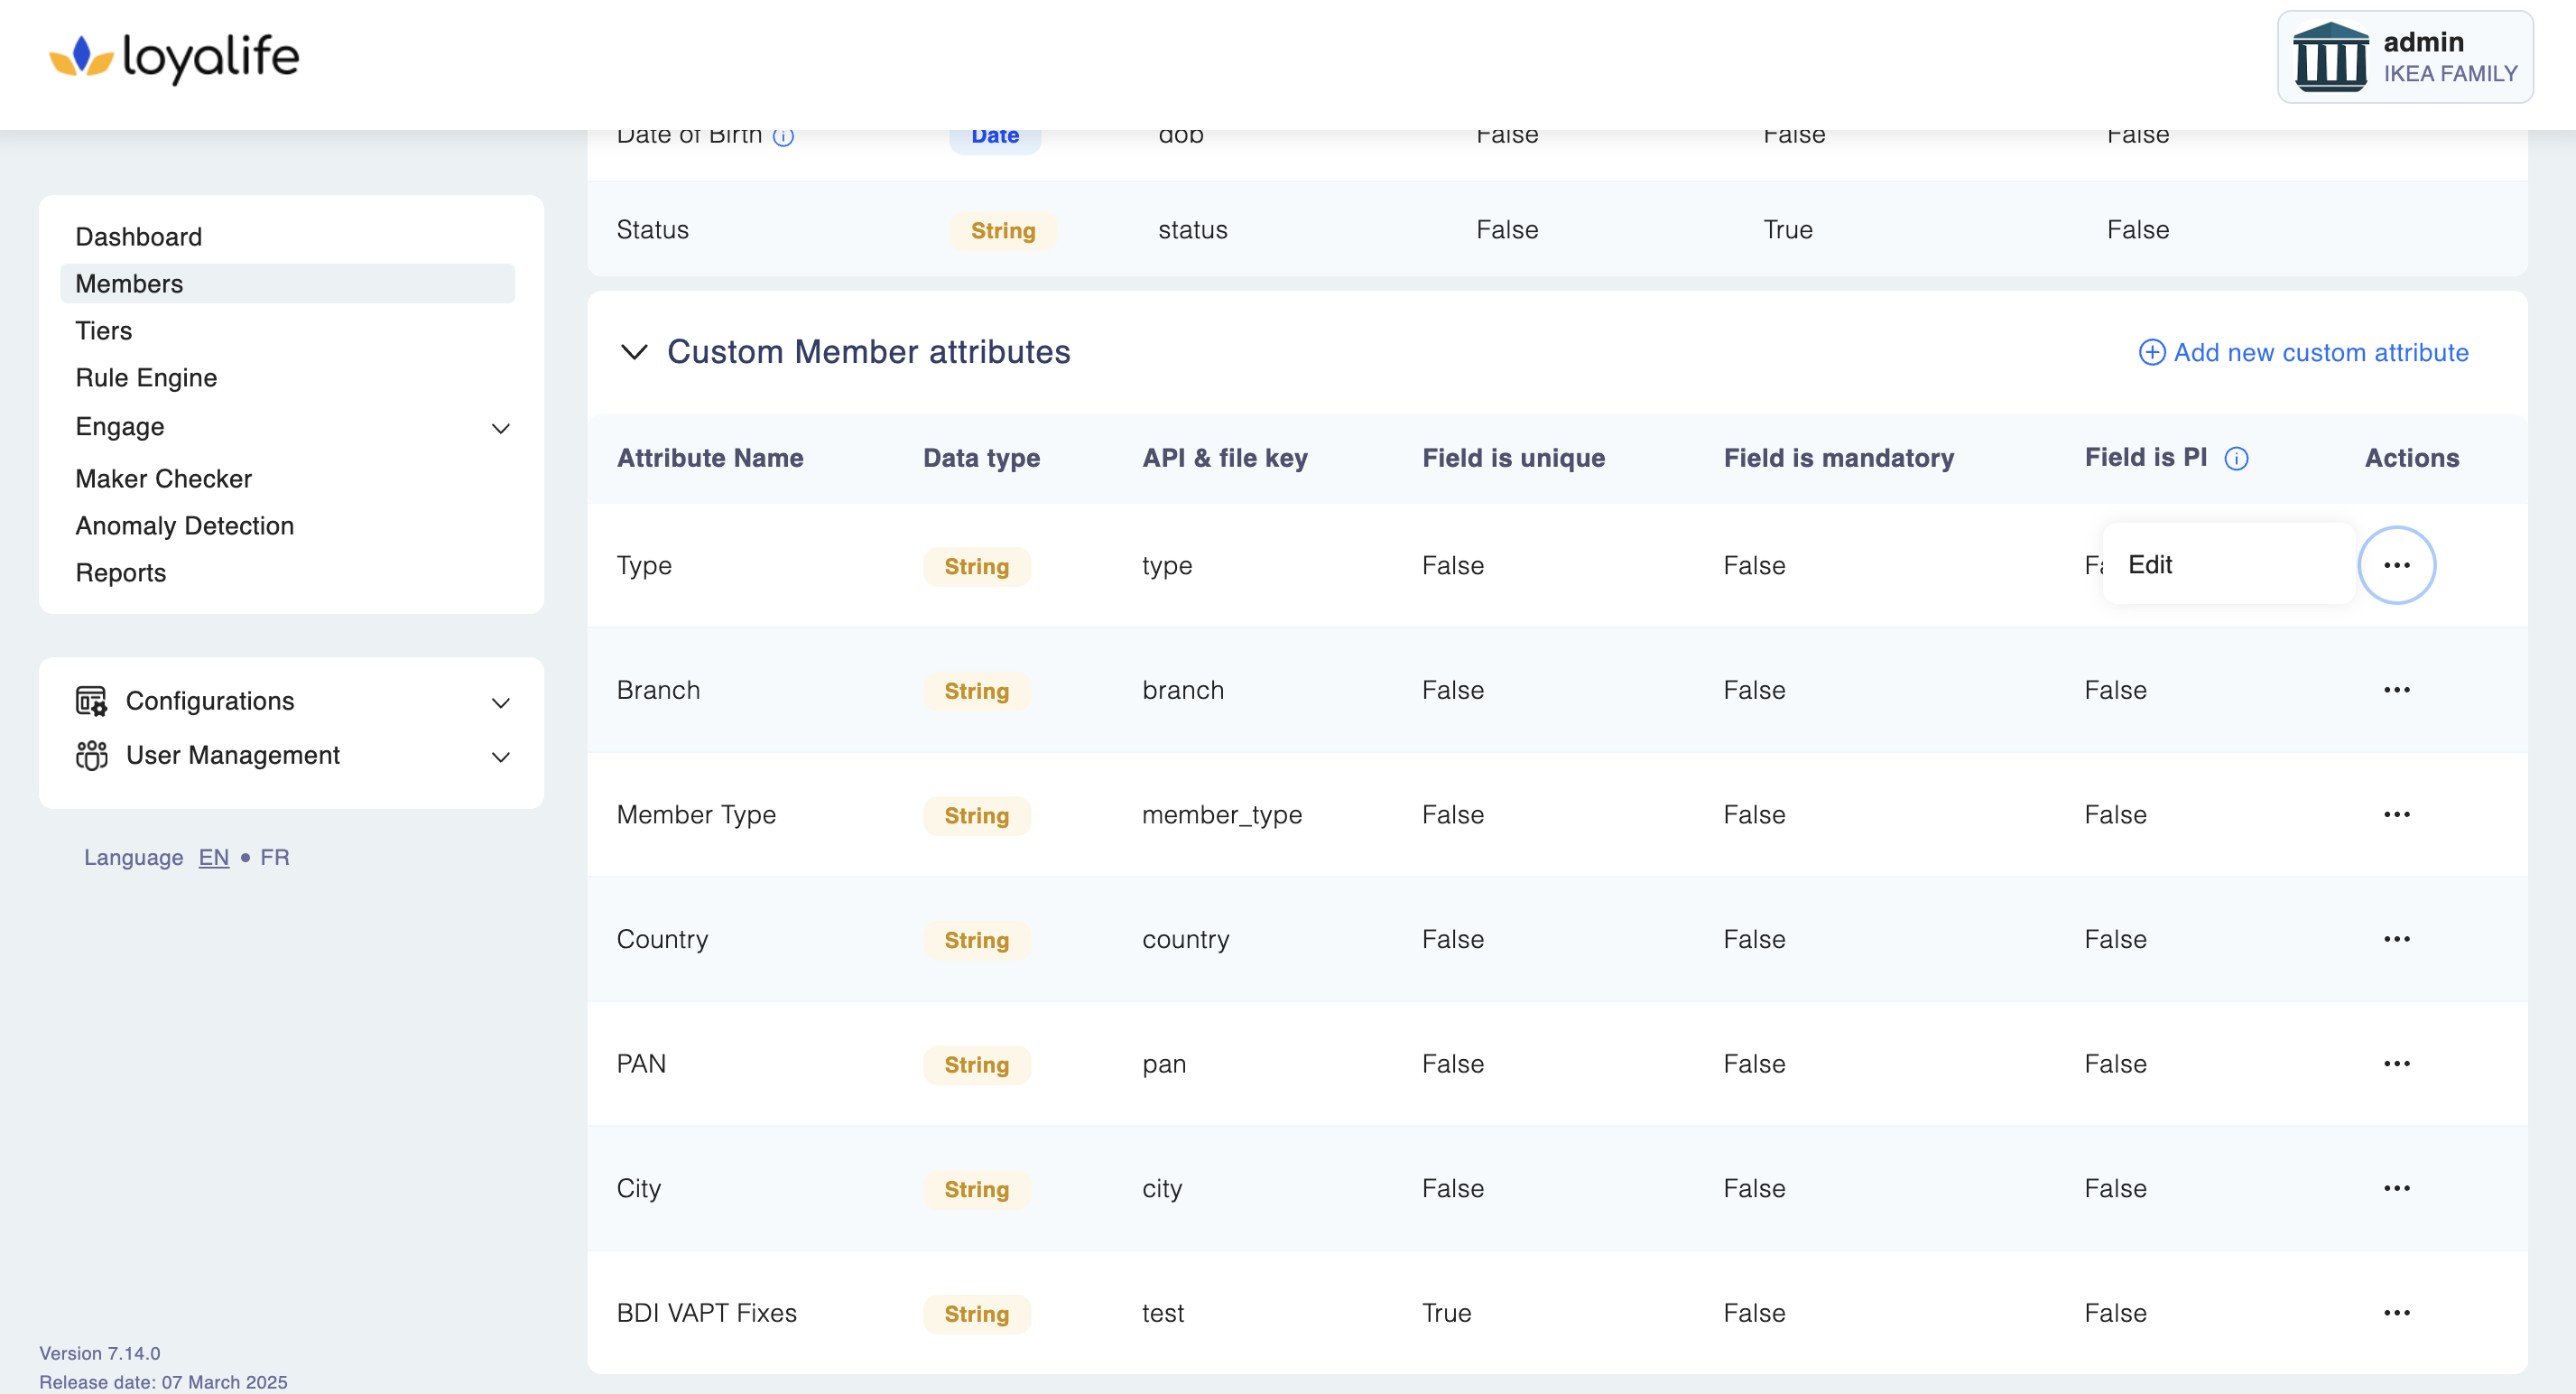
- Delete: Remove the attribute if it's no longer needed (only available if the attribute is not tied to any existing data).
Updated 3 months ago